Auto-starts with System: The --restart unless-stopped policy ensures that the TravelBuff container automatically boots whenever Docker or your computer starts up.
Option A: Standard Docker CLI Run
Terminal Command
# 1. Pull the official Docker image
docker pull abhishekkharvadi/TravelBuff:latest

# 2. Run the container on port 5000
docker run -d \
  -p 5000:5000 \
  --name travelbuff \
  -v travelbuff_data:/app/data \
  --restart unless-stopped \
  abhishekkharvadi/TravelBuff:latest
Option B: Docker Compose (Recommended)
Create a file named docker-compose.yml in your project directory:
Auto-starts when your laptop boots: PM2 automatically saves your running instance and registers a macOS startup service, so TravelBuff starts automatically in the background whenever you turn on or log into your Mac.
Option 1: Direct ZIP Download (Recommended)
Download source code without needing Git installed.
Auto-starts on system boot: Systemd integration via PM2 ensures TravelBuff restarts automatically as a system service whenever your machine or server restarts.
Auto-starts when your laptop boots: Use PM2 background manager with pm2 save or add a launcher script to your Windows Startup folder (shell:startup) to ensure TravelBuff runs automatically every time Windows boots.
Option 1: Direct ZIP Download (Recommended)
Download and extract ZIP directly without Git command line.
# 1. Download & Extract using PowerShell
Invoke-WebRequest -Uri "https://github.com/abhishekkharvadi/TravelBuff/archive/refs/heads/main.zip" -OutFile "main.zip"
Expand-Archive -Path "main.zip" -DestinationPath "."
cd TravelBuff-main

# 2. Install dependencies & build
npm install
npm run build

# 3. Start background process with PM2 & save for auto-start
npx pm2 start server.js --name travelbuff
npx pm2 save
Option 2: Clone via Git
PowerShell
git clone https://github.com/abhishekkharvadi/TravelBuff.git
cd TravelBuff
npm install
npm run build

# Start background process & save
npx pm2 start server.js --name travelbuff
npx pm2 save
How to Stop & Delete / Uninstall TravelBuff on Windows
To stop the background process or remove TravelBuff completely from Windows:
PowerShell (Stop & Delete)
# 1. Stop and remove PM2 background process
npx pm2 stop travelbuff
npx pm2 delete travelbuff
npx pm2 save

# (Alternative) Force terminate any active node server
Stop-Process -Name node -Force -ErrorAction SilentlyContinue

# 2. Remove project files and folders
Remove-Item -Recurse -Force .\TravelBuff-main, .\TravelBuff -ErrorAction SilentlyContinue
1. Overview & Features
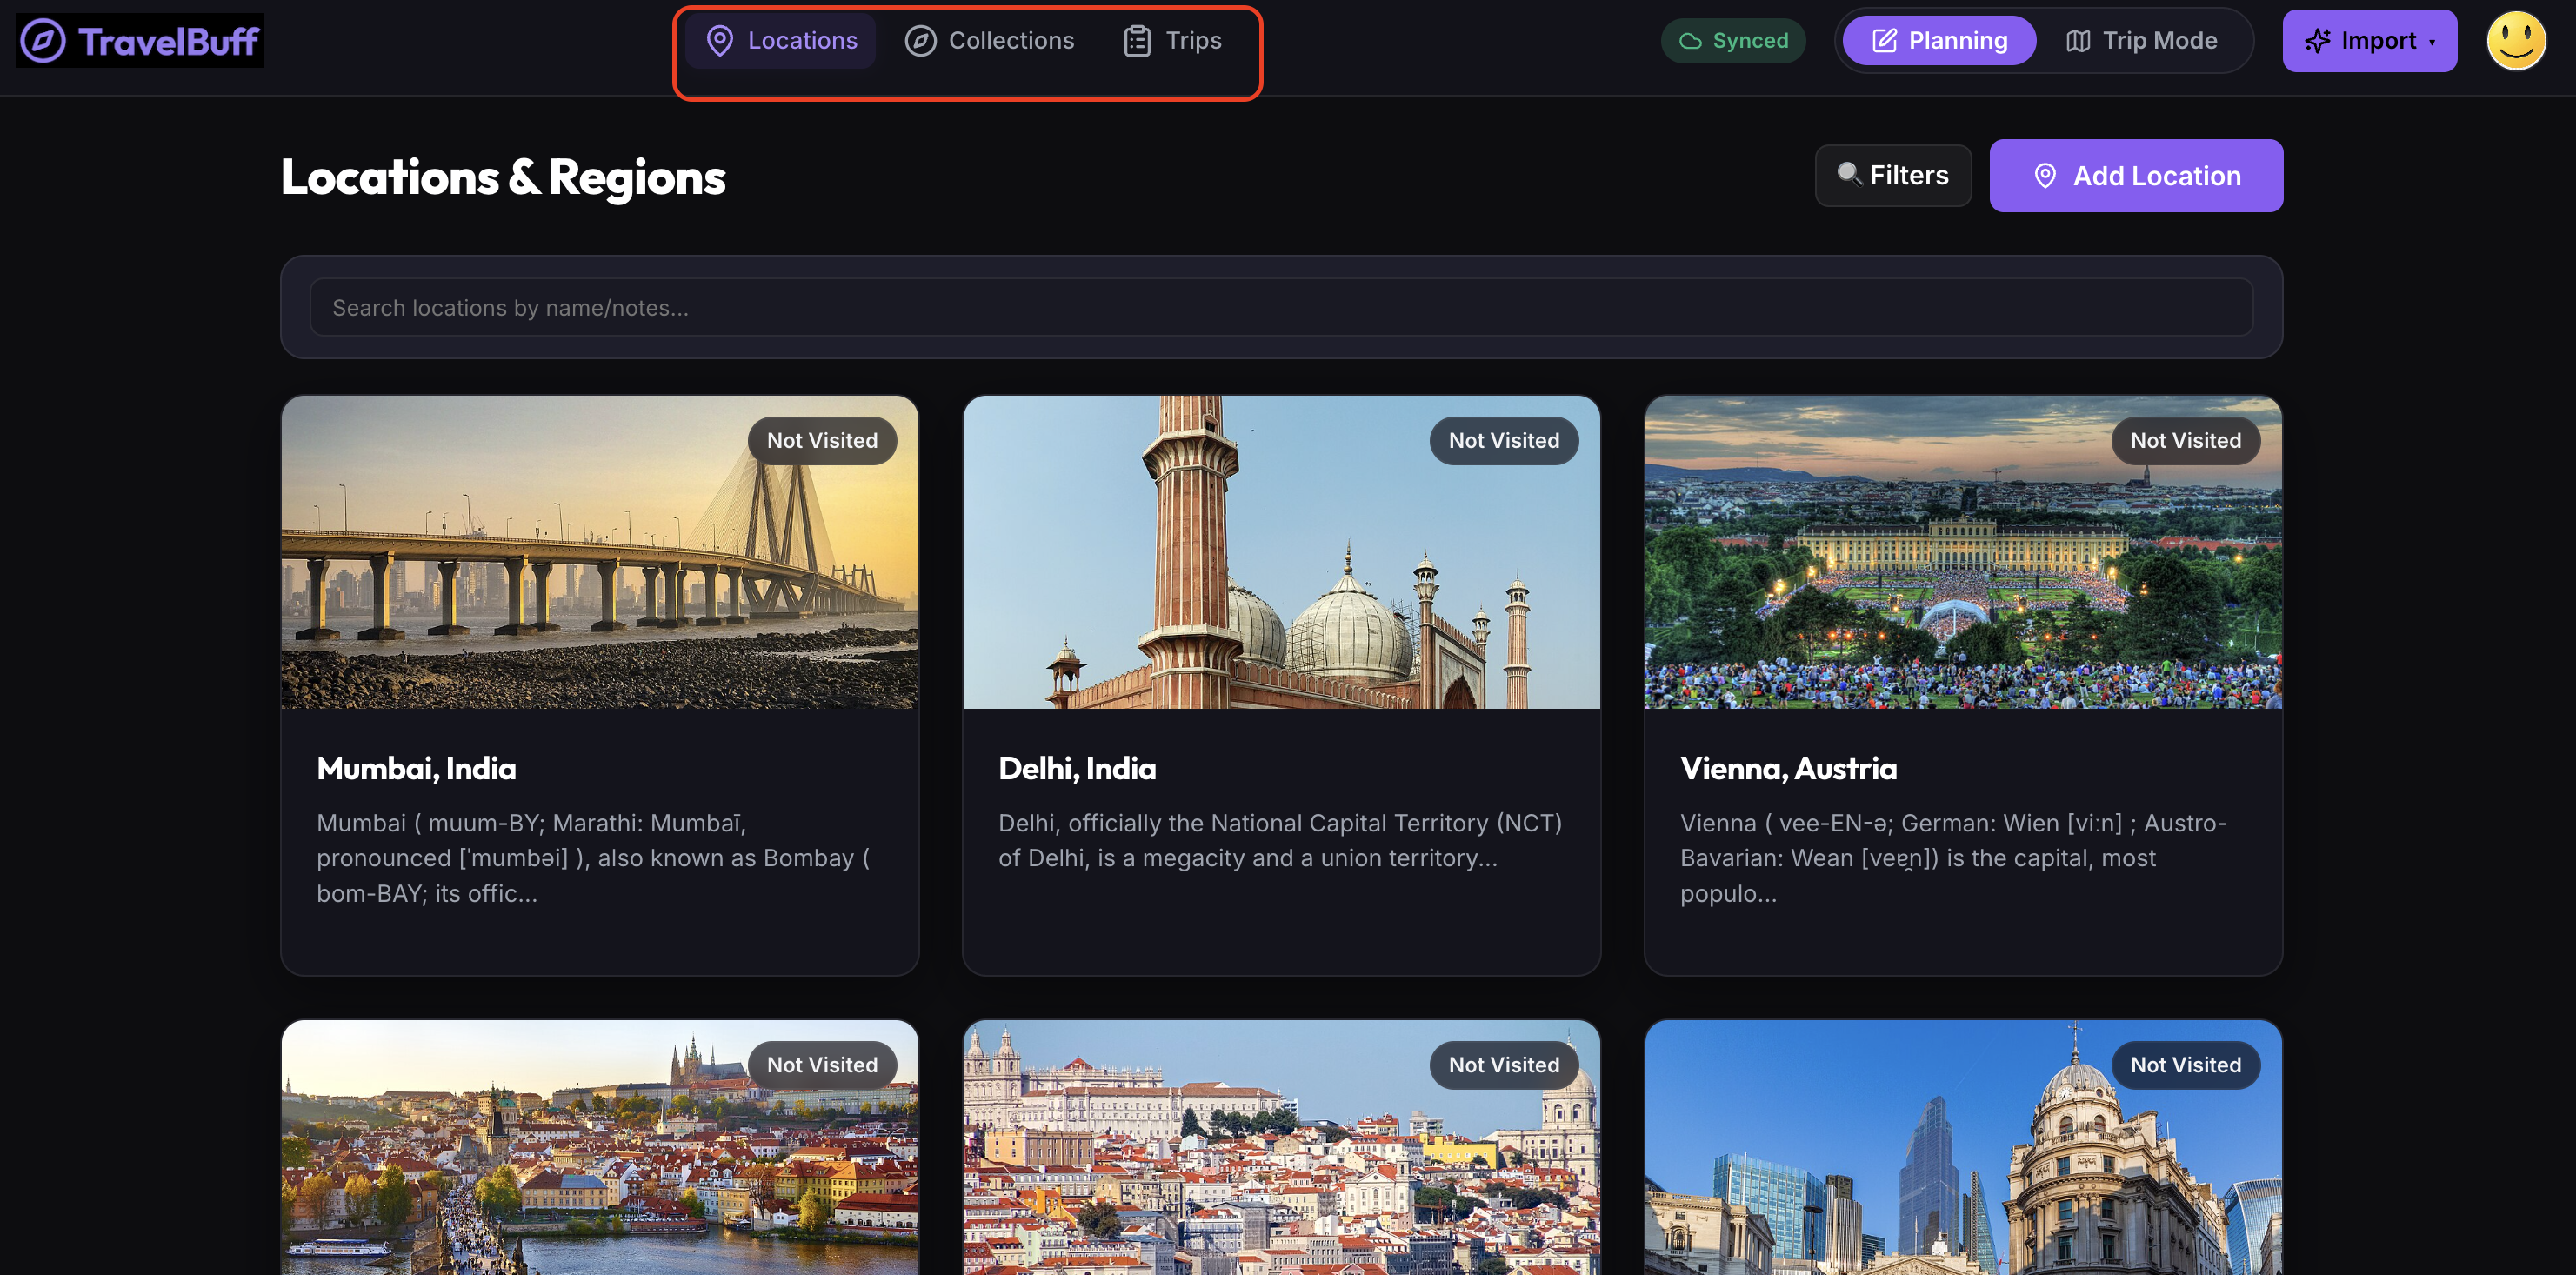
Welcome to the official documentation for TravelBuff — your personal travel organizer and itinerary planner designed to work seamlessly across all your devices, even when you're offline.
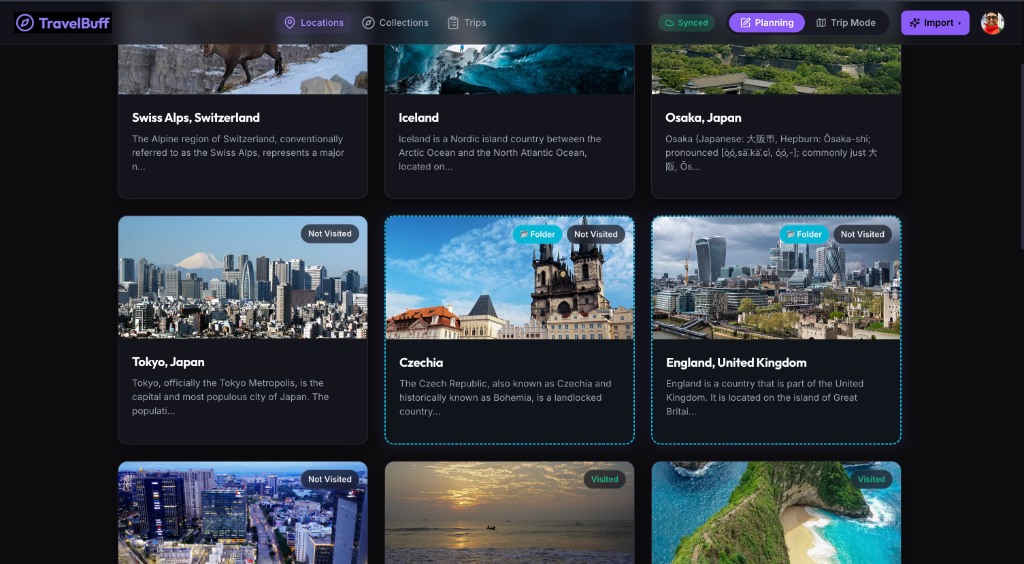
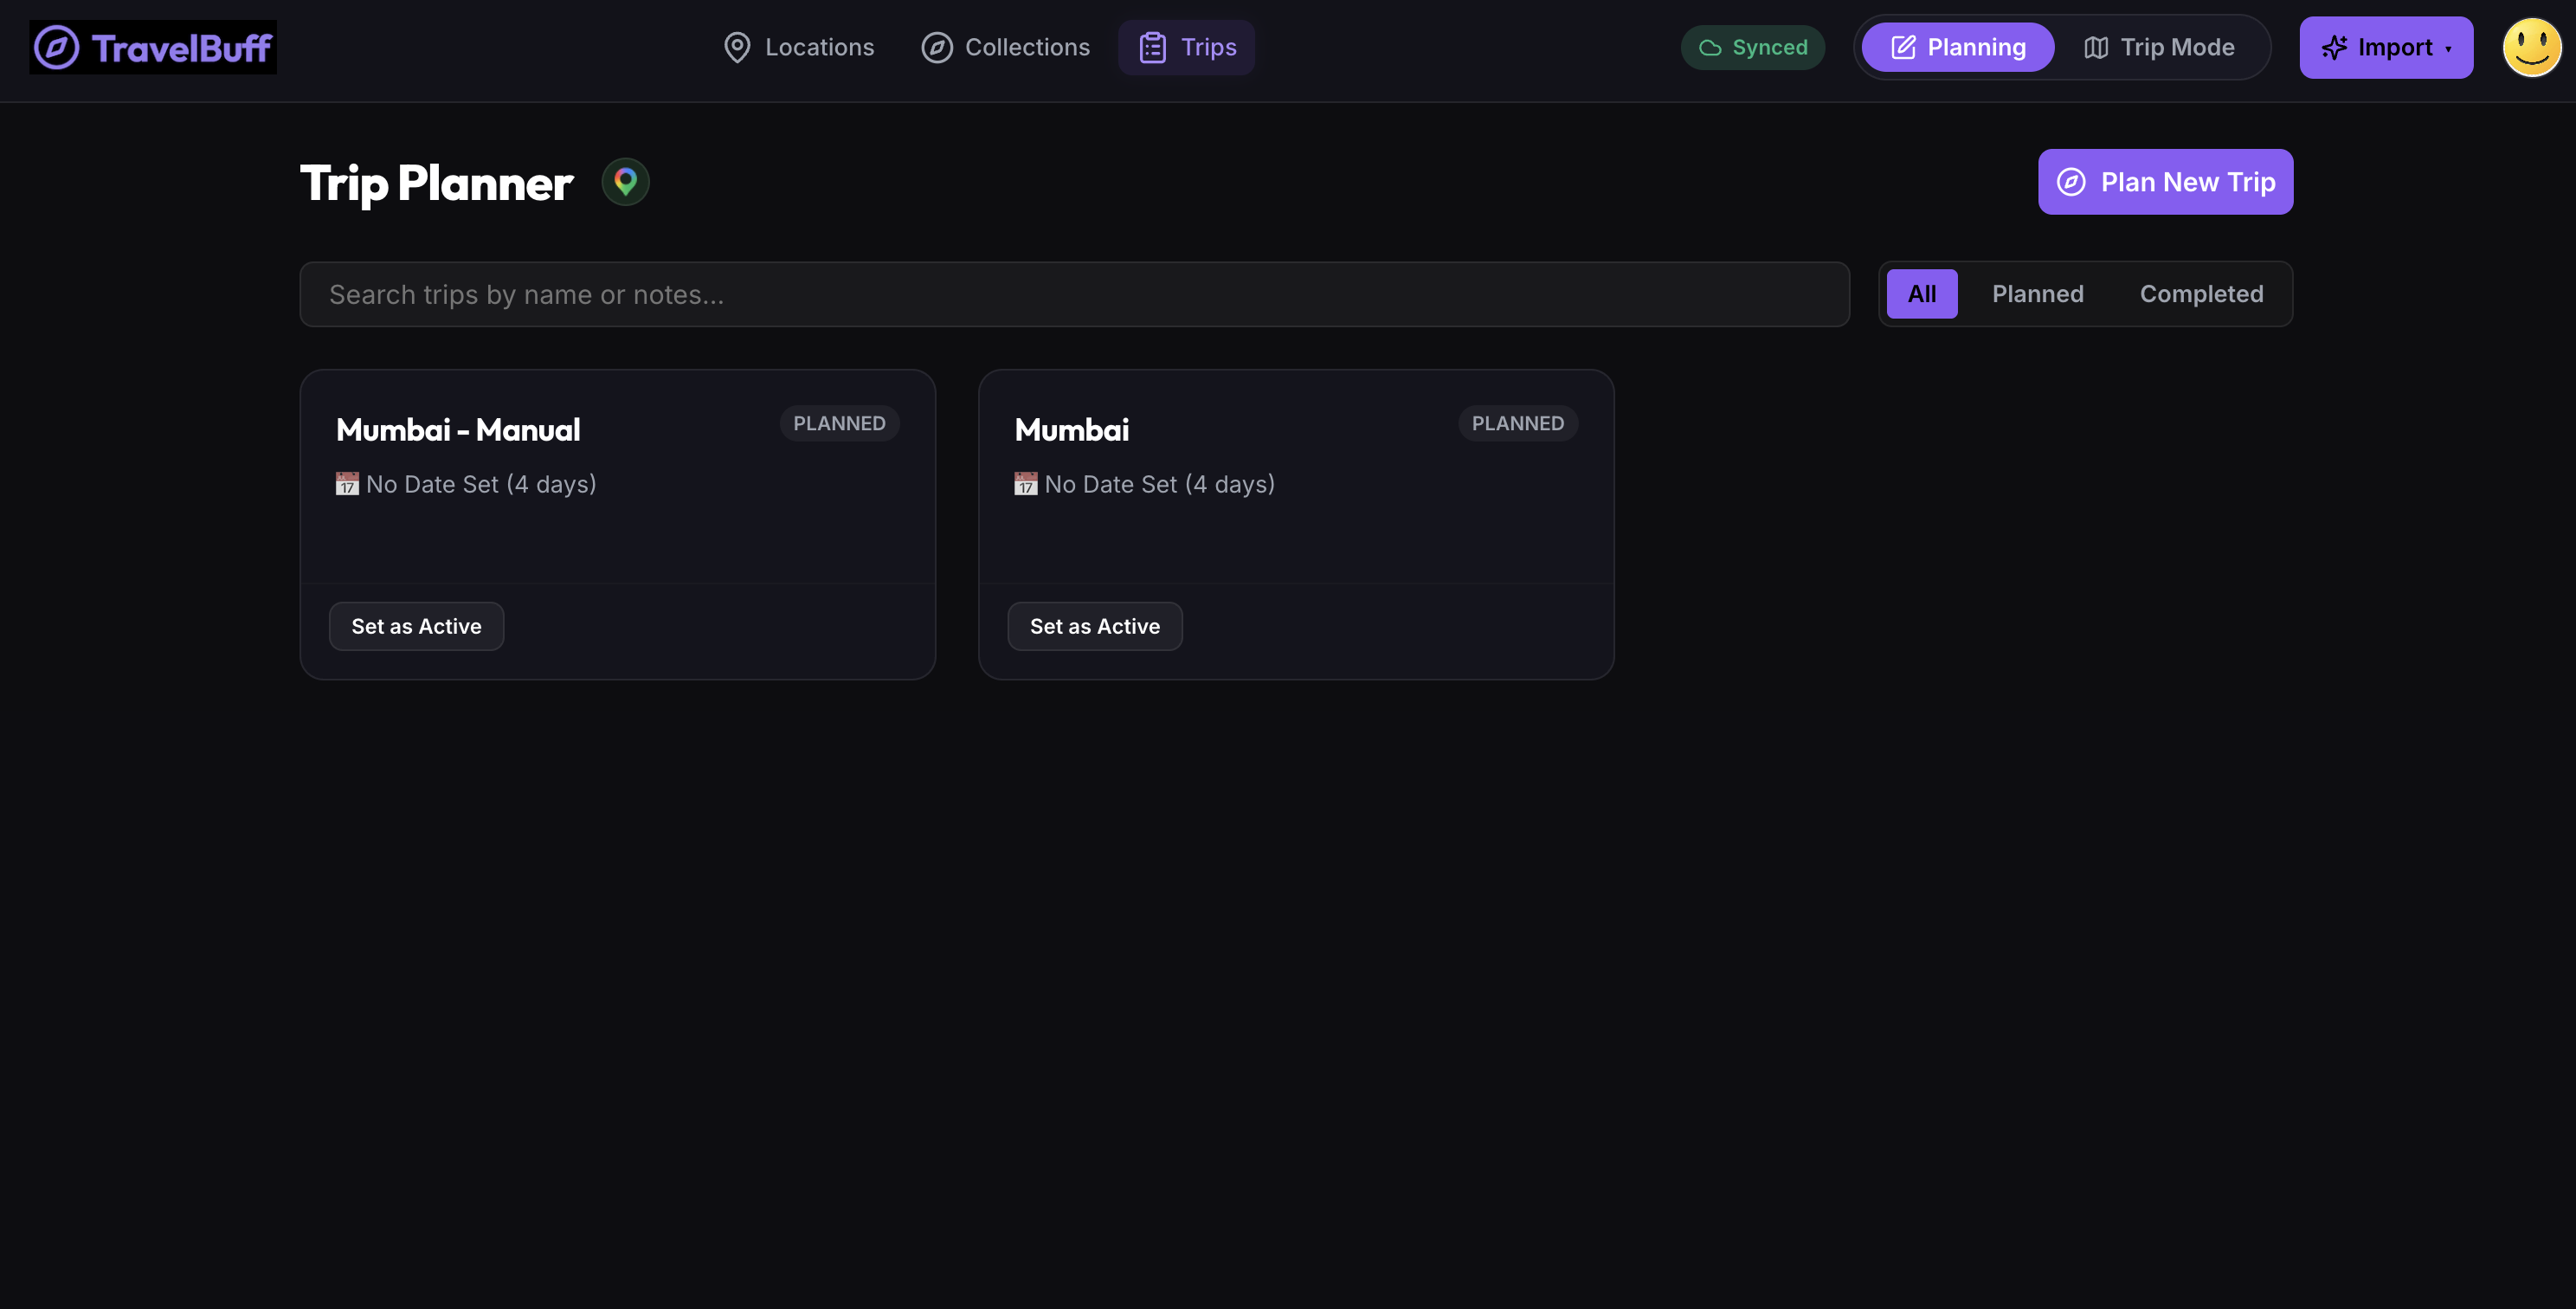
Figure 1.1: TravelBuff Main Dashboard Overview
The TravelBuff Philosophy
TravelBuff is designed for travelers who value reliability, speed, and privacy. Traditional travel planners stop working when you lose internet connection in remote locations, subways, or during flights. TravelBuff solves this with an Offline-First approach:
All your travel details are saved directly on your device.
Any changes you make show up instantly without waiting for a connection.
When you reconnect to the internet, your changes automatically sync with your backup account.
Live updates automatically sync across your phone, tablet, and computer so all your devices stay up to date.
Core Features
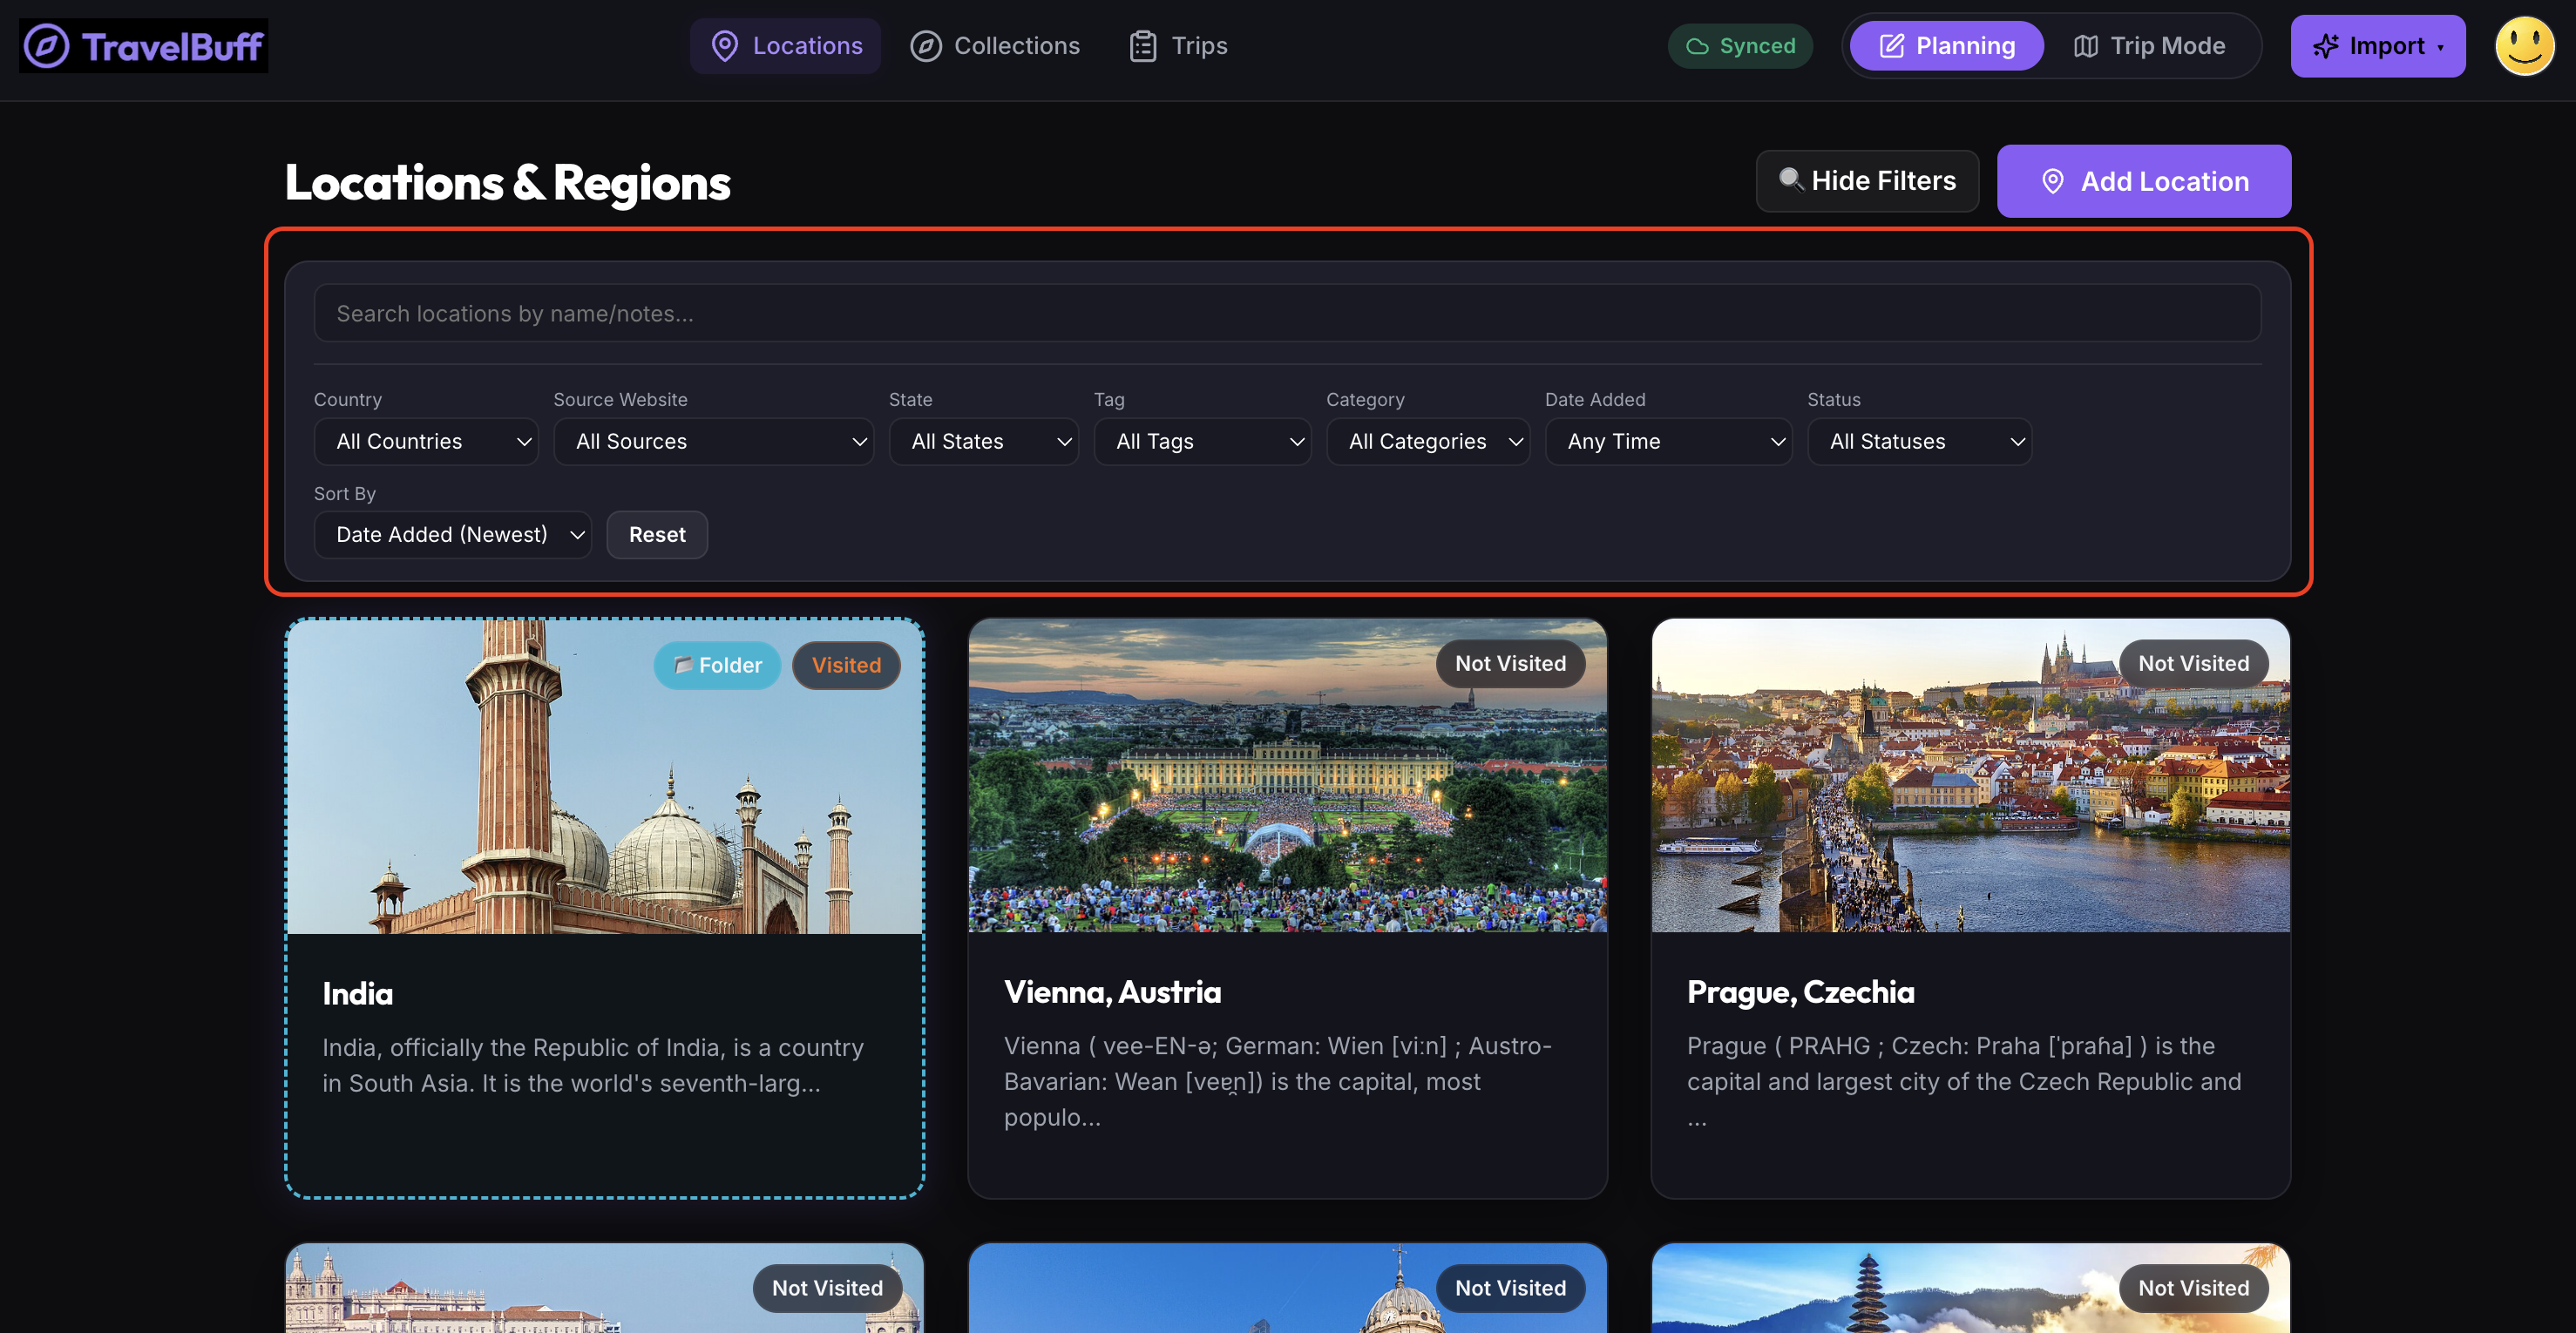
Organized Folders & Tags: Group your destinations and regions into clear folders with custom labels.
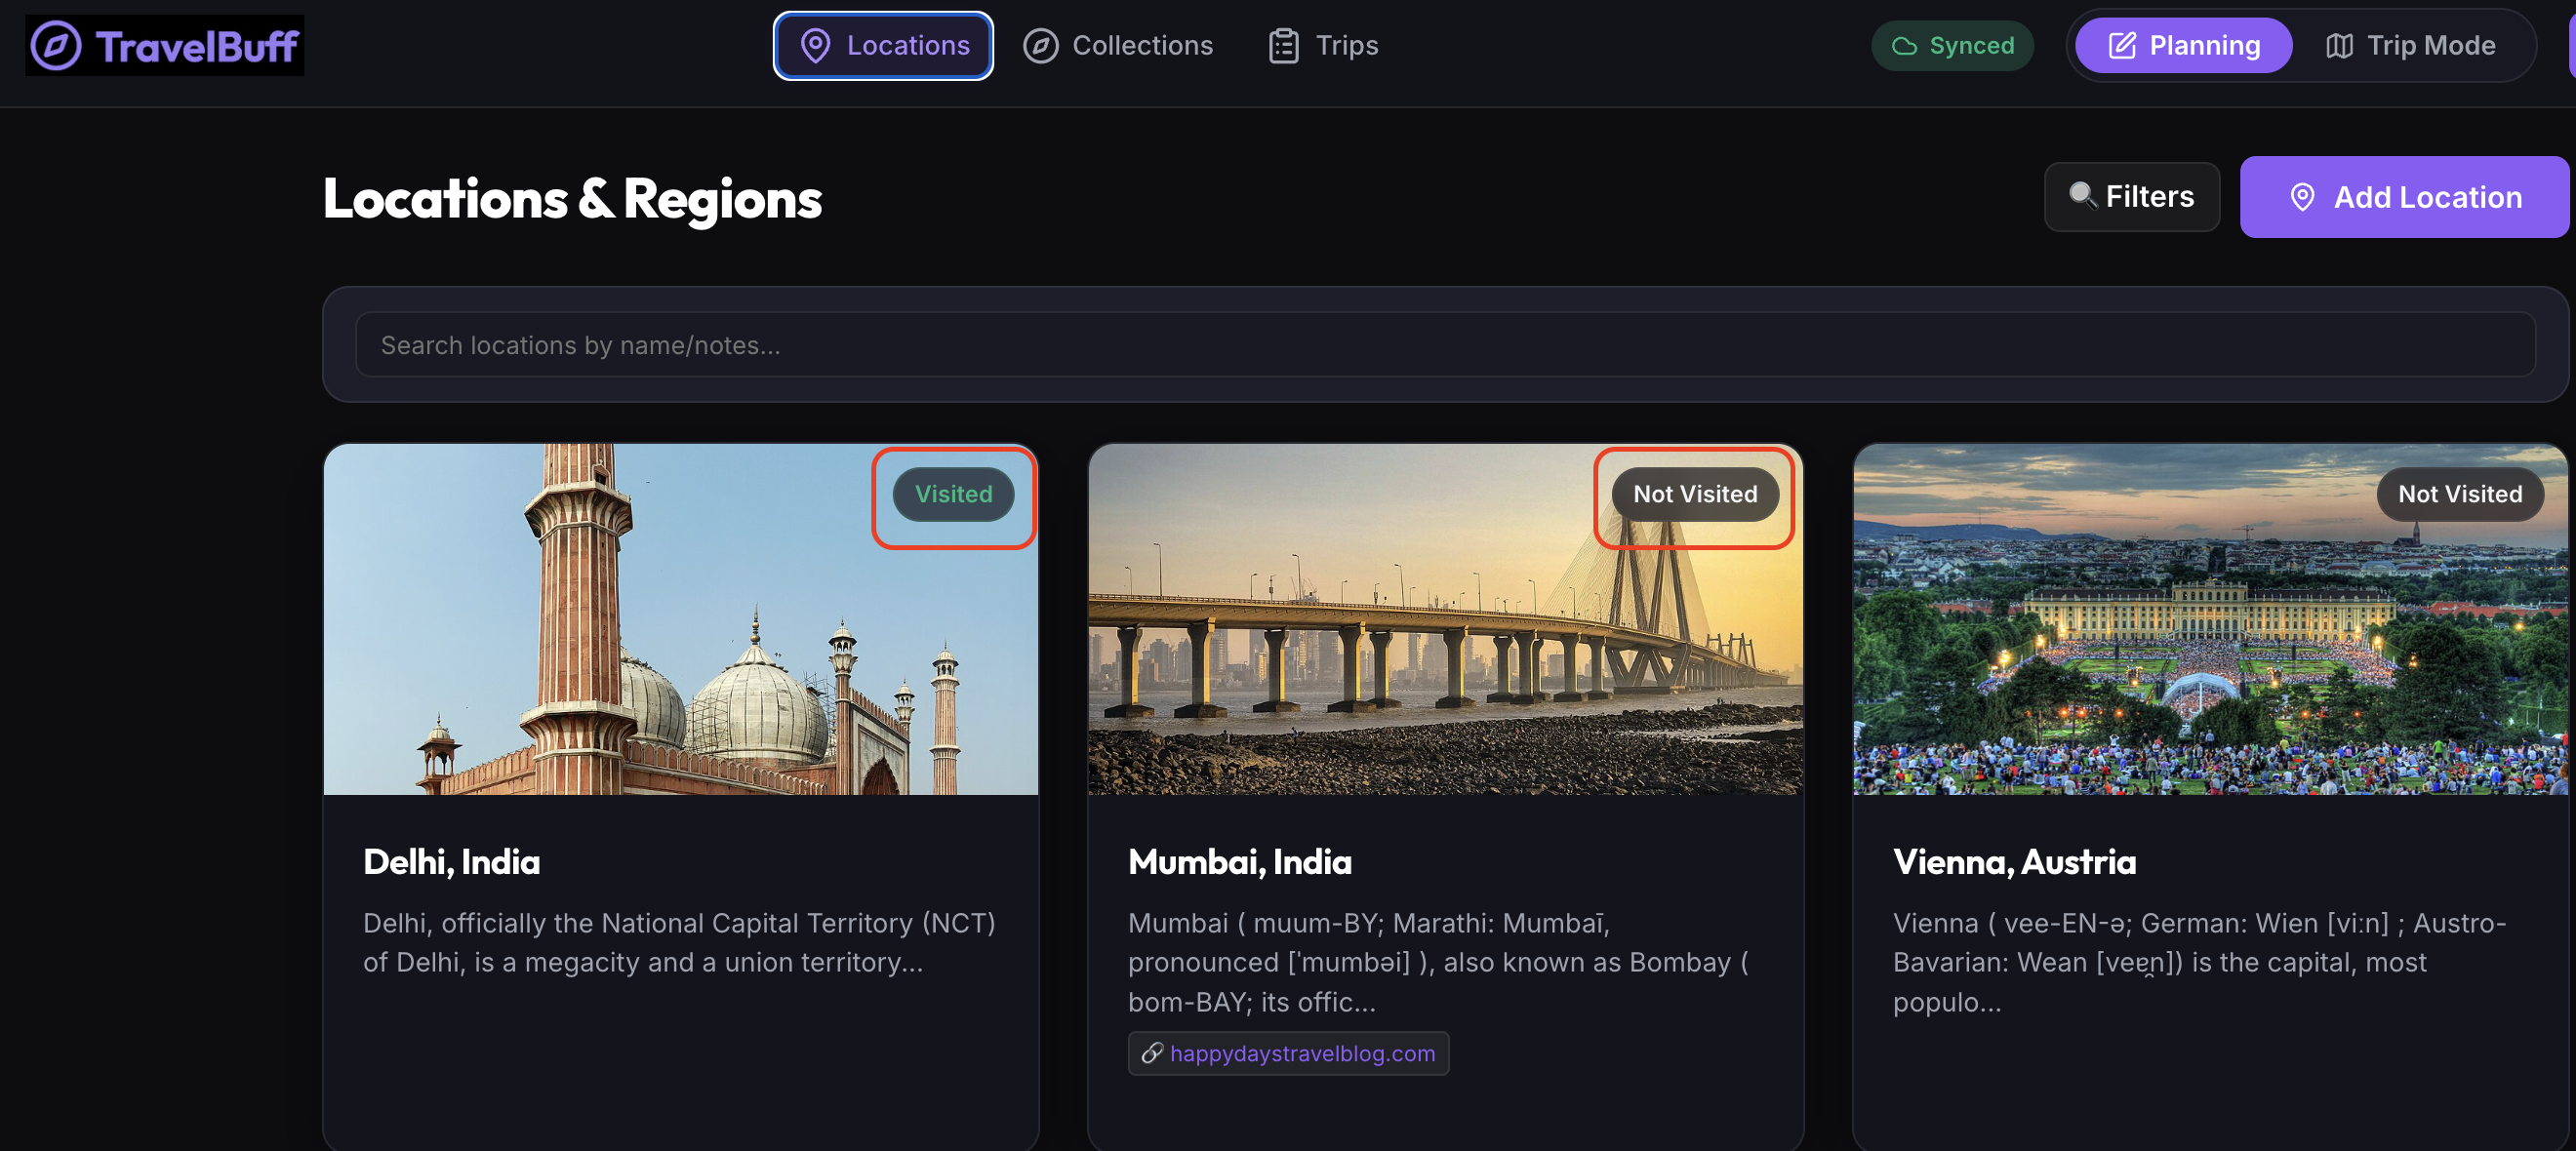
Visited Badges: Easily see where you've been with visual "Visited", "Partial", and "Not Visited" status indicators.
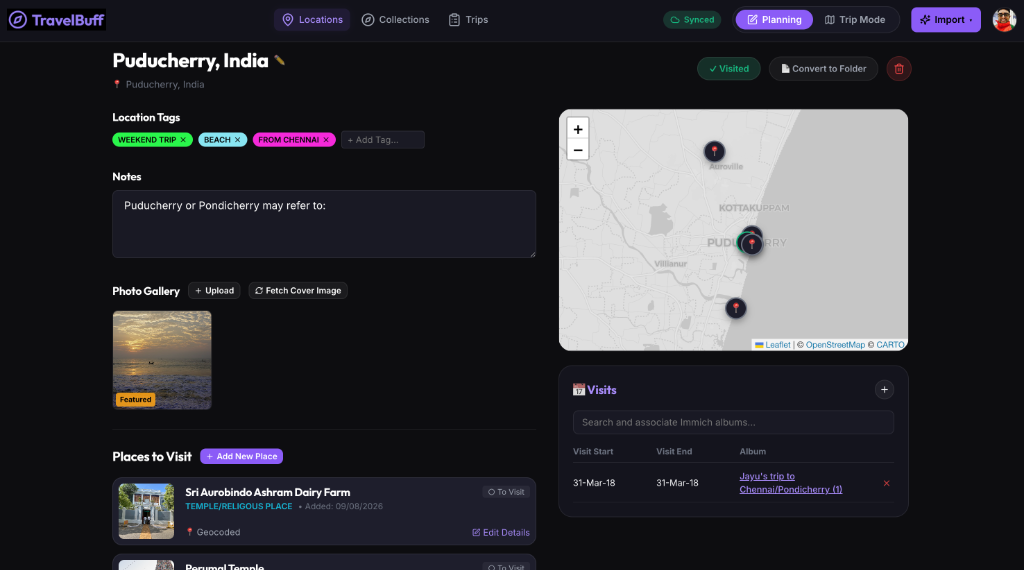
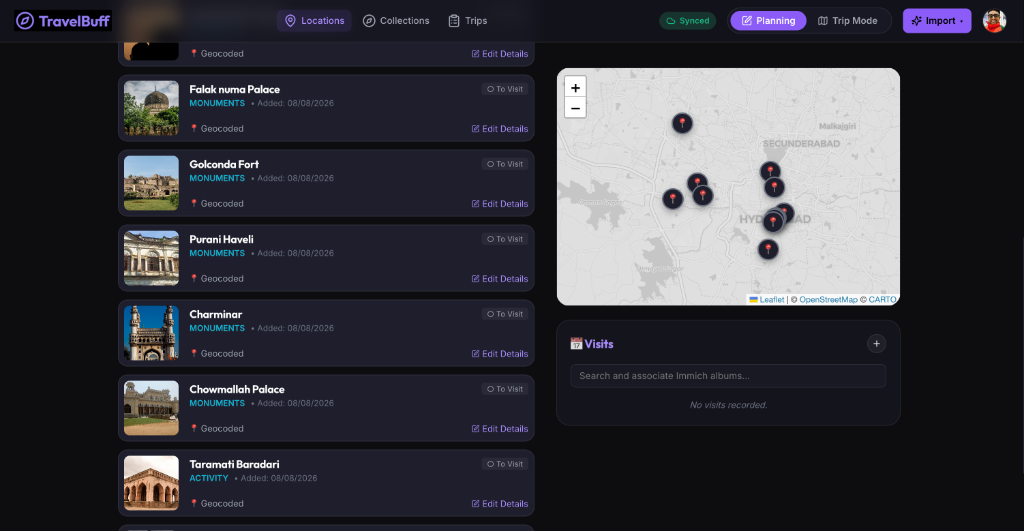
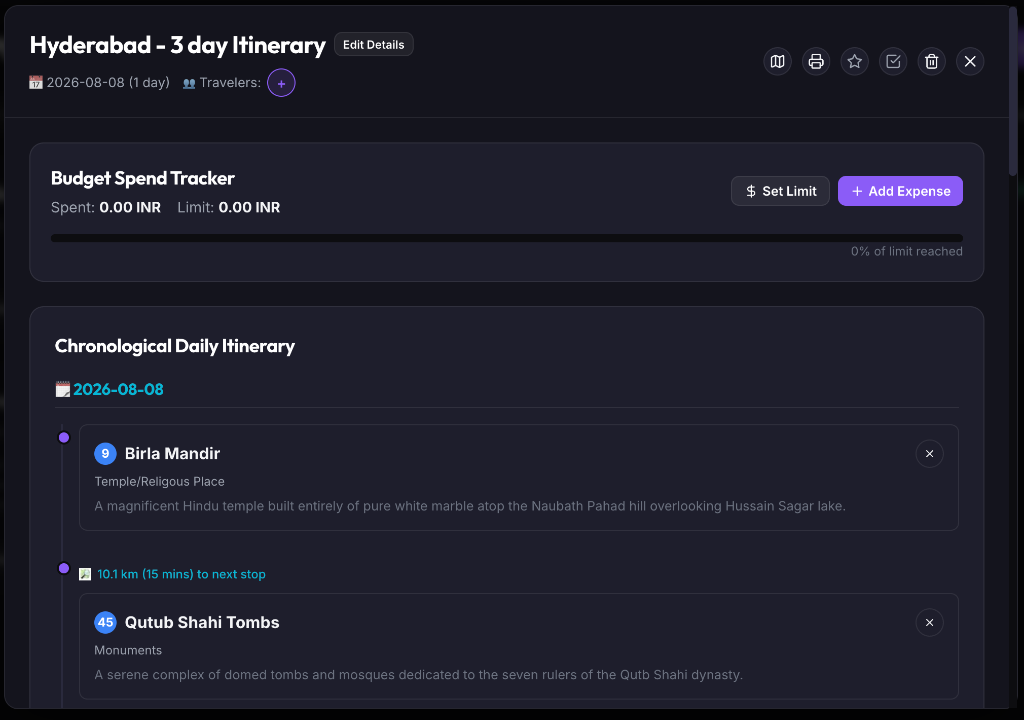
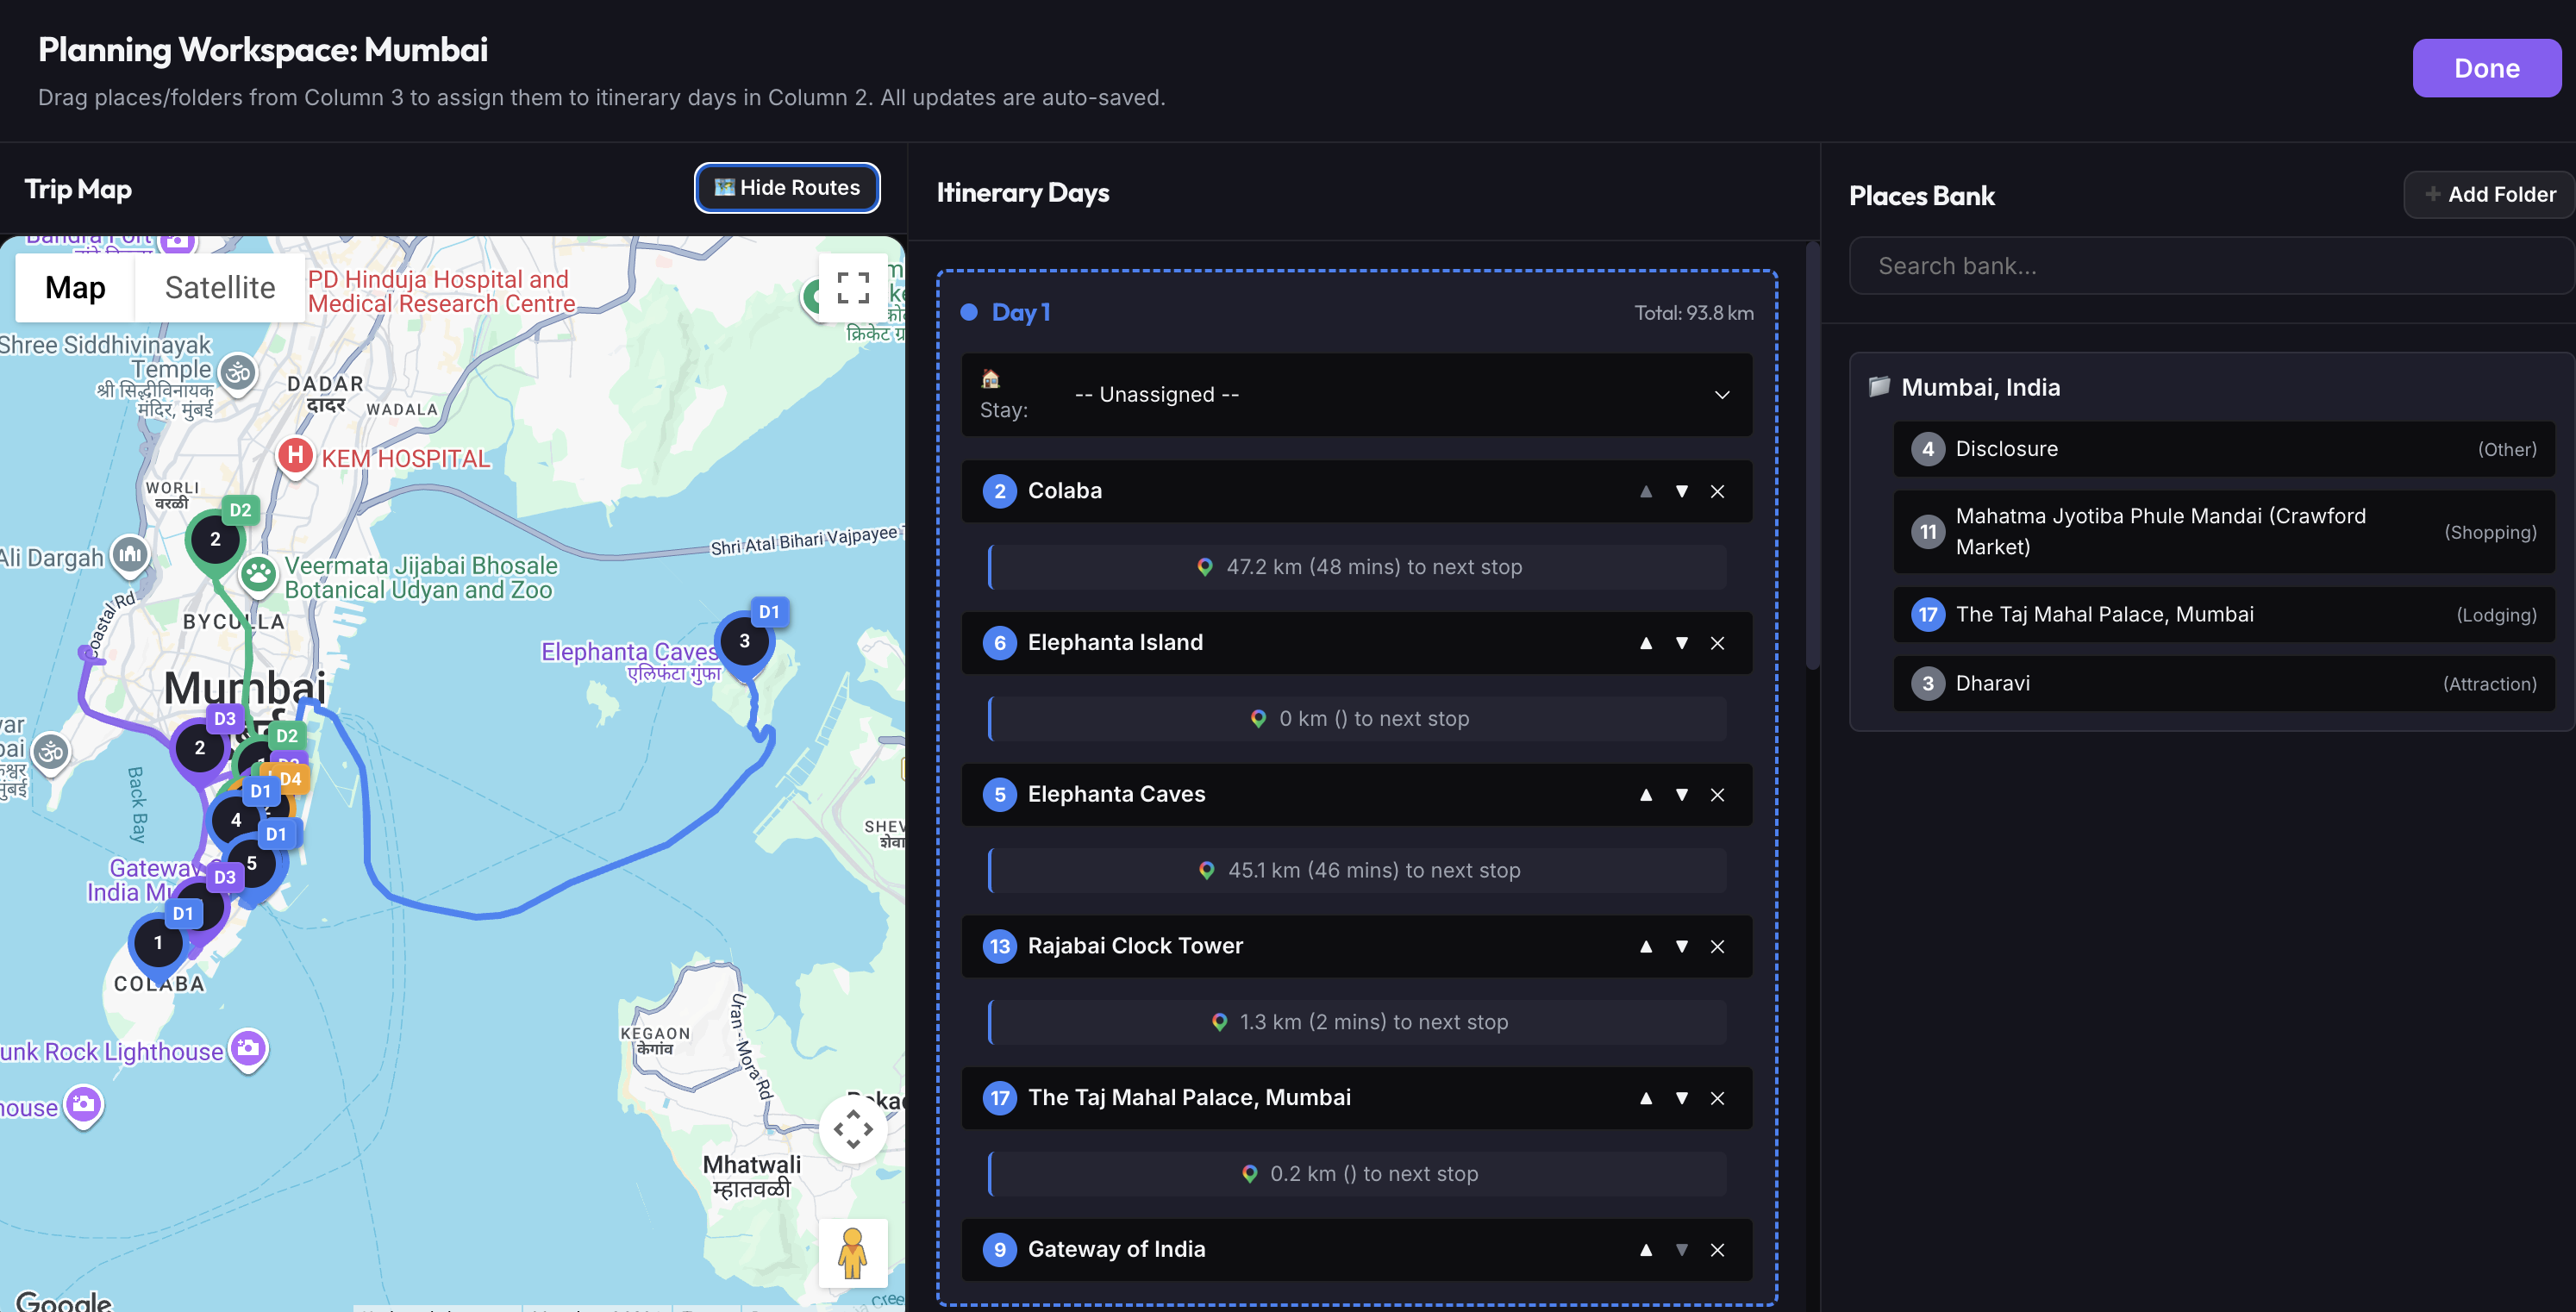
Interactive Maps & Numbered Routes: View your spots on interactive maps with clear step-by-step numbered markers (#1, #2, #3...).
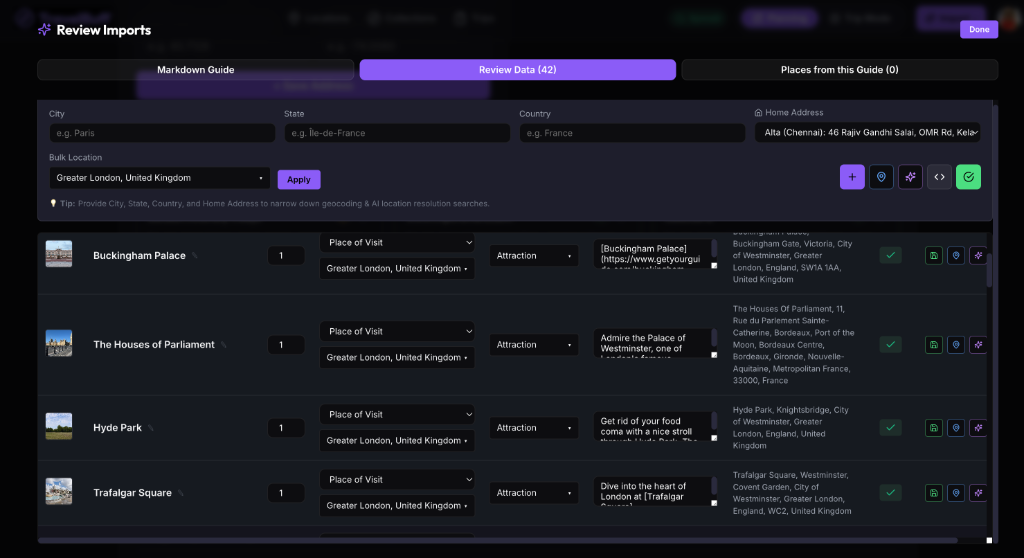
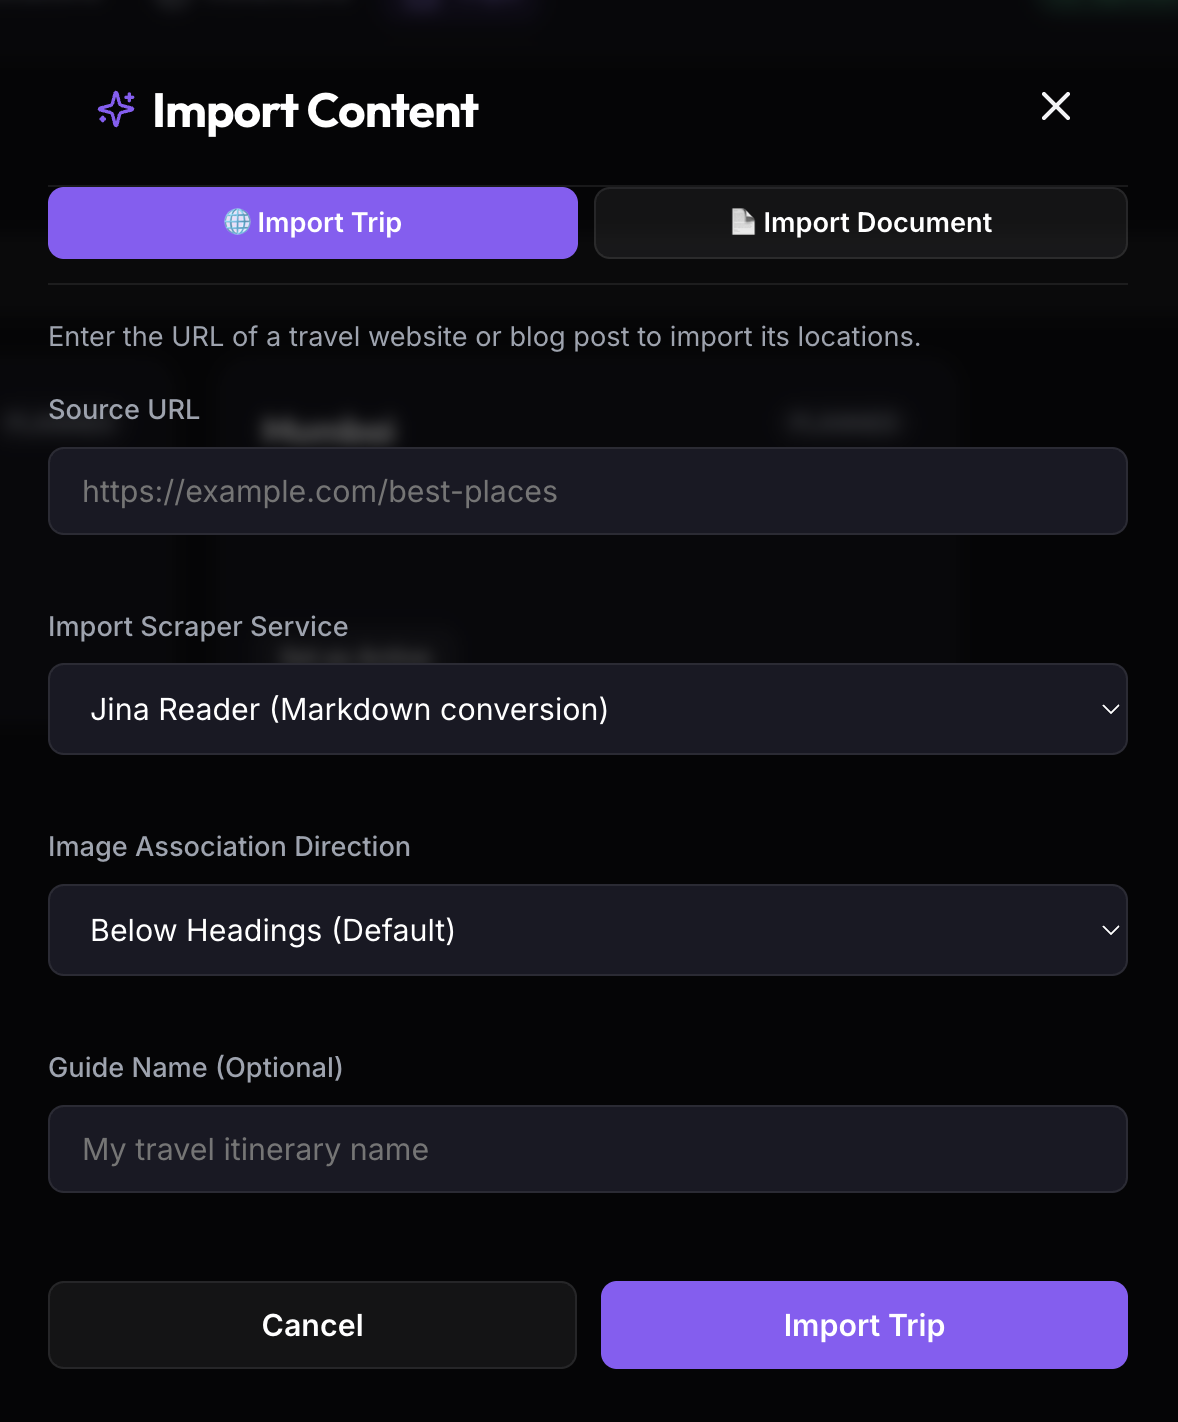
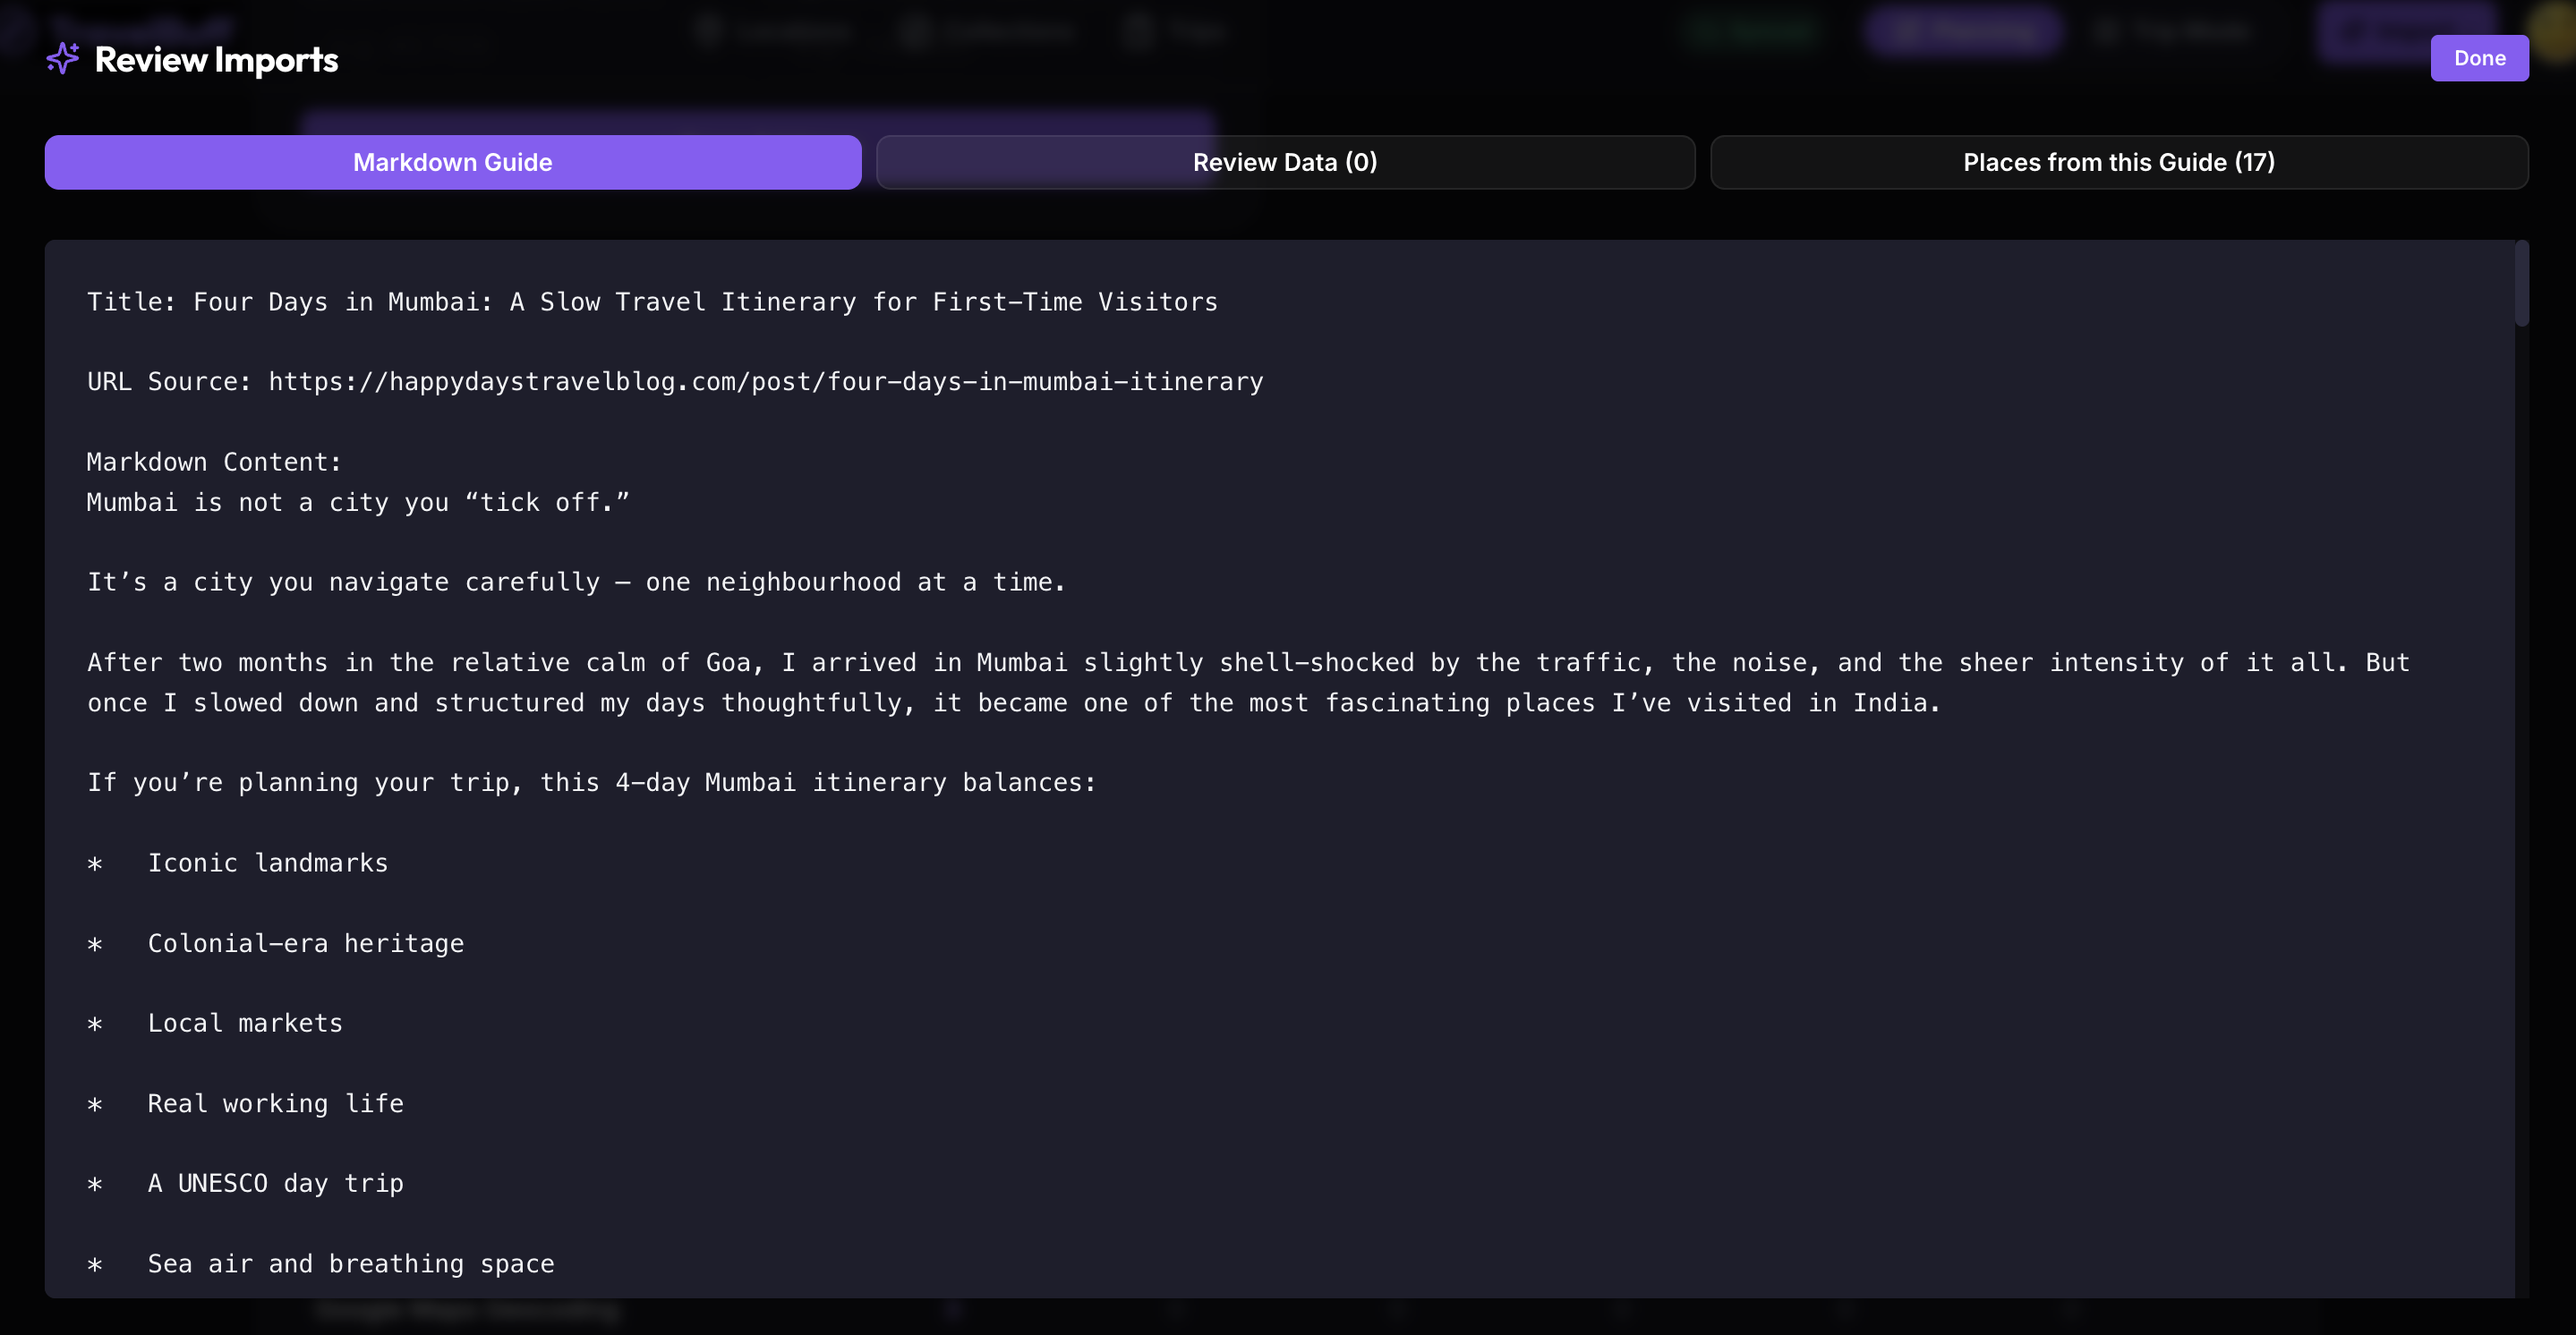
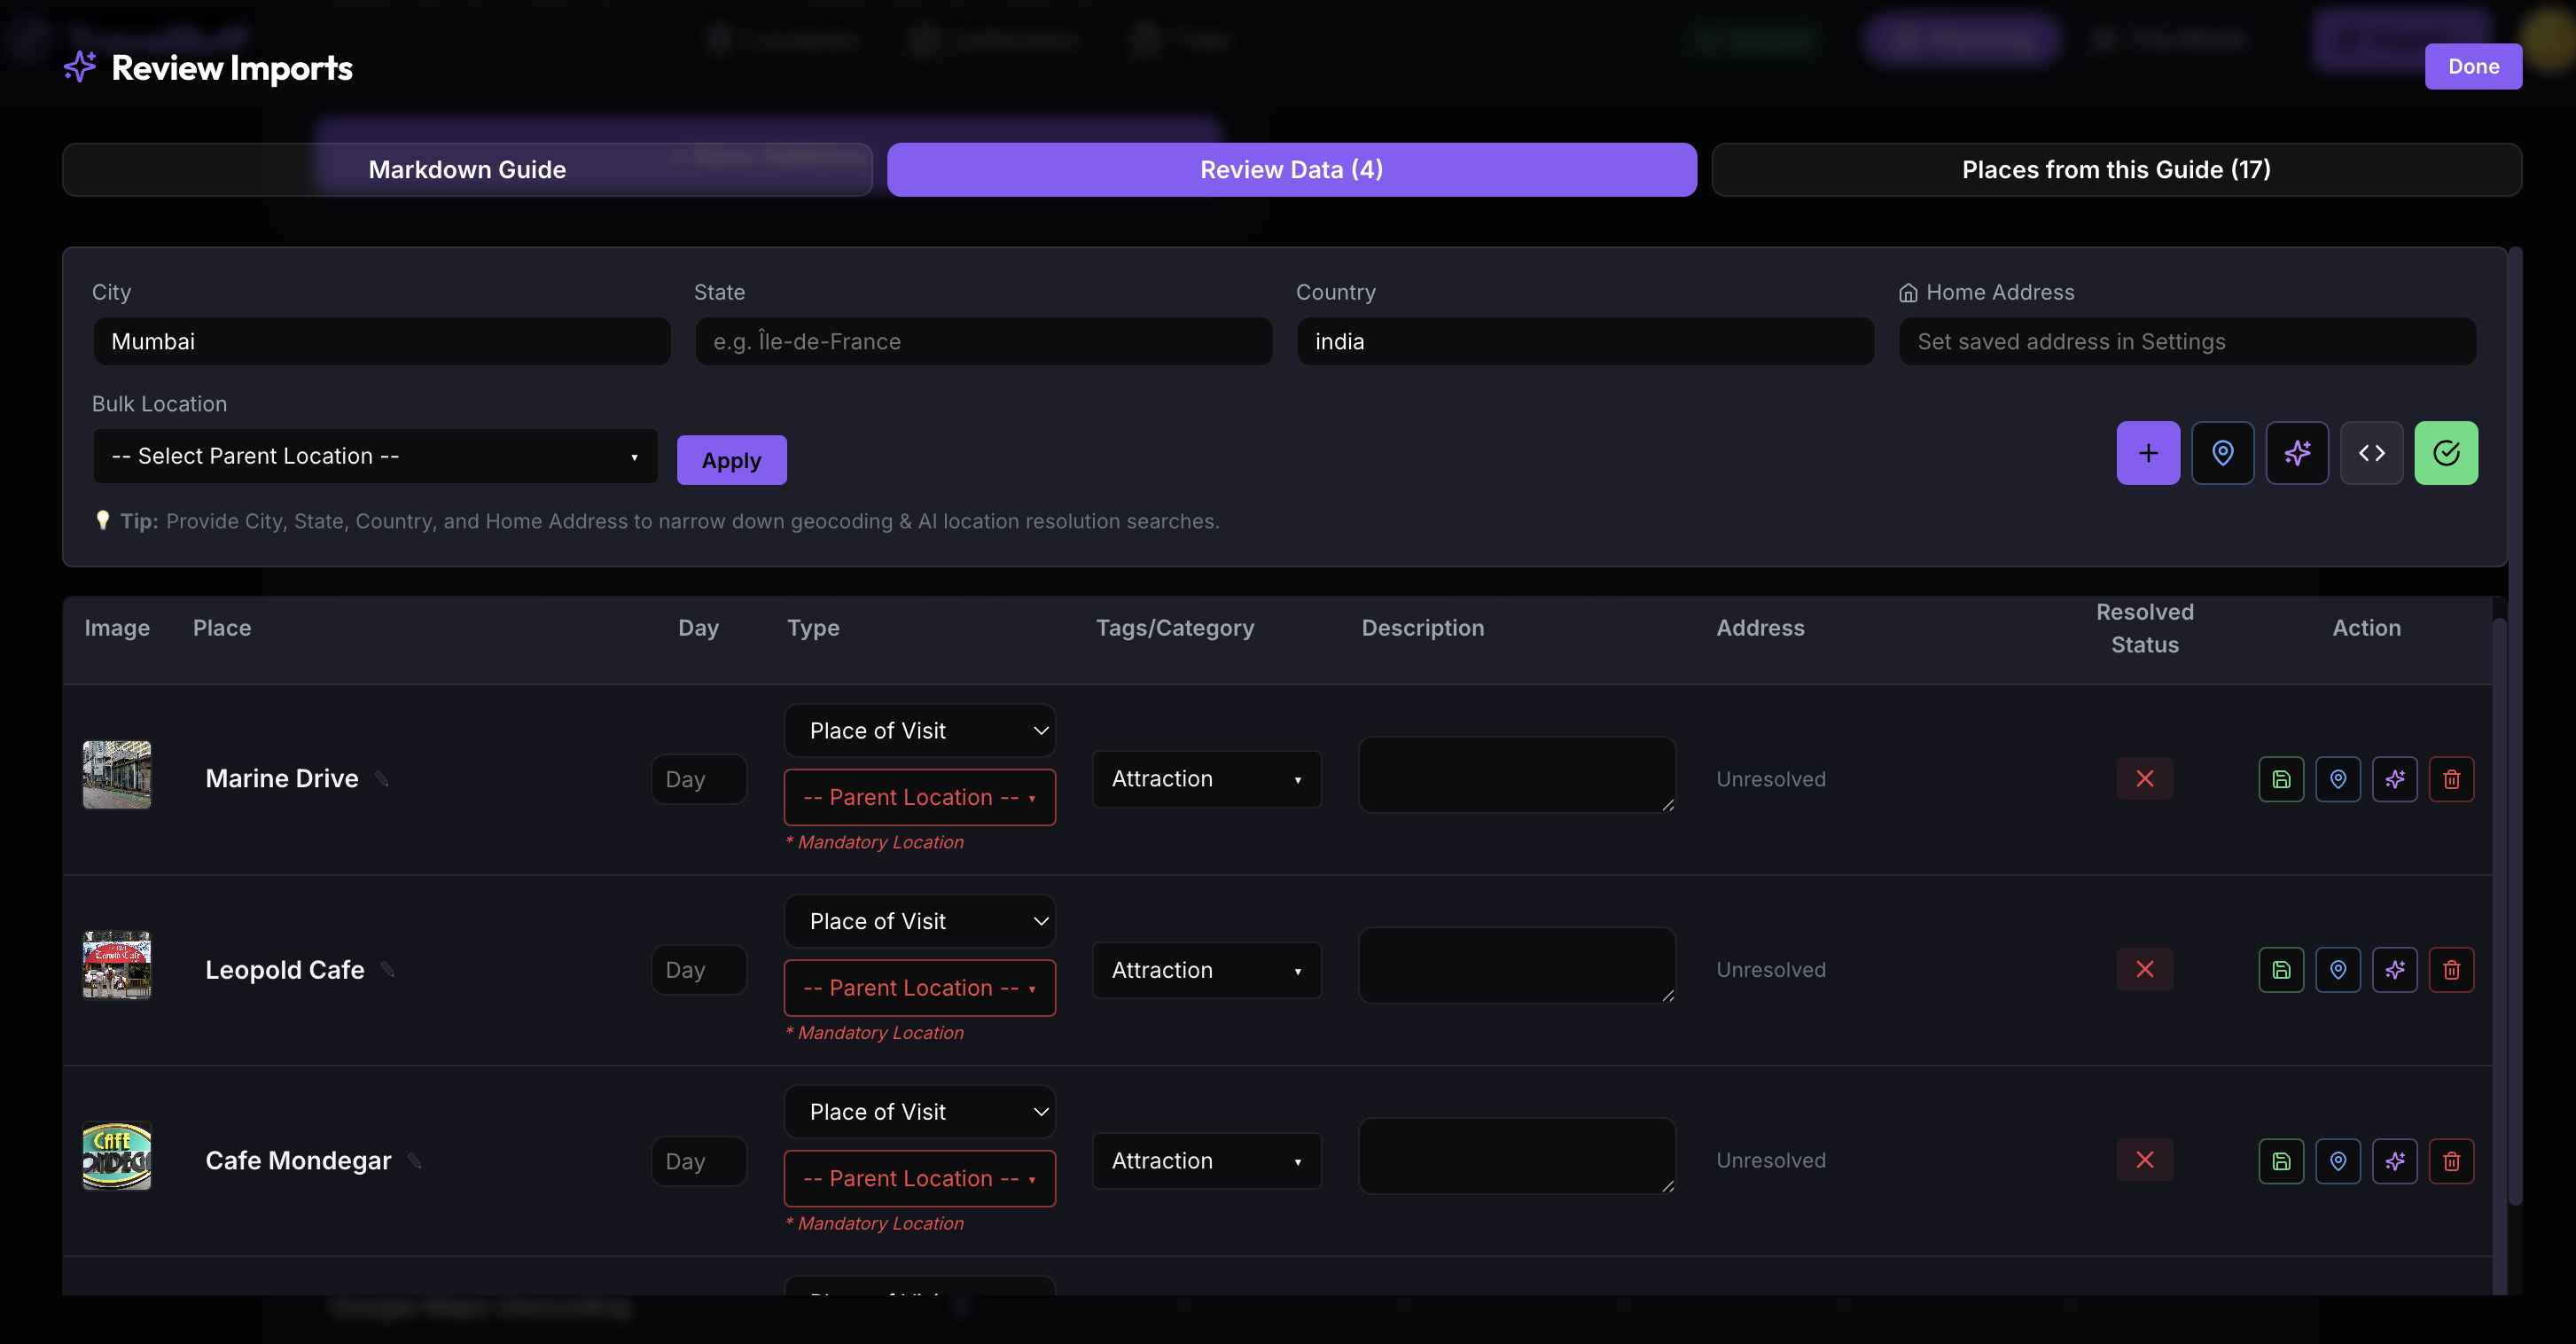
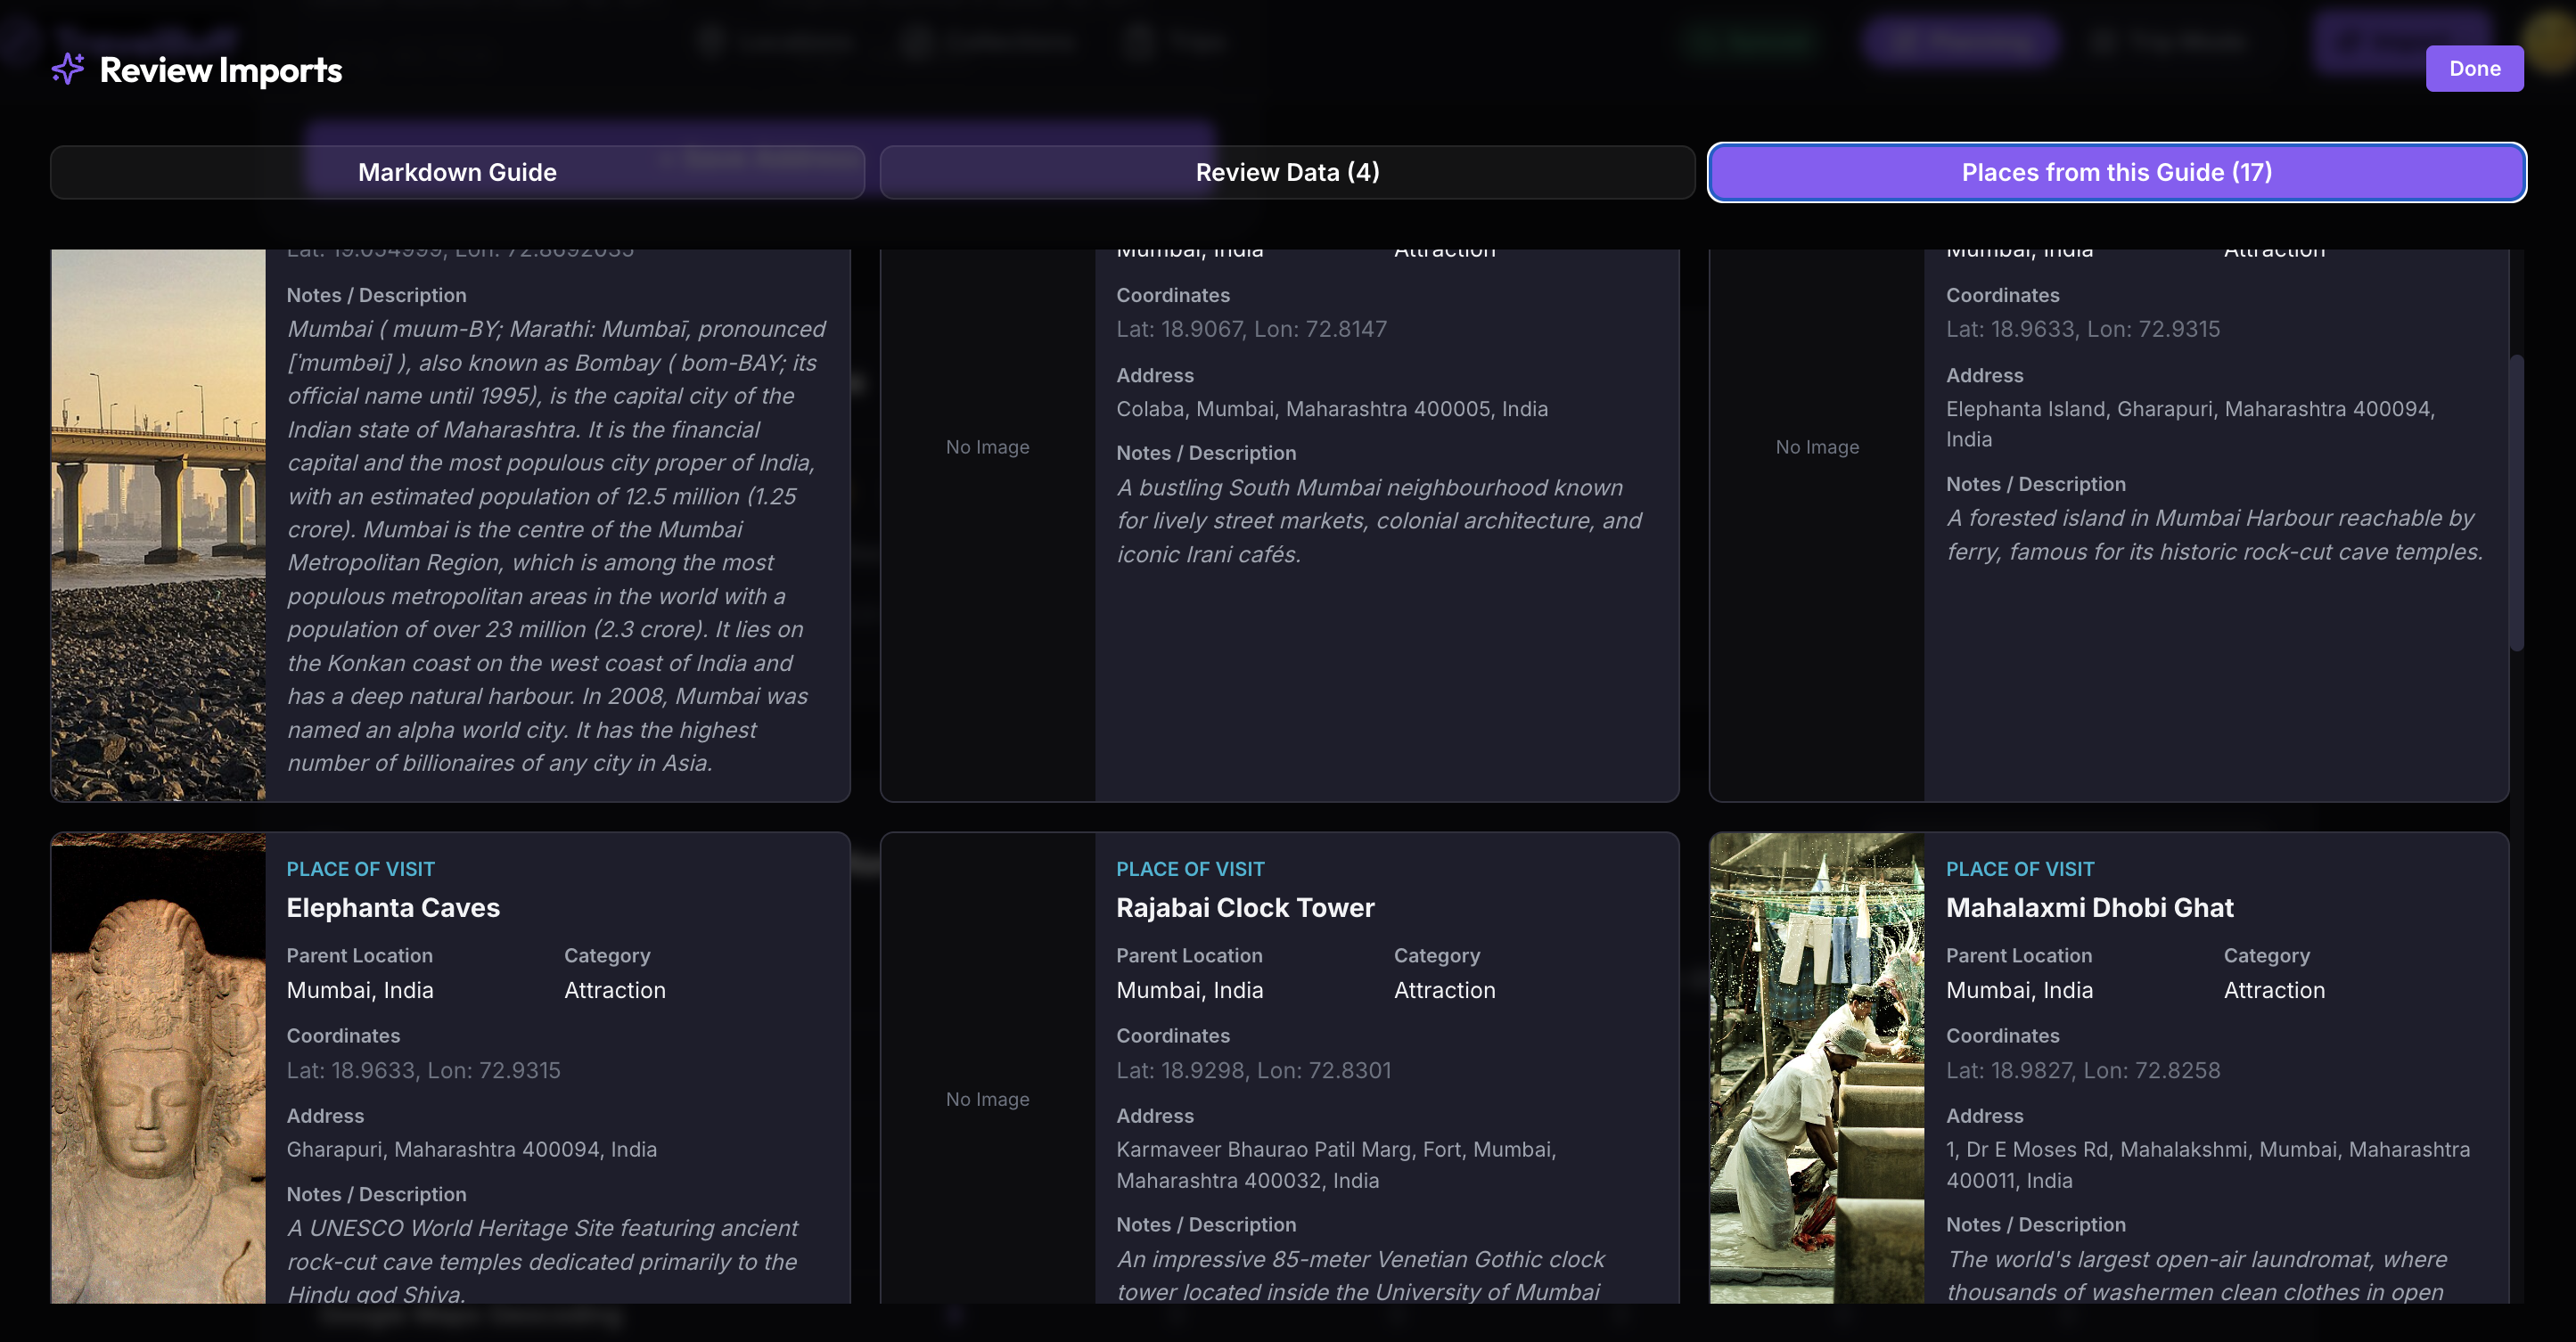
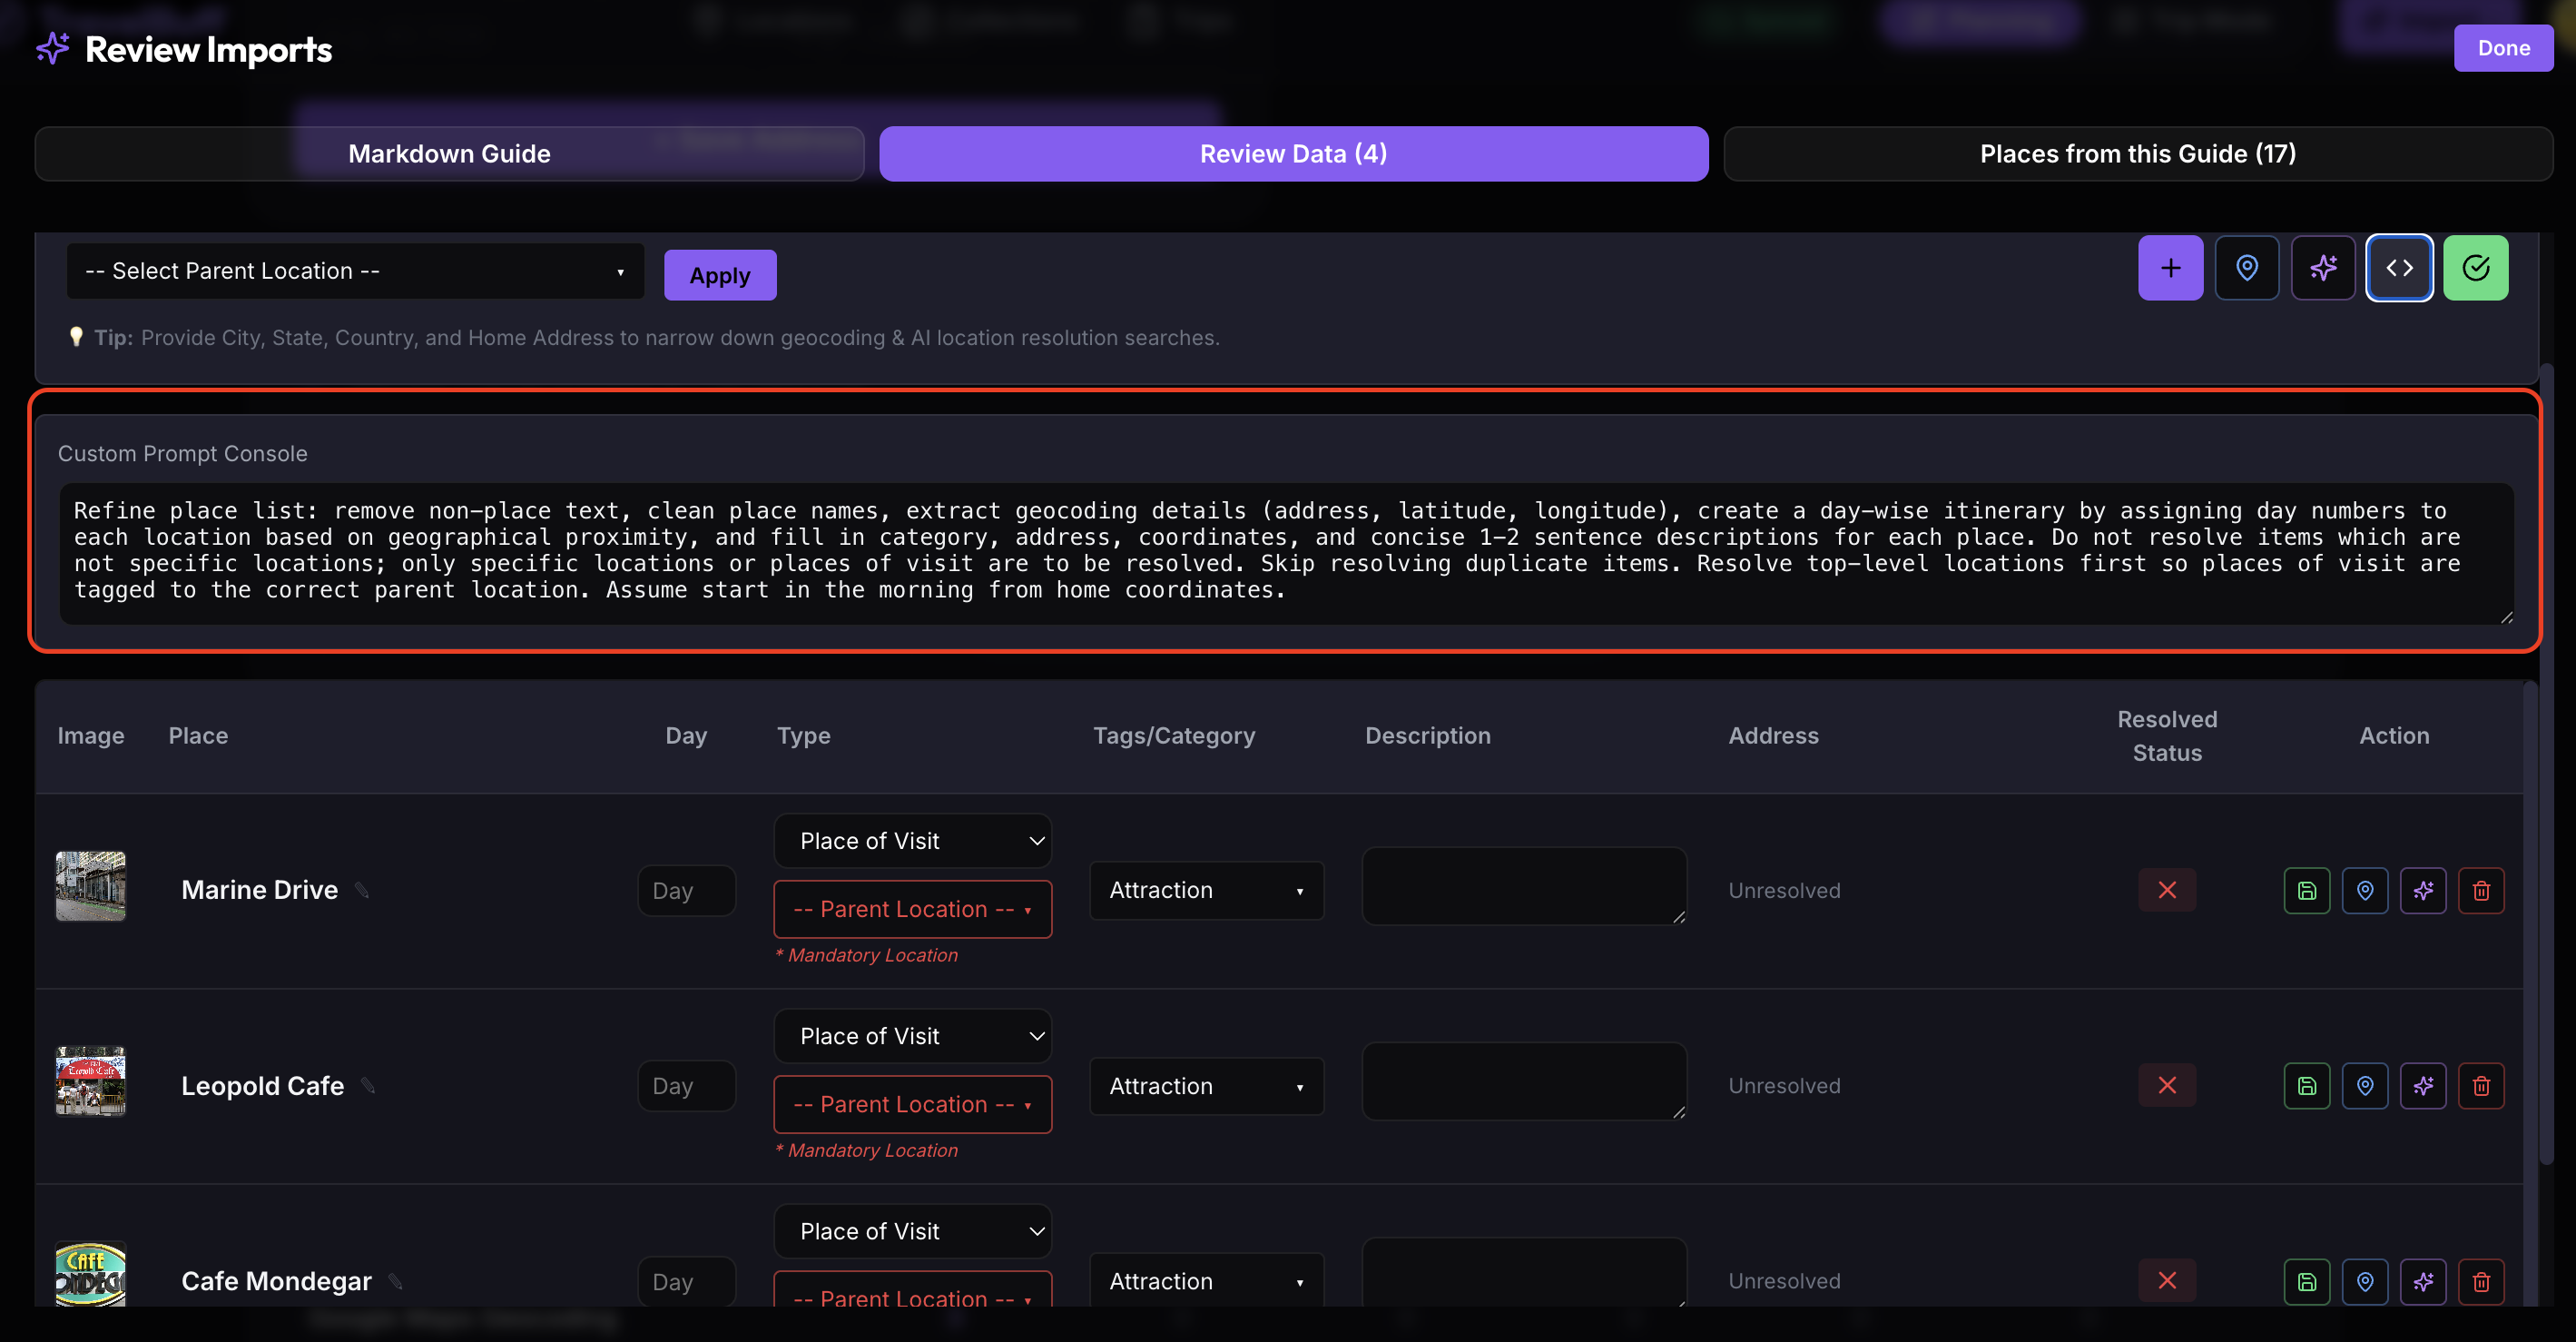
AI Trip Importer: Automatically convert web articles, travel guides, or documents into structured travel plans with smart location details.
Photo & Travel Companion Sync: Connect with your photo library server to easily tag travel companions with face photo avatars.
GPS Travel Log Import: Import GPS logs from your trips to accurately measure your actual travel distances.
Multi-Currency Expense Tracker: Log expenses in any currency and set custom exchange rates to stay on top of your travel budget.
Mobile-Friendly Design: Simple, easy-to-use interface optimized for smartphone screens and touch navigation.
Figure 1.2: Interactive Map with Step-by-Step Numbered RoutesFigure 1.3: Visited Status Indicators (Visited, Partial, Not Visited)
2. Setting Up TravelBuff
Prerequisites Check (All Operating Systems)
Before setting up TravelBuff, ensure you have Node.js (version 18 or higher) installed on your computer:
Open your terminal or Command Prompt.
Type node -v and press Enter.
If Node.js is installed, you will see a version number (such as v18.16.0 or v20.9.0). If not, download and install Node.js from nodejs.org.
Step 1: Open the Project Folder
Open your command line tool and navigate to where you downloaded or extracted the TravelBuff project files:
macOS / Linux
cd ~/Downloads/TravelBuff
Windows
cd C:\Users\YourUsername\Downloads\TravelBuff
Step 2: Install Required Packages
Download all the application components by running the install command in your terminal:
Terminal
npm install
This process takes about a minute to complete and sets up all necessary libraries automatically.
TravelBuff uses a configuration file named .env in the main folder to manage basic application settings.
1. Example Configuration Template:
.env
# Port number where TravelBuff will run (Default: 3000 for Desktop, 5000 for Docker)
PORT=3000

# Secret phrase used to secure user accounts
JWT_SECRET=my-travelbuff-secret-key-12345

# Folder path for storing uploaded photos and documents
UPLOADS_DIR=./data/uploads
2. How to create the .env file on your Operating System:
macOS / Linux: Run touch .env then edit with nano .env. Press Ctrl + O to save, and Ctrl + X to exit.
Windows: In PowerShell run New-Item .env -ItemType File, then open in Notepad and save.
Step 4: Launch TravelBuff
You can choose to run TravelBuff interactively in your terminal or continuously in the background with automatic startup on machine boot.
Option A: Run Interactively (Foreground Mode)
Terminal
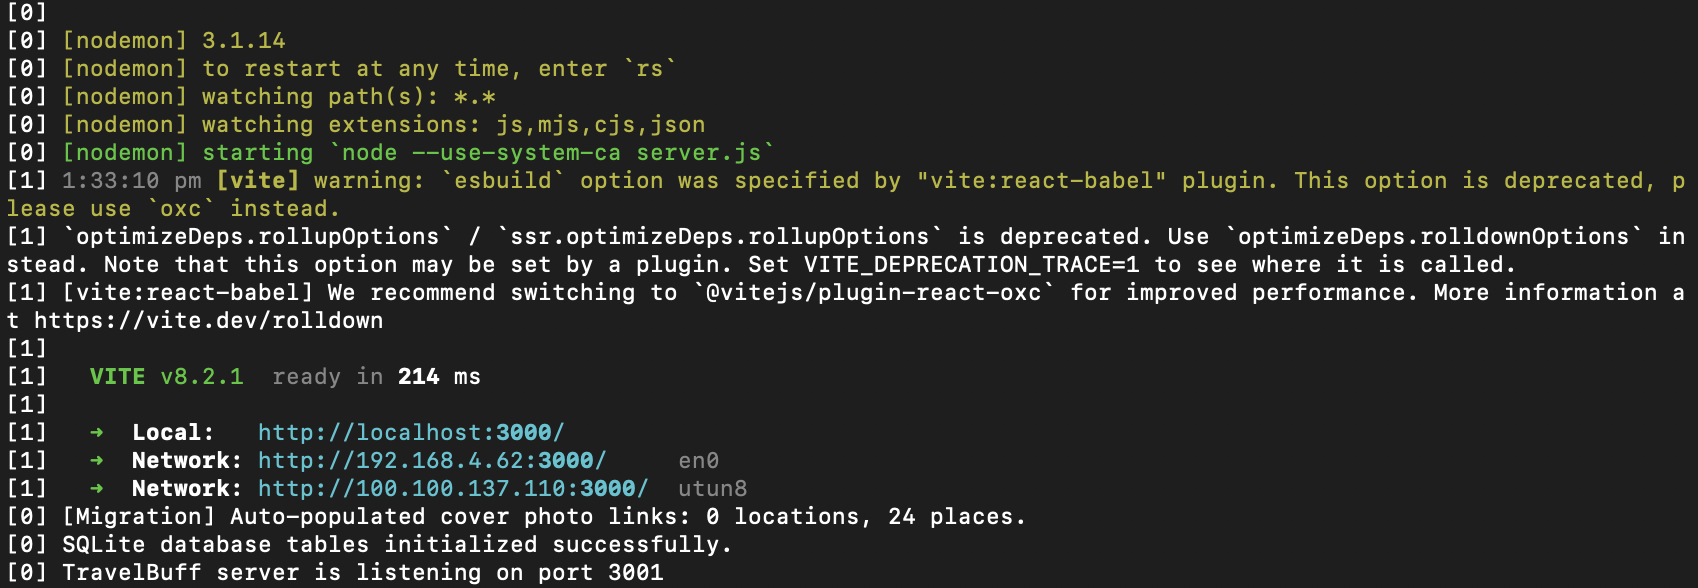
npm run dev
Figure 2.1: Launching TravelBuff via npm run dev
Option B: Run in the Background with Auto-Start on Boot (PM2)
Run TravelBuff as a background daemon that automatically resumes whenever your computer turns on:
Terminal (macOS & Linux)
# 1. Start application under PM2 process supervisor
npx pm2 start server.js --name travelbuff

# 2. Configure system hook to auto-launch TravelBuff on system startup
npx pm2 startup
npx pm2 save
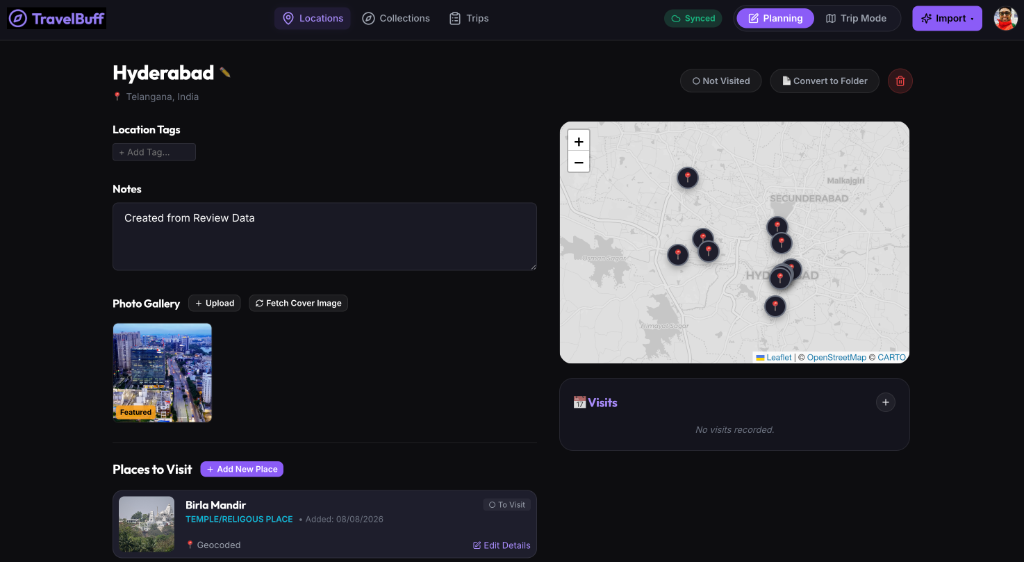
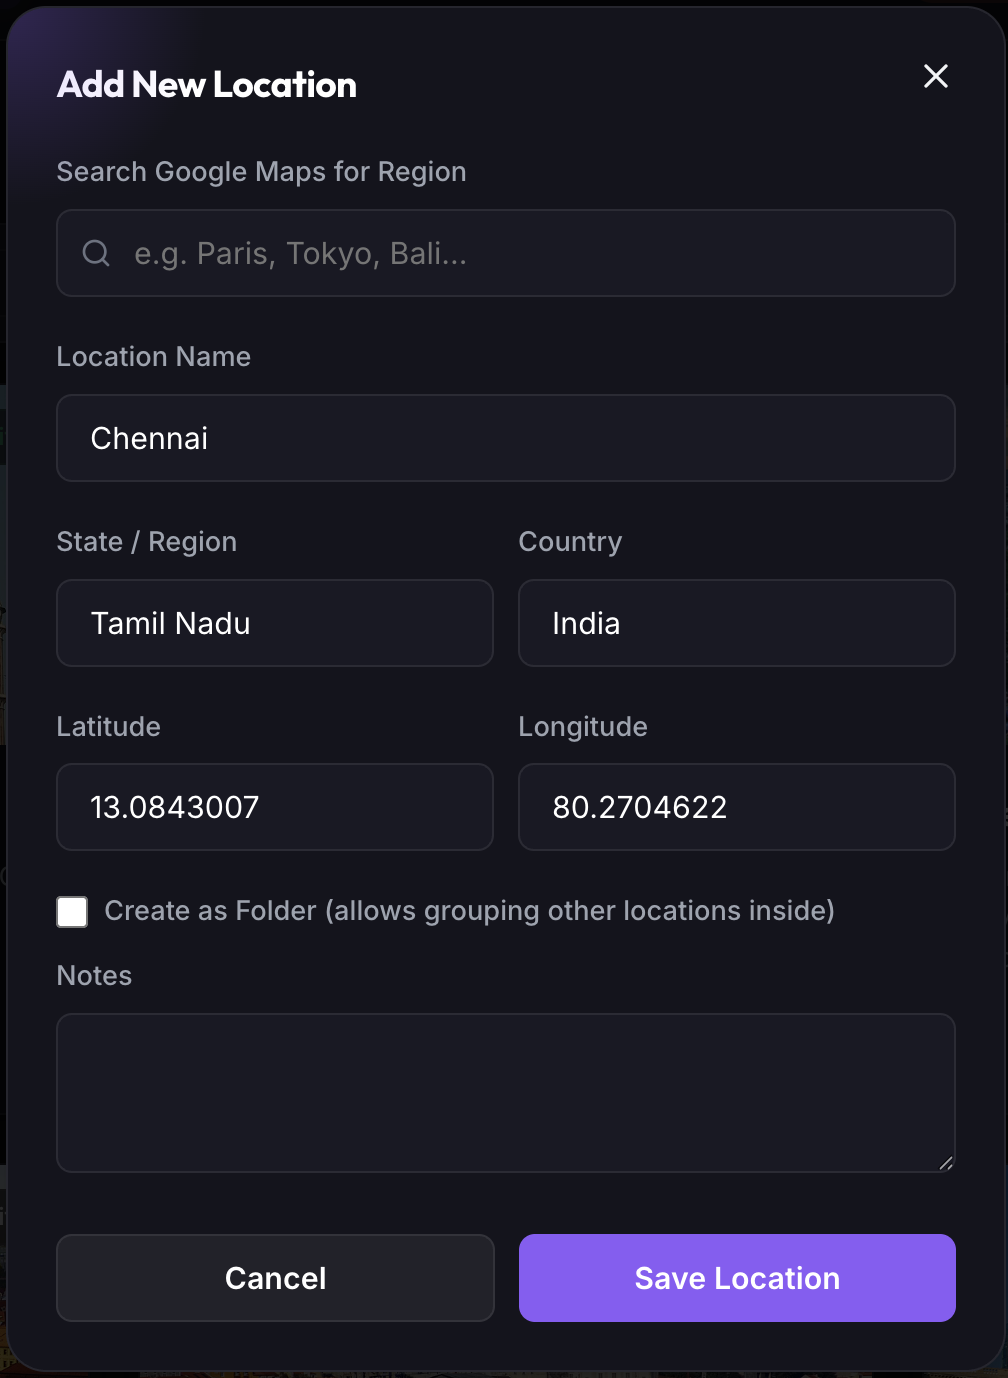
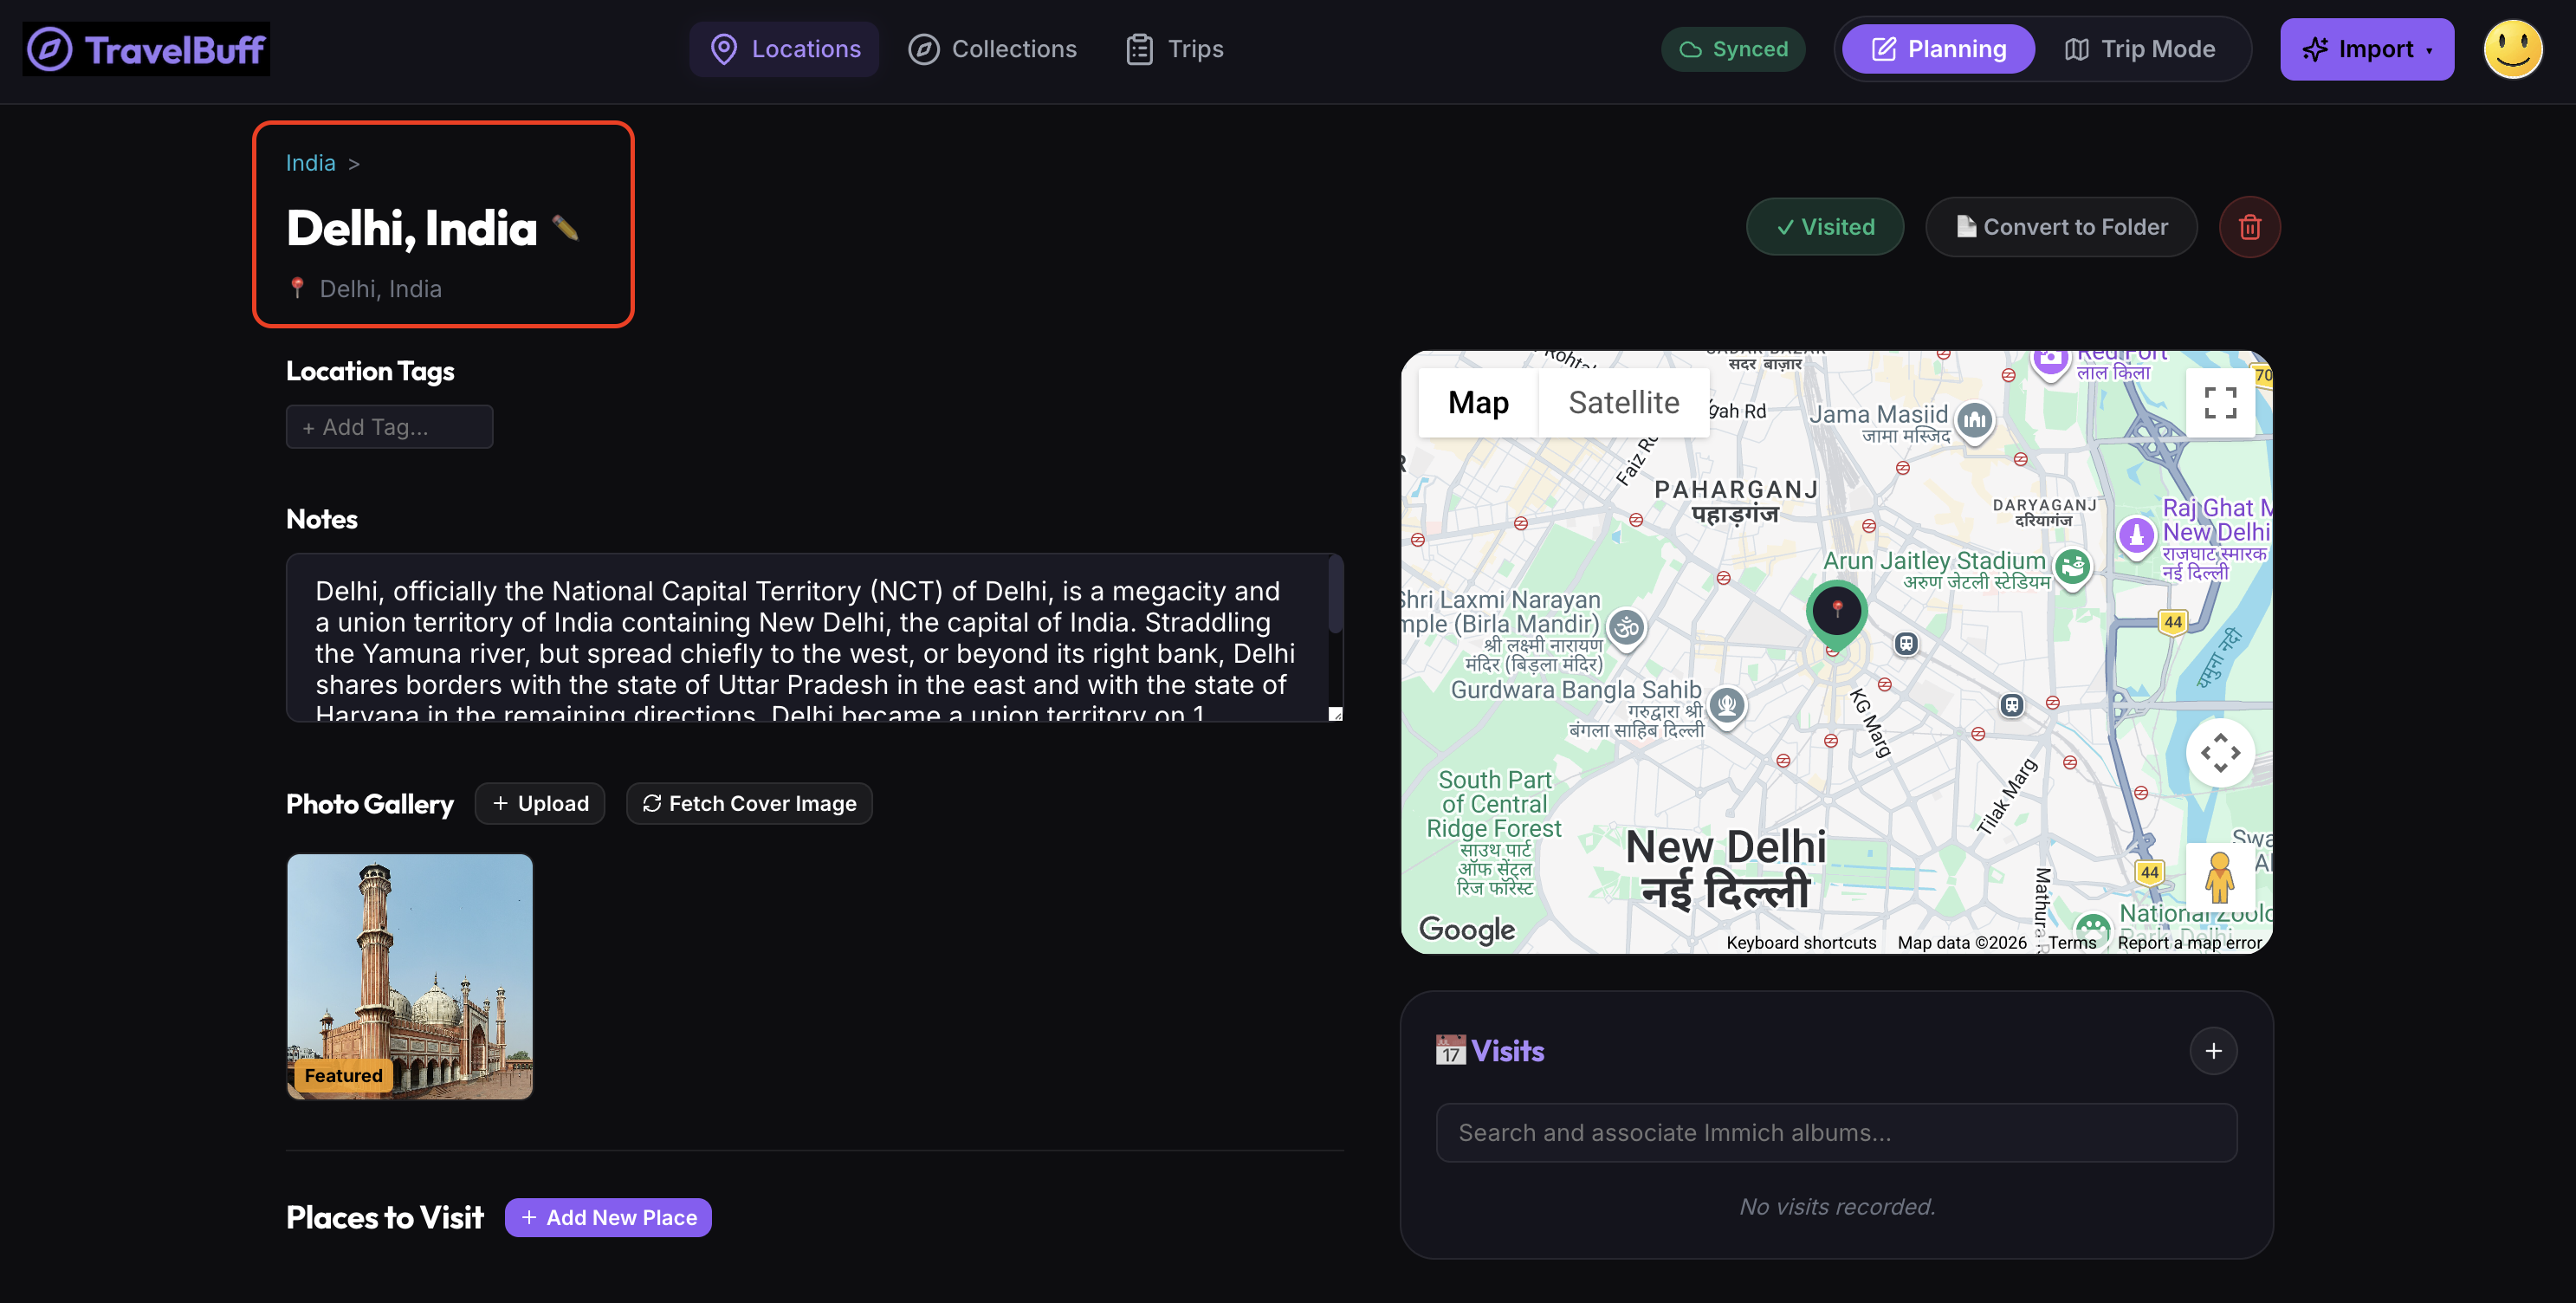
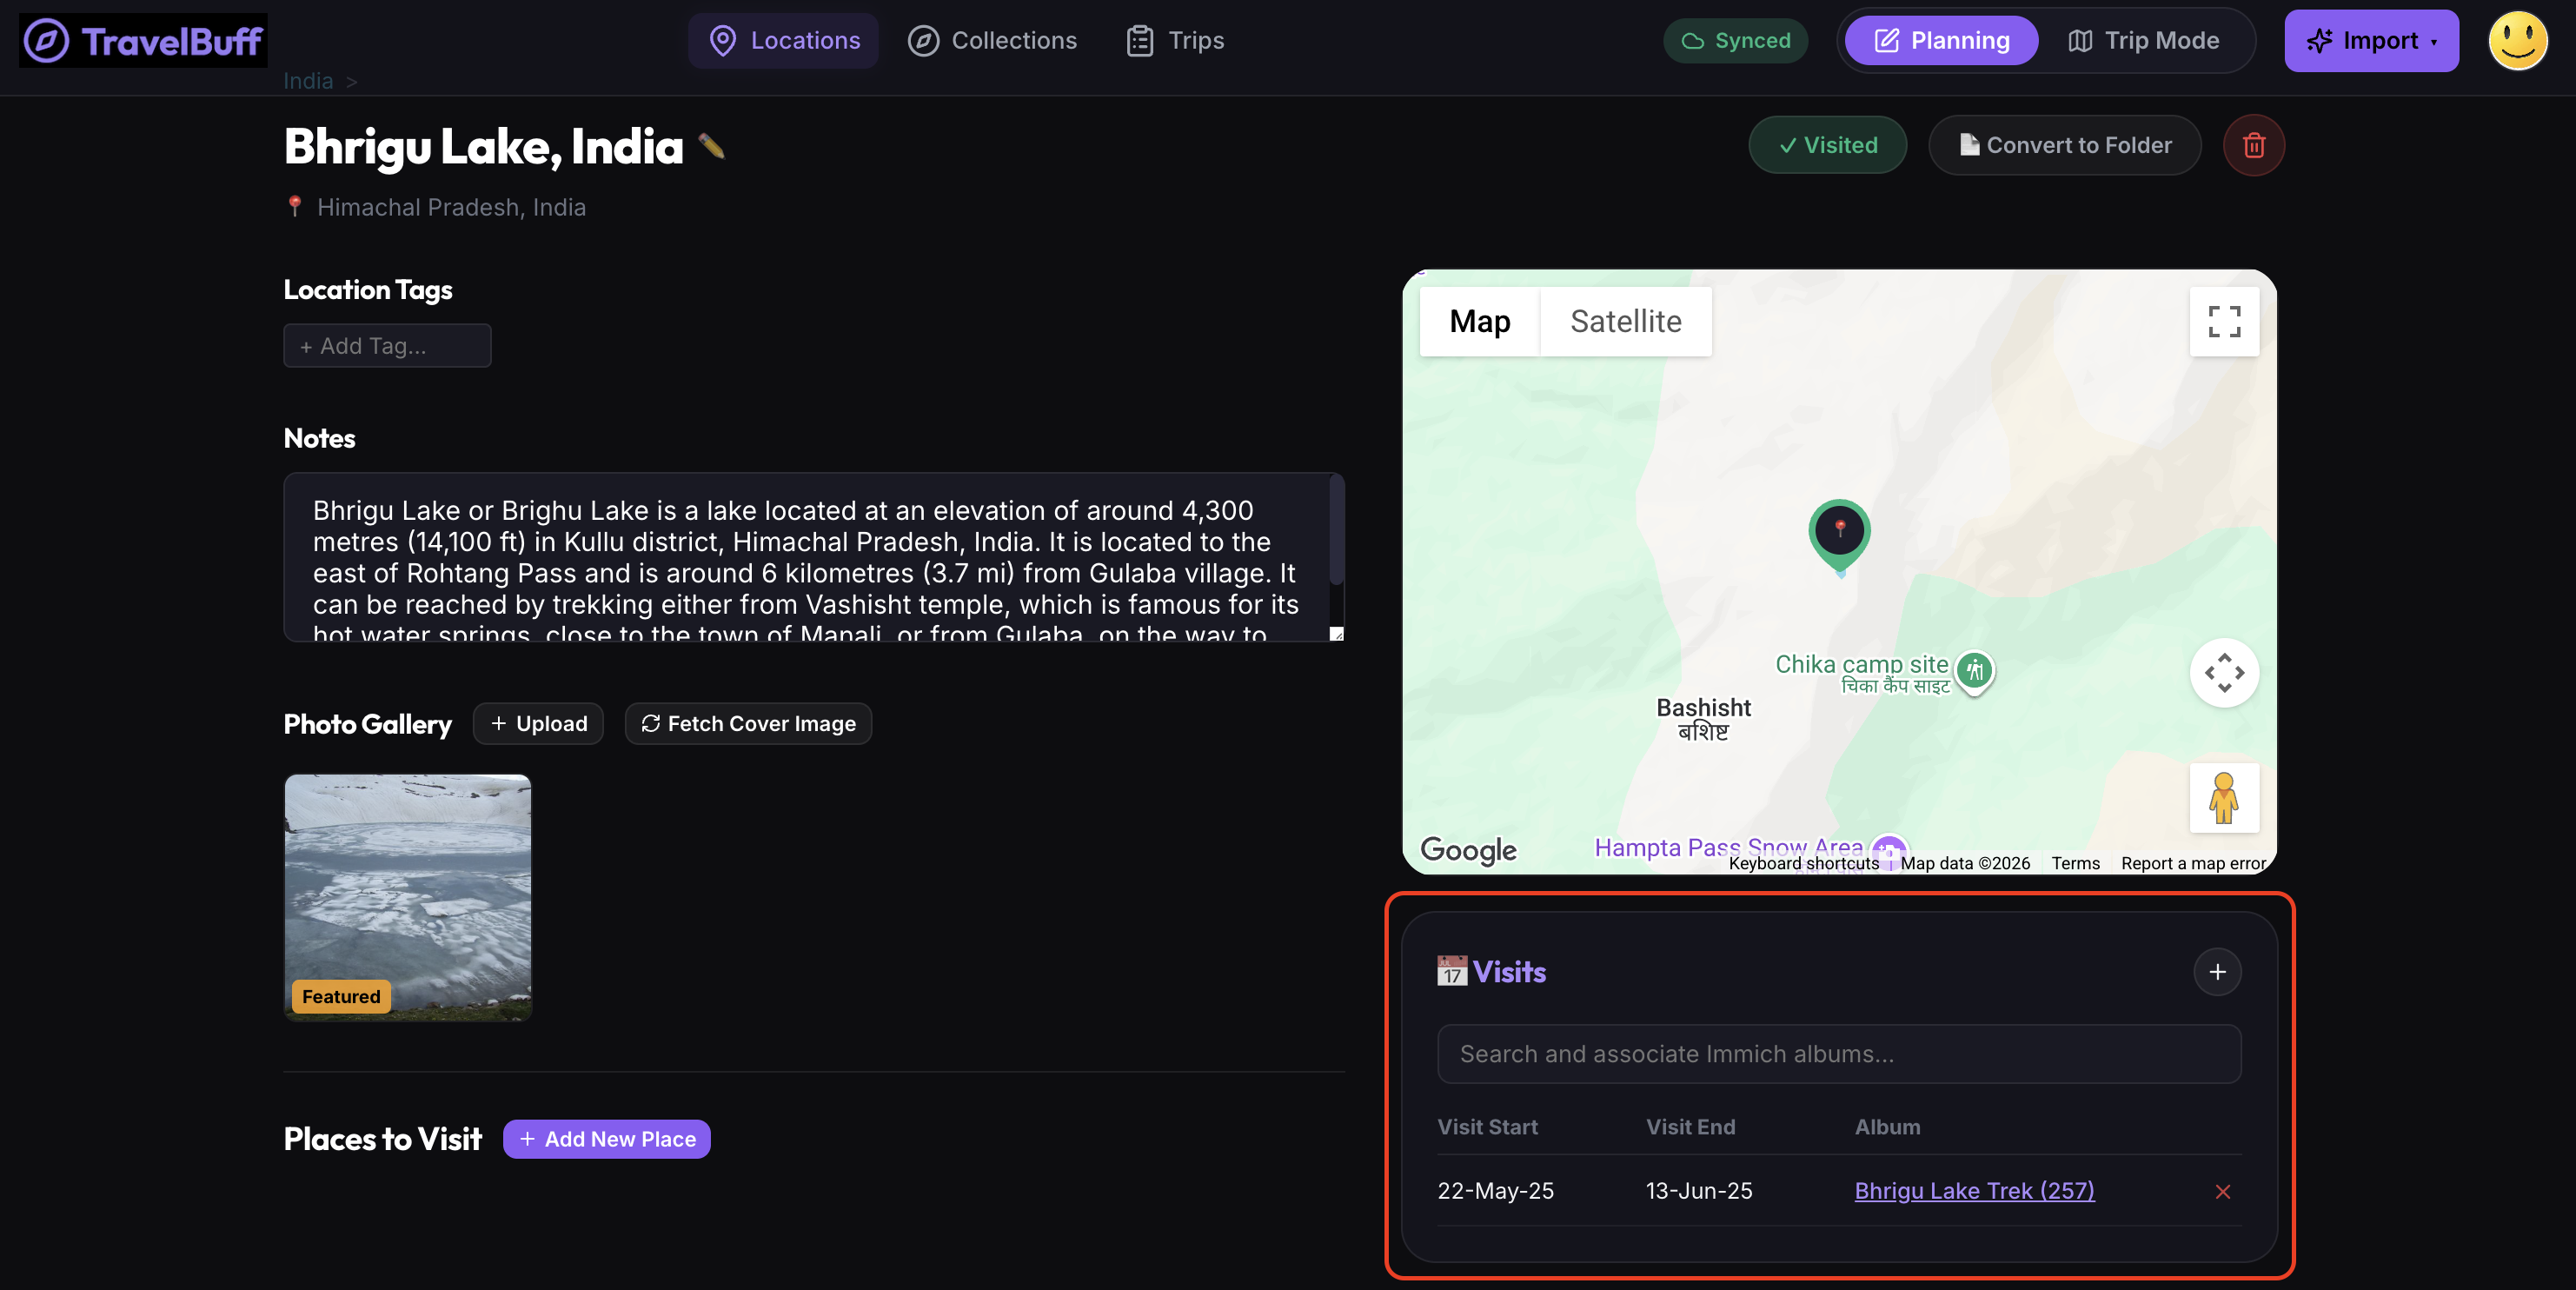
Add a Location: Click the + Add Location button on the Locations screen.
Search & Auto-Fill: Start typing your destination in the search bar. Location details—including name, state, country, and map coordinates—are automatically filled in.
Automated Featured Cover Photos: TravelBuff automatically searches for and downloads a featured cover photo in the background.
Folder Option: Check Create as Folder or click Convert to Folder on any location to contain sub-locations or cities.
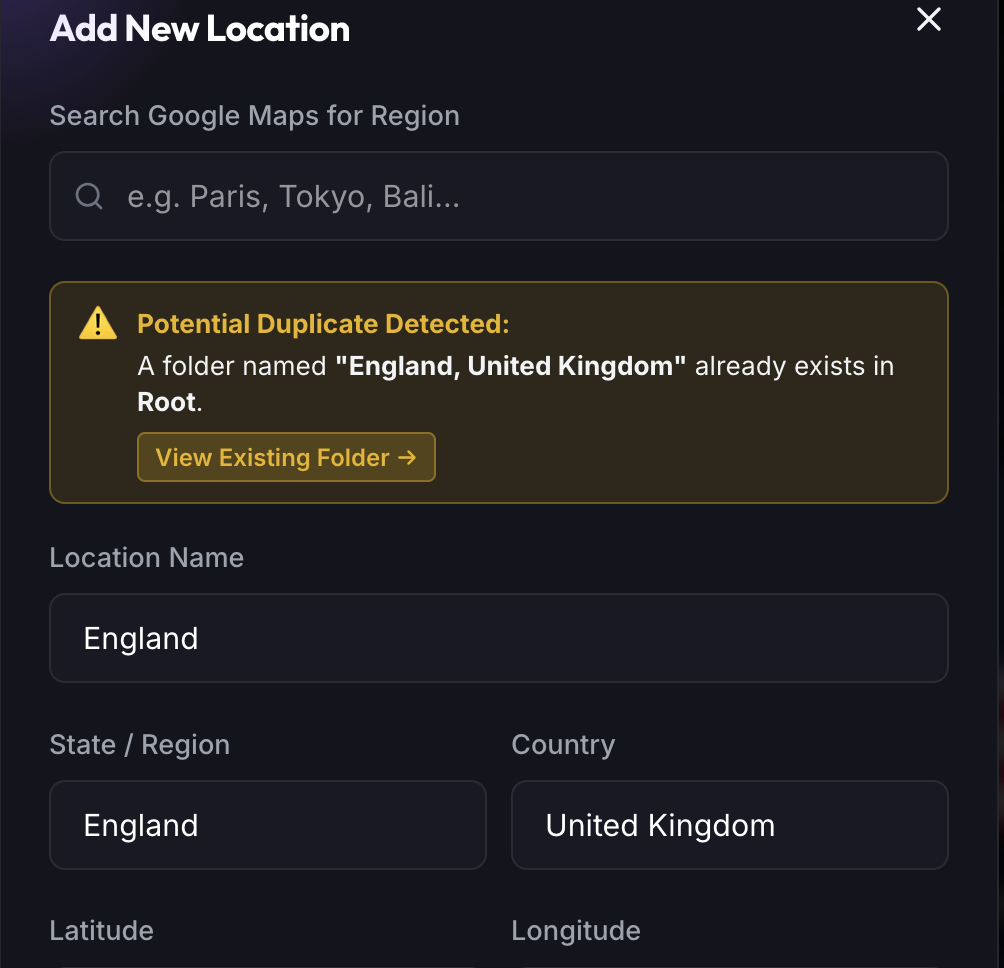
TravelBuff features automatic, live duplicate detection that inspects the entire database across all folders and locations, regardless of hierarchical nesting depth.
Multi-Factor Matching: Evaluates exact/normalized names, state/country pairings, and GPS coordinates within 150 meters.
Inline Warning Banner: Displays existing parent hierarchy breadcrumbs with a direct "View Existing Folder/Location" jump button.
Figure 3.6: Global Duplicate Prevention Warning Banner
Places of Visit & Categorization
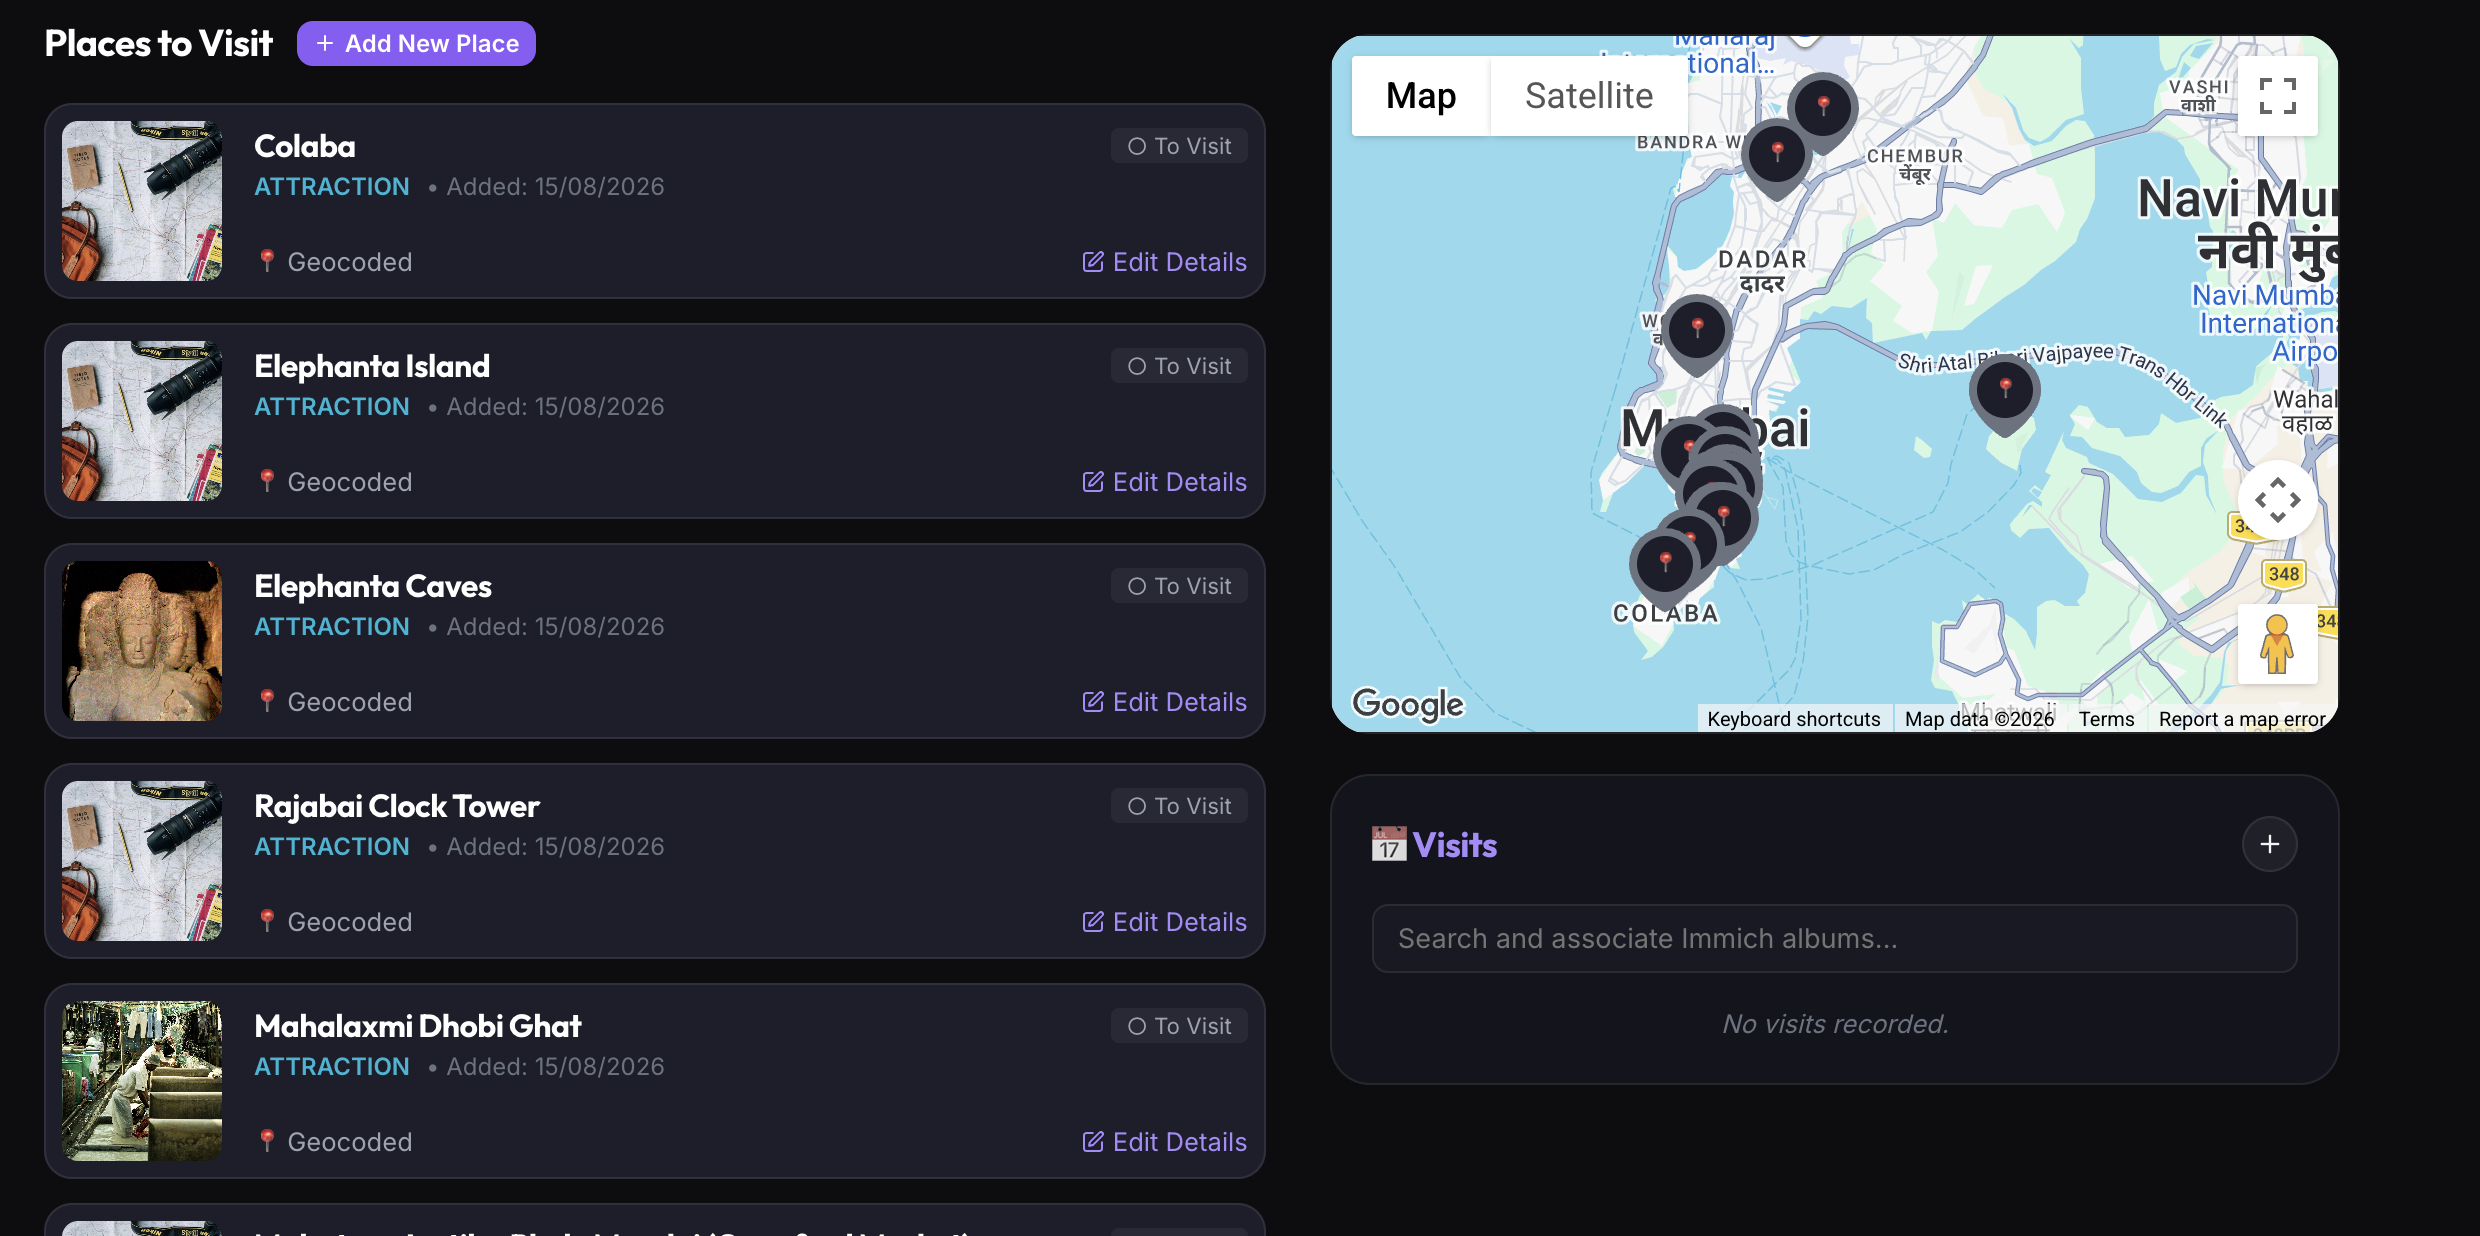
Multiple Places per Location: Store cafes, hotels, waterfalls, or museums inside any folder.
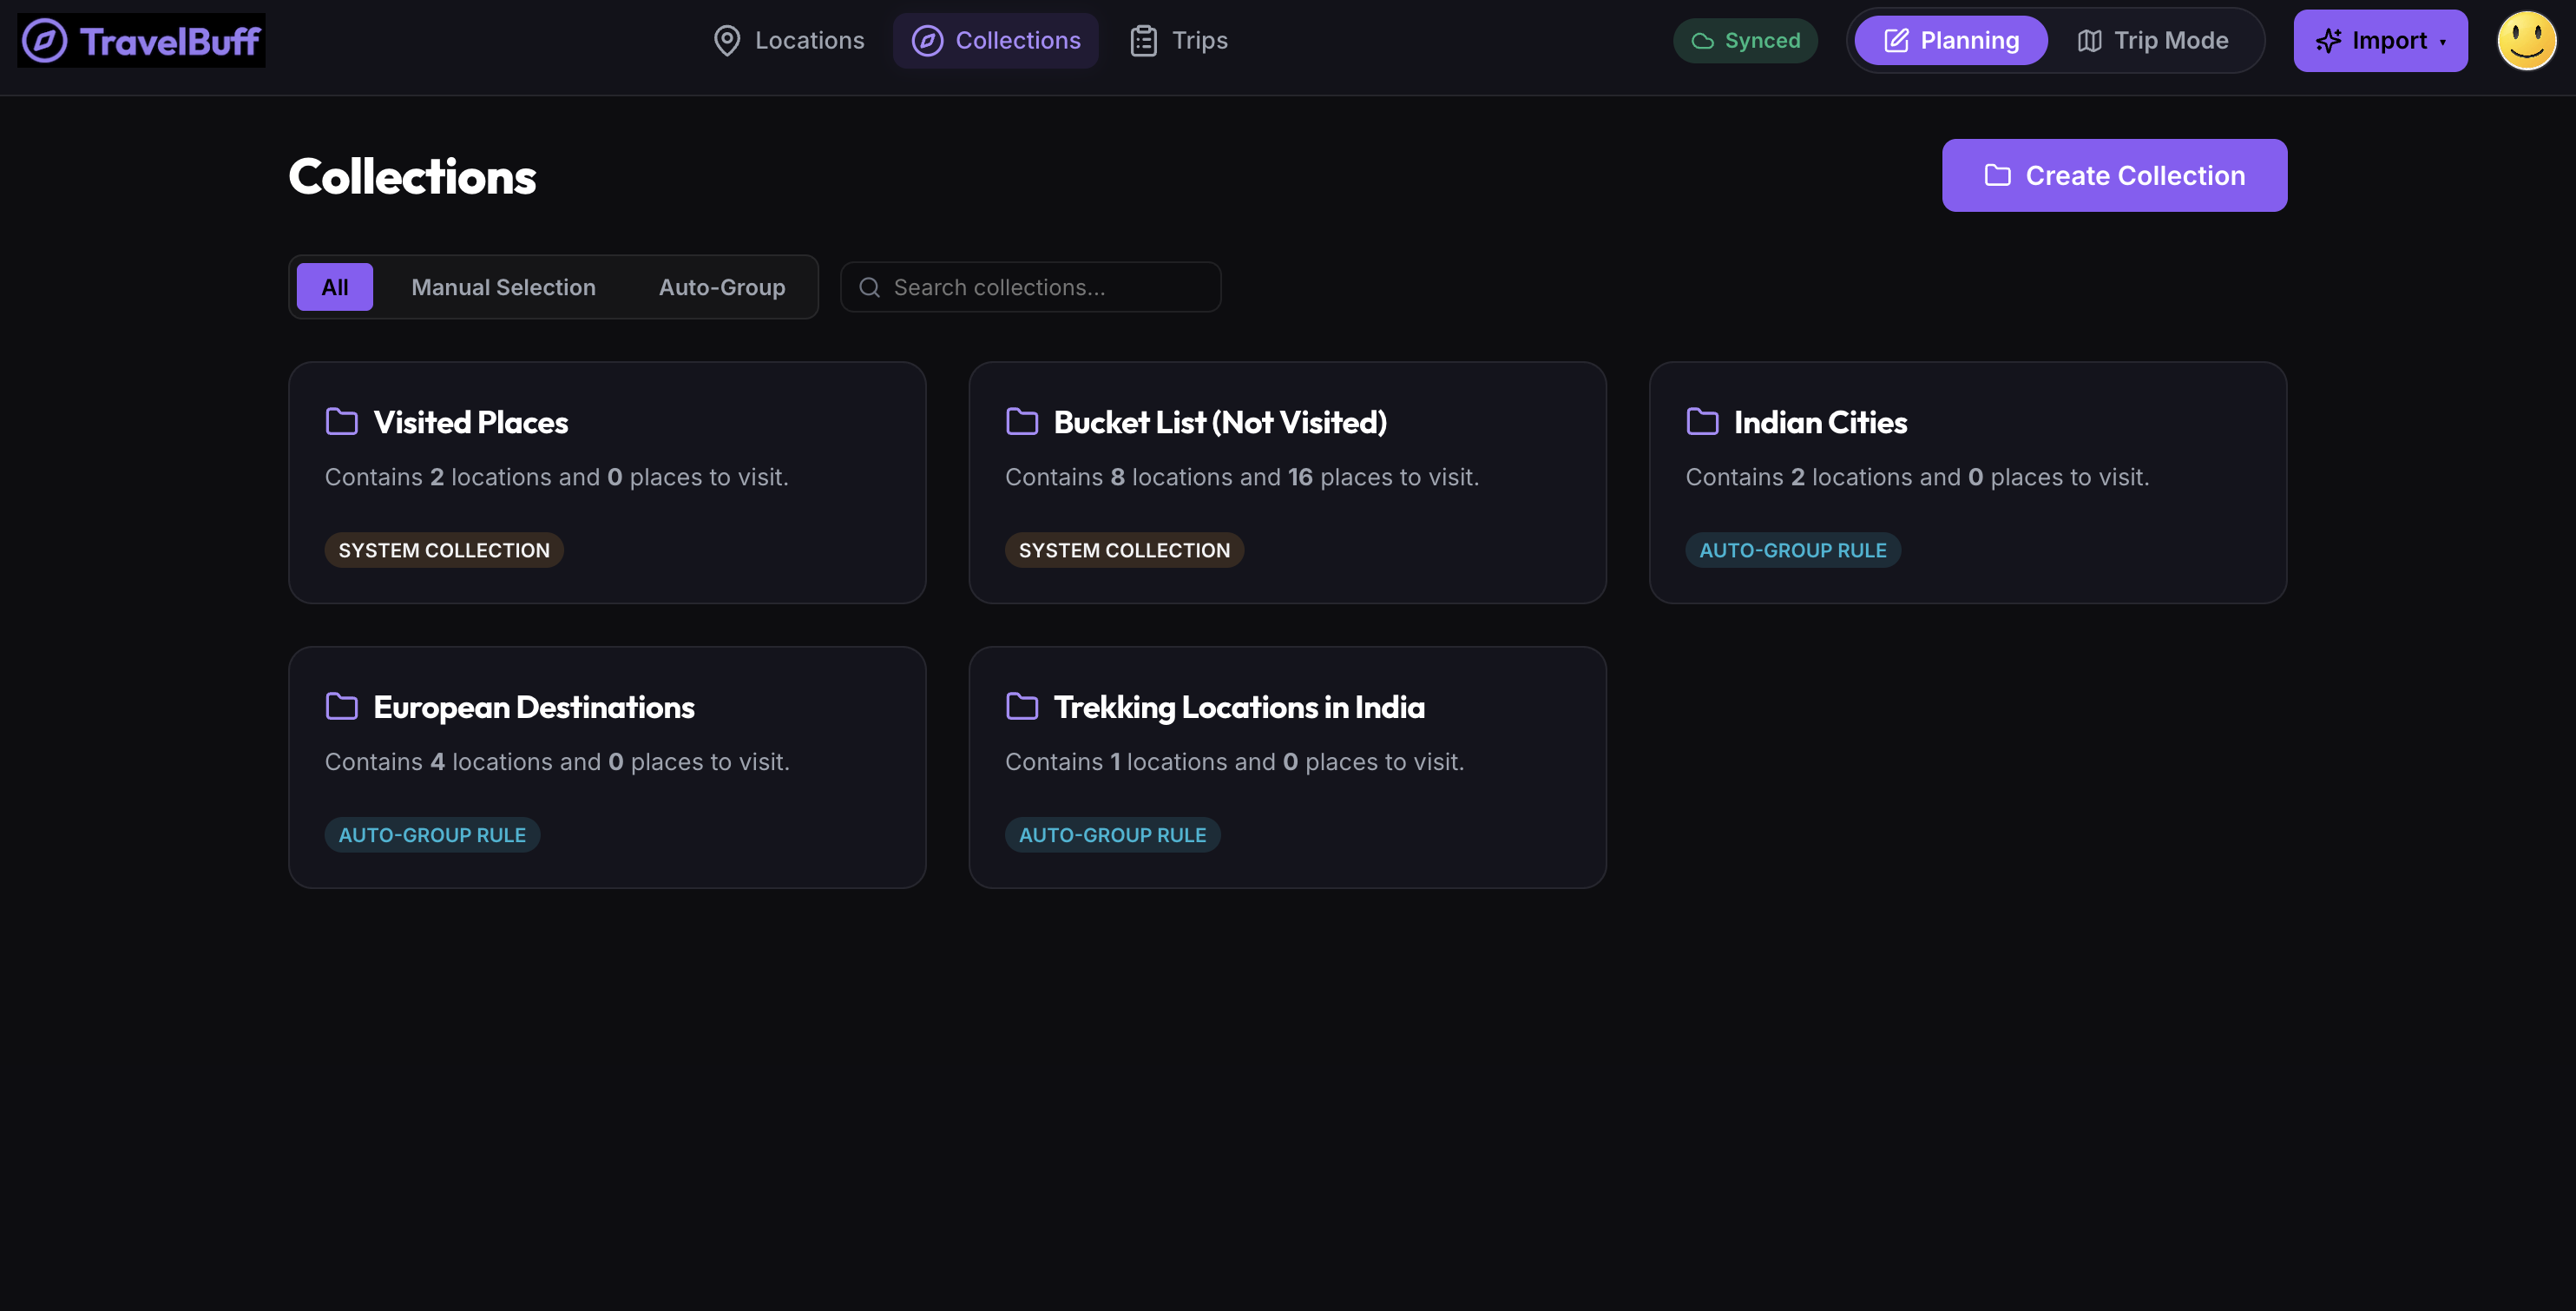
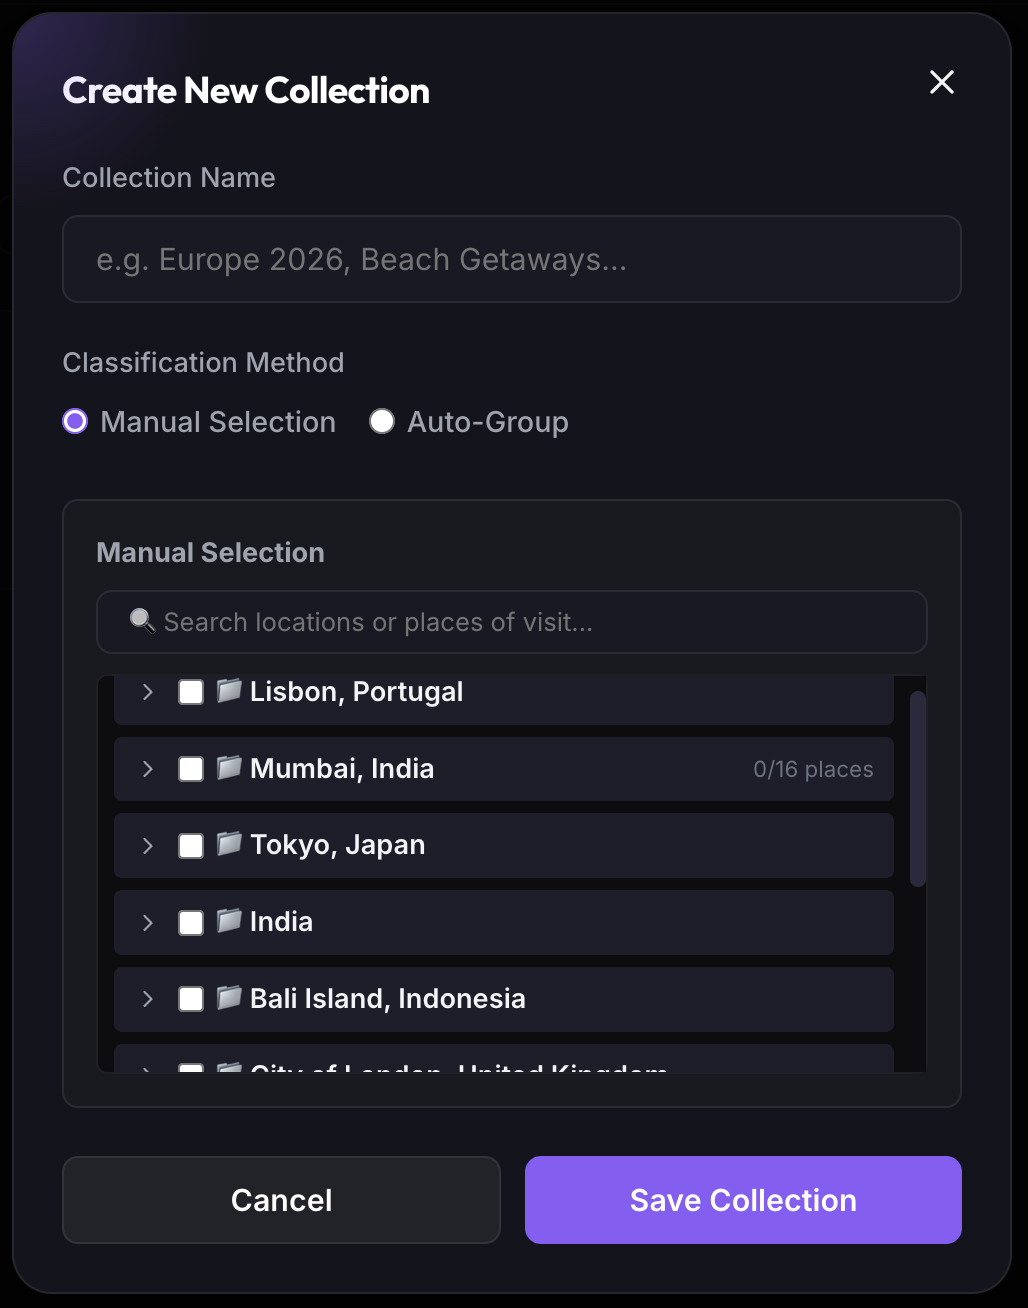
Manual Selection: Hand-pick specific destination folders or individual places from a searchable tree.
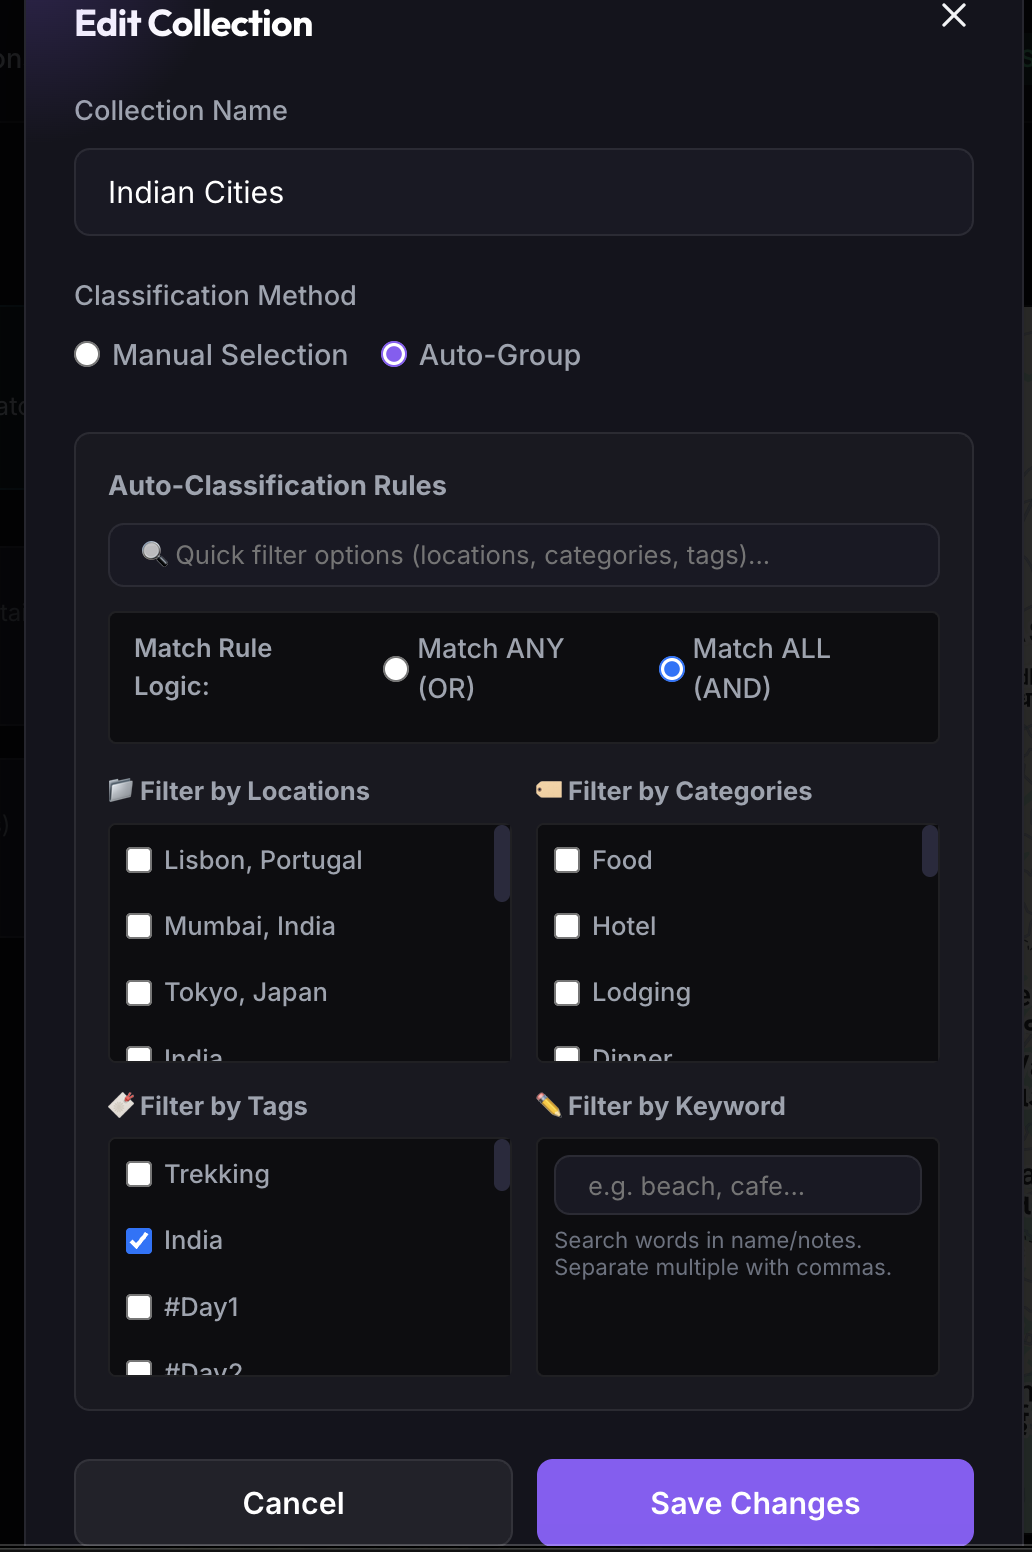
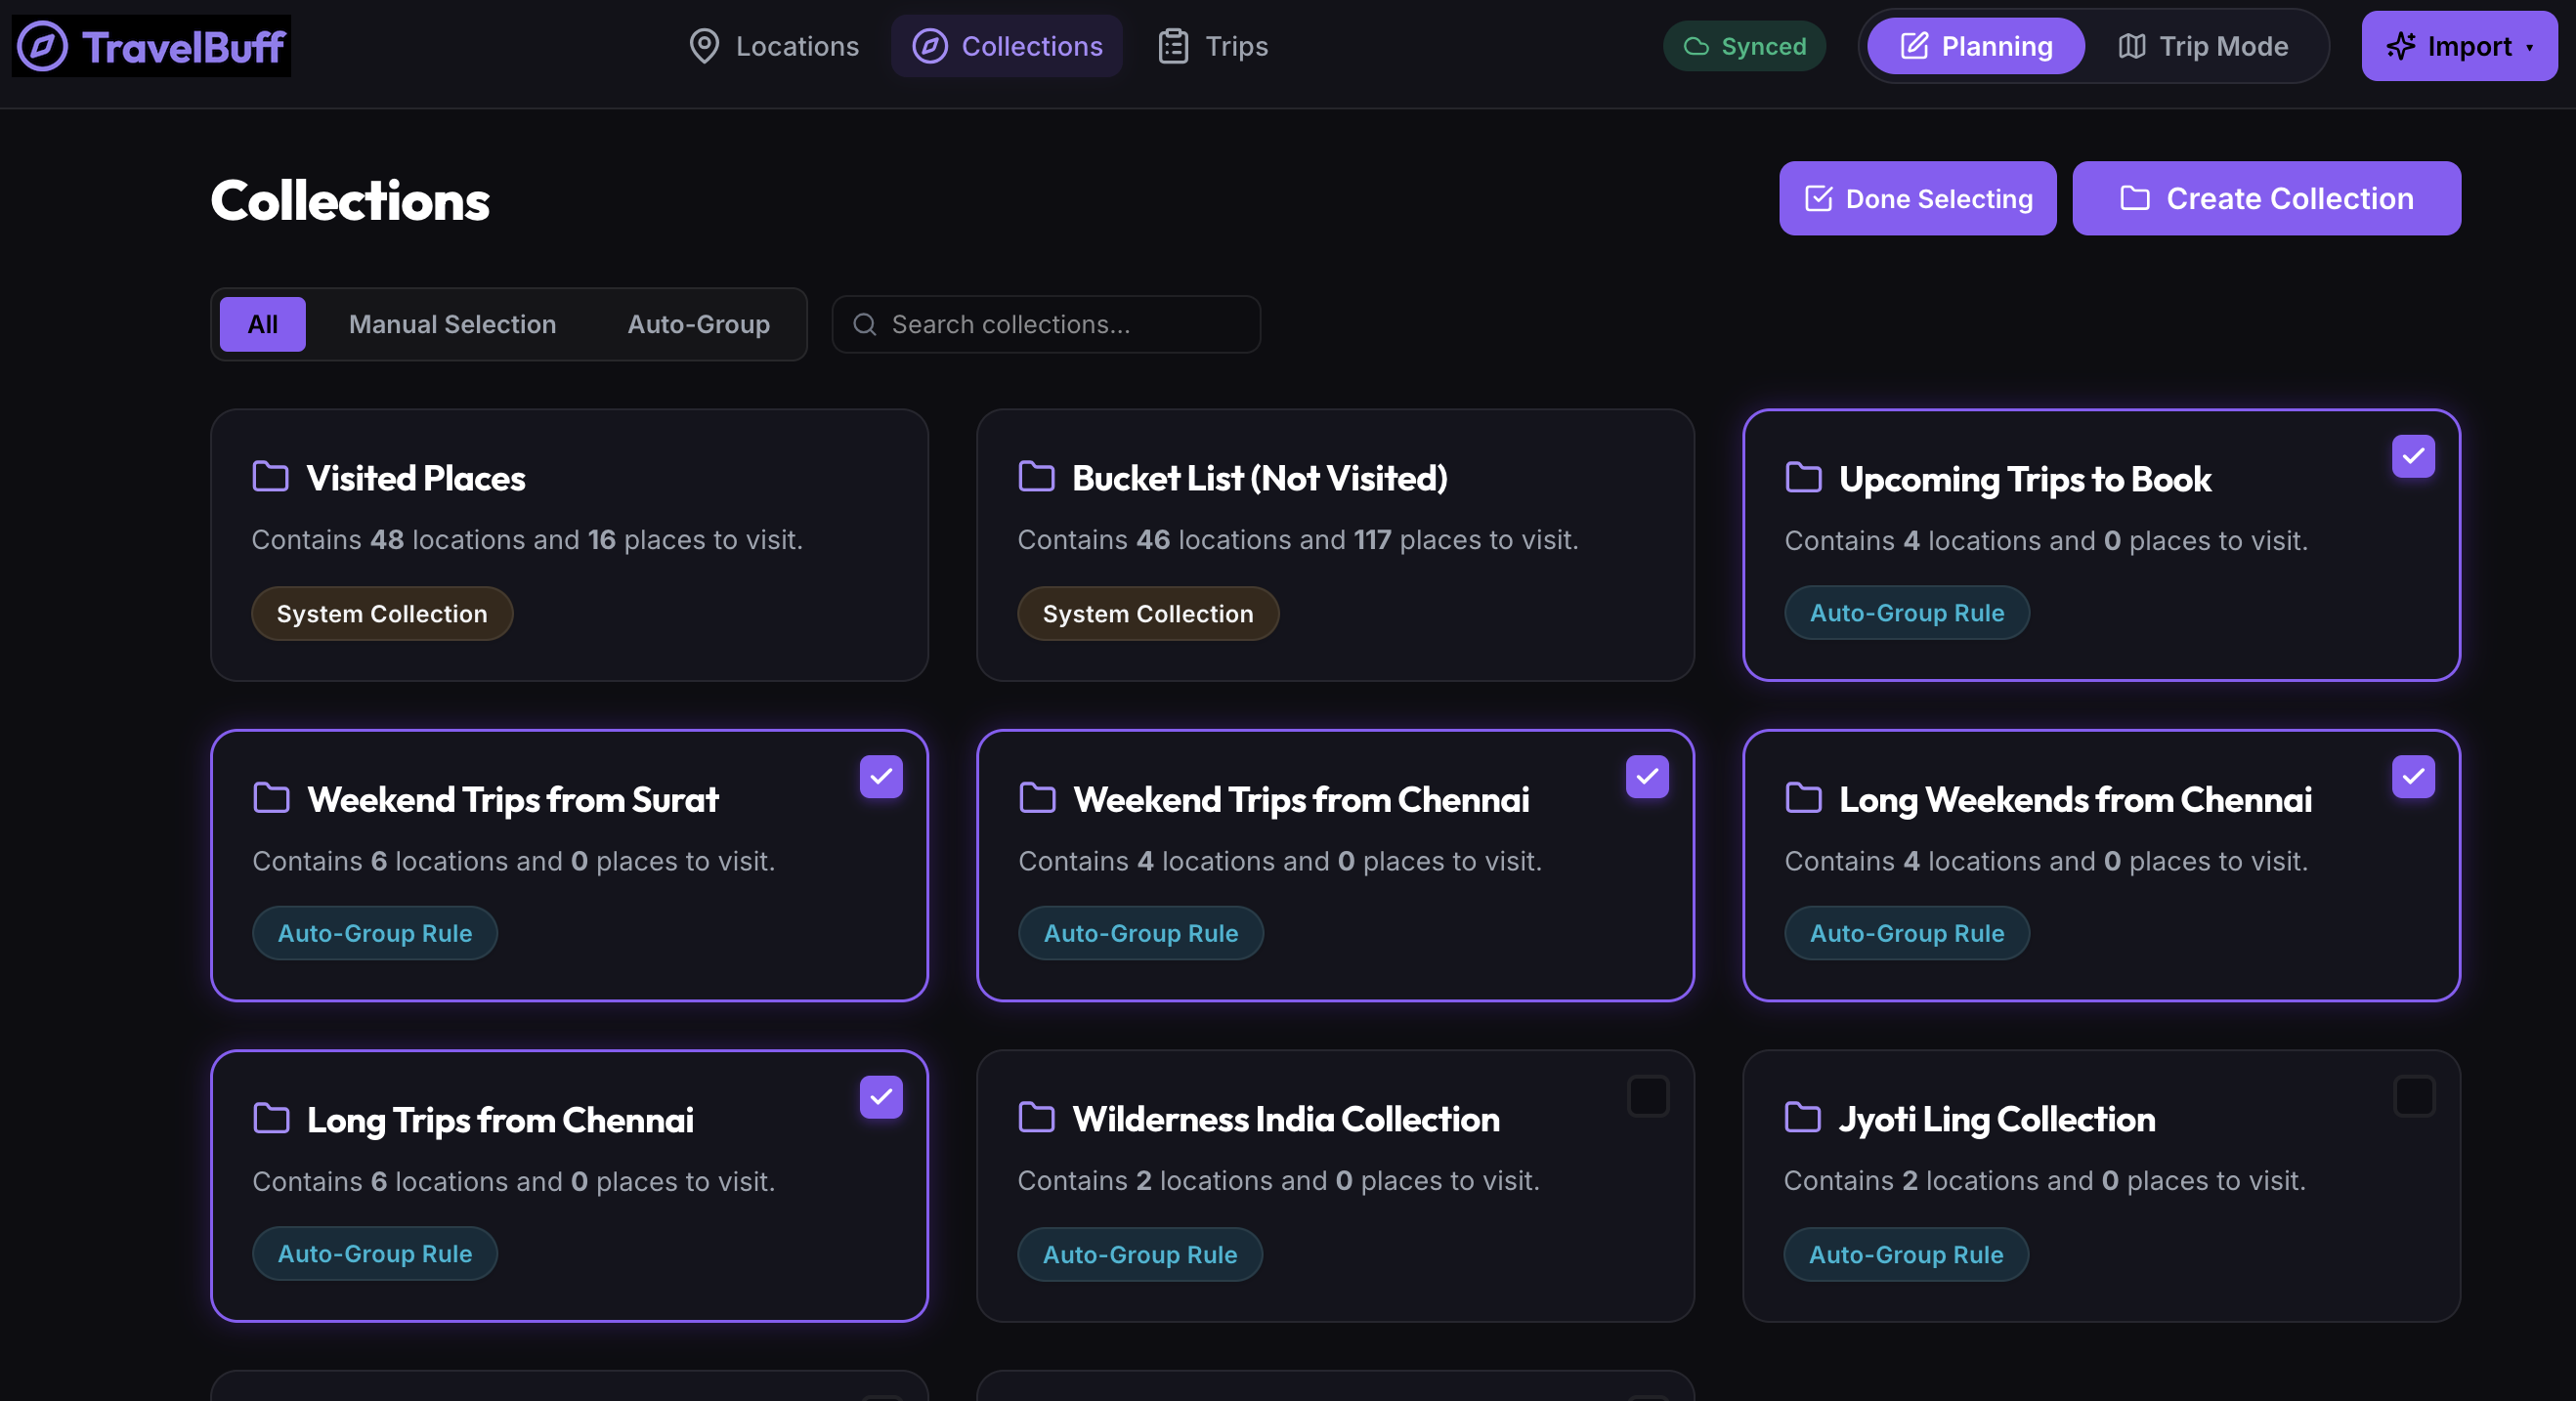
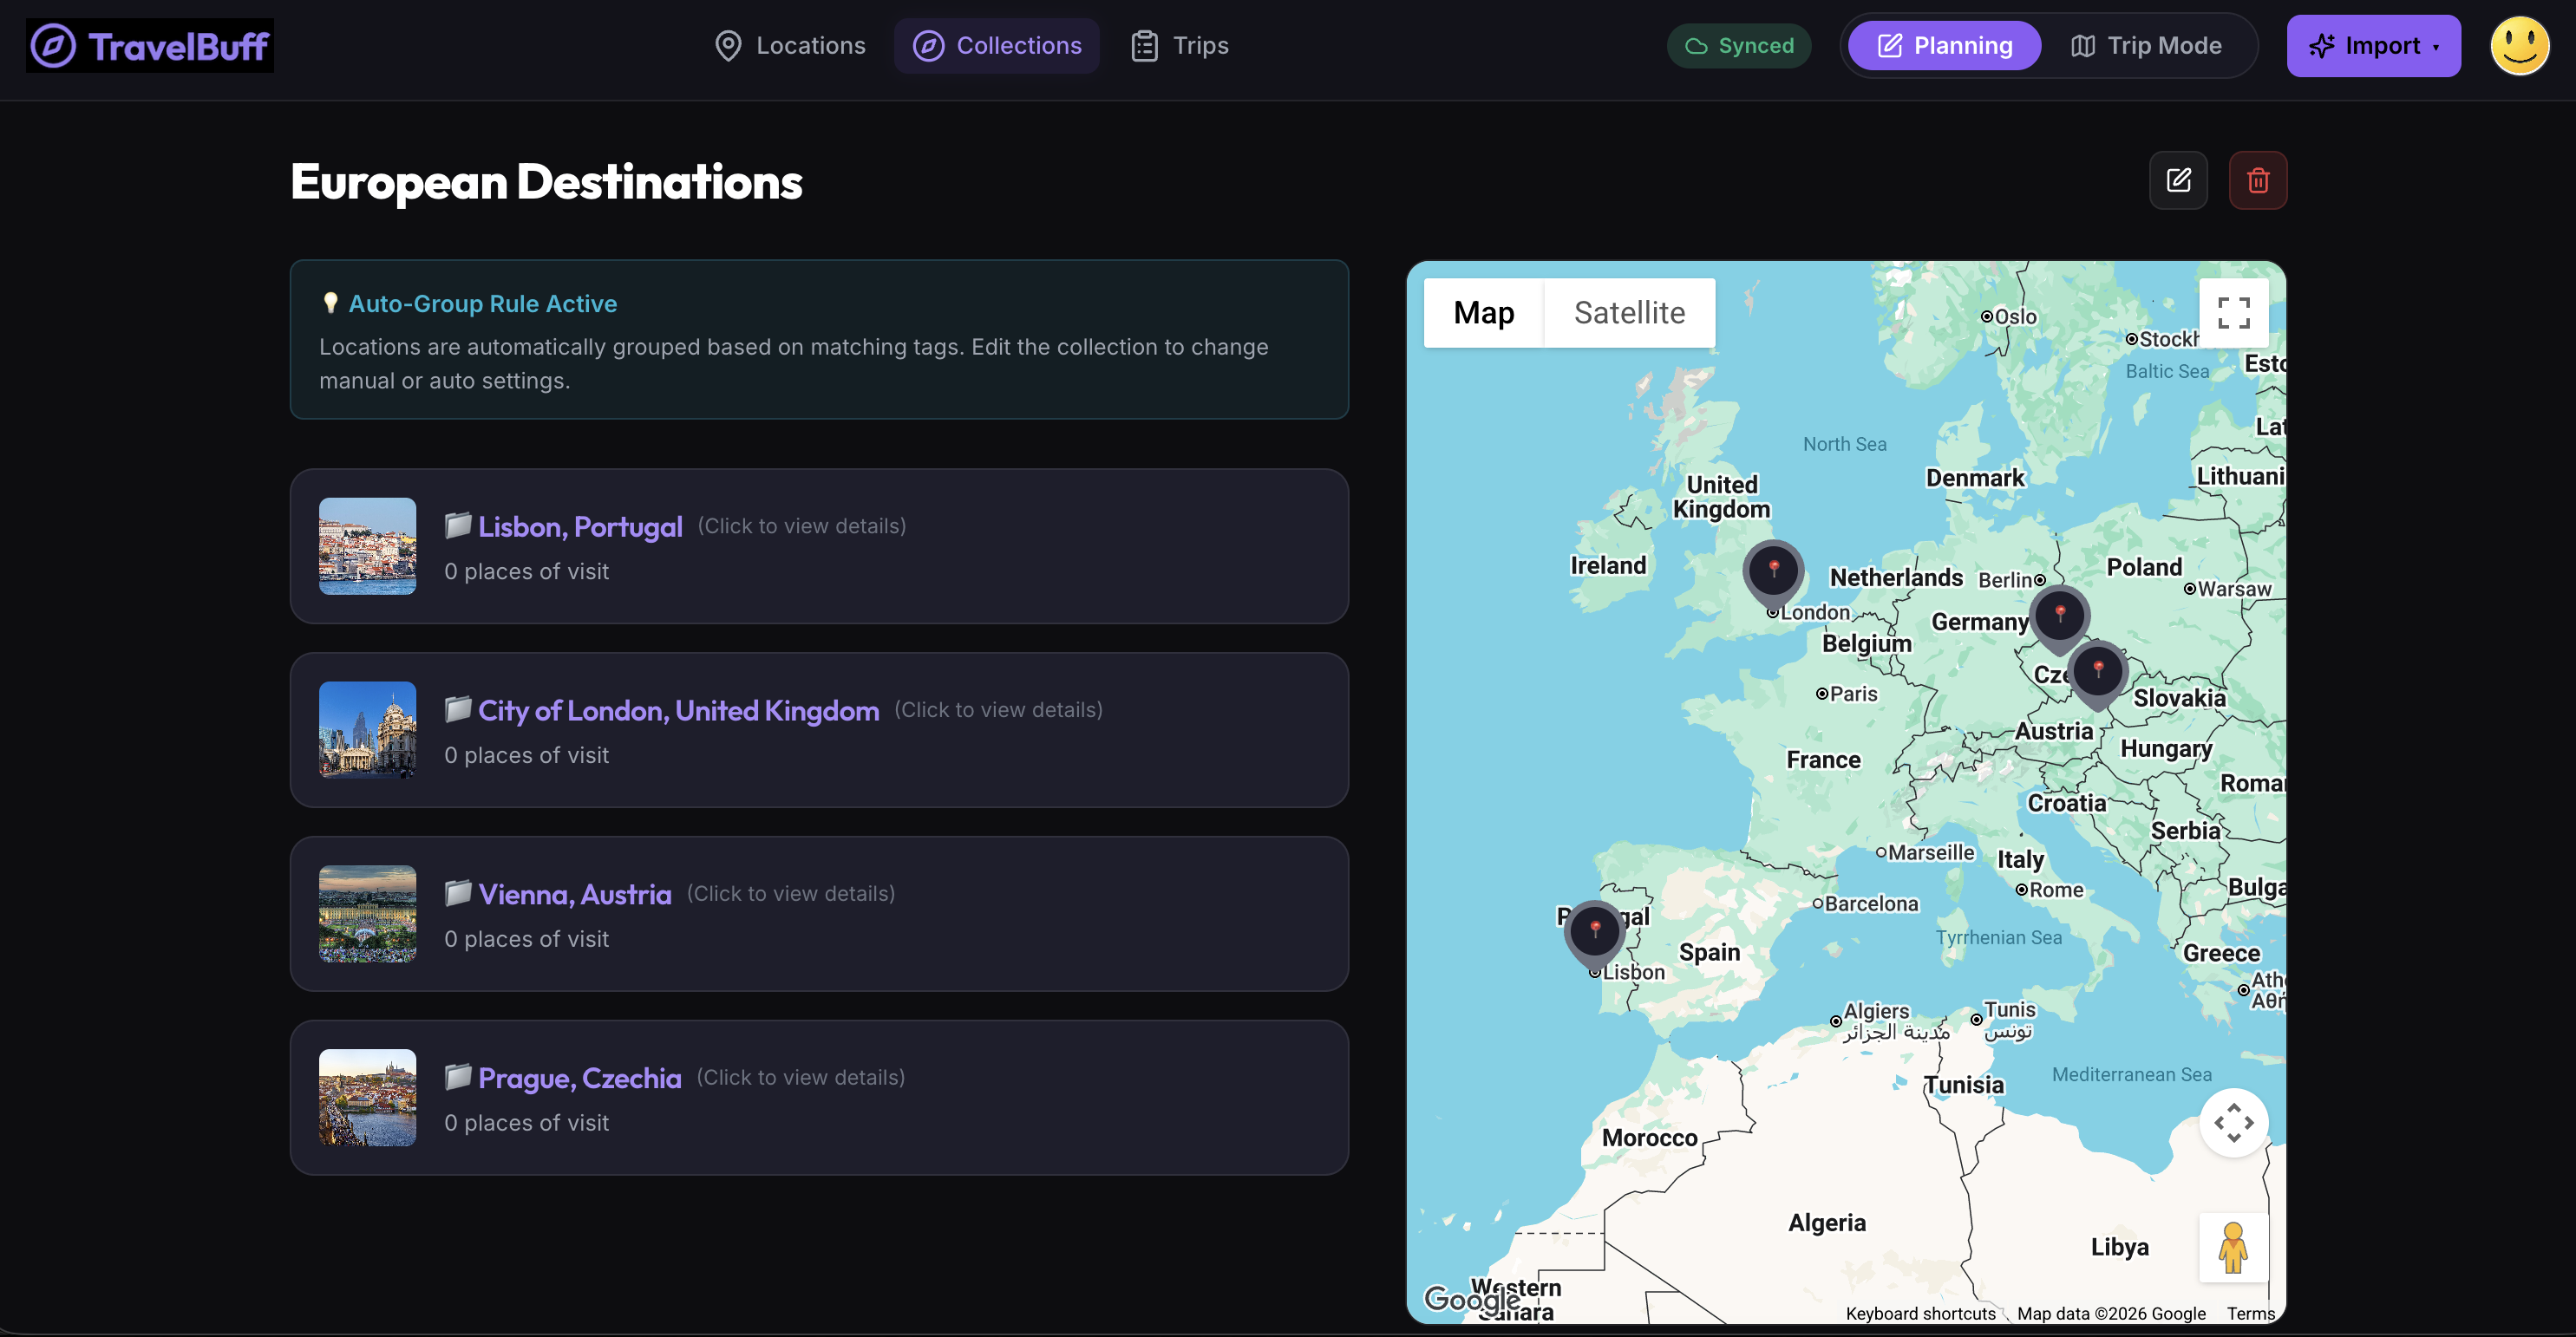
Auto-Group Rules: Automatically populate collections using locations, categories, tags, or keyword matching with Match ANY (OR) or Match ALL (AND) logic.
Figure 4.2: Manual Selection Tree SelectorFigure 4.3: Auto-Group Rule Builder
Multi-Select Mode & Bulk Deletion
Manage collections in batches with the interactive selection mode:
Click the "Select" button in the Collections header.
Selection checkboxes will appear on each custom collection card (System collections remain protected).
Click cards to toggle selection (or click "Select All" in the floating bottom action bar).
Click "Delete (N)" to remove selected collections while safely preserving all underlying locations and places.
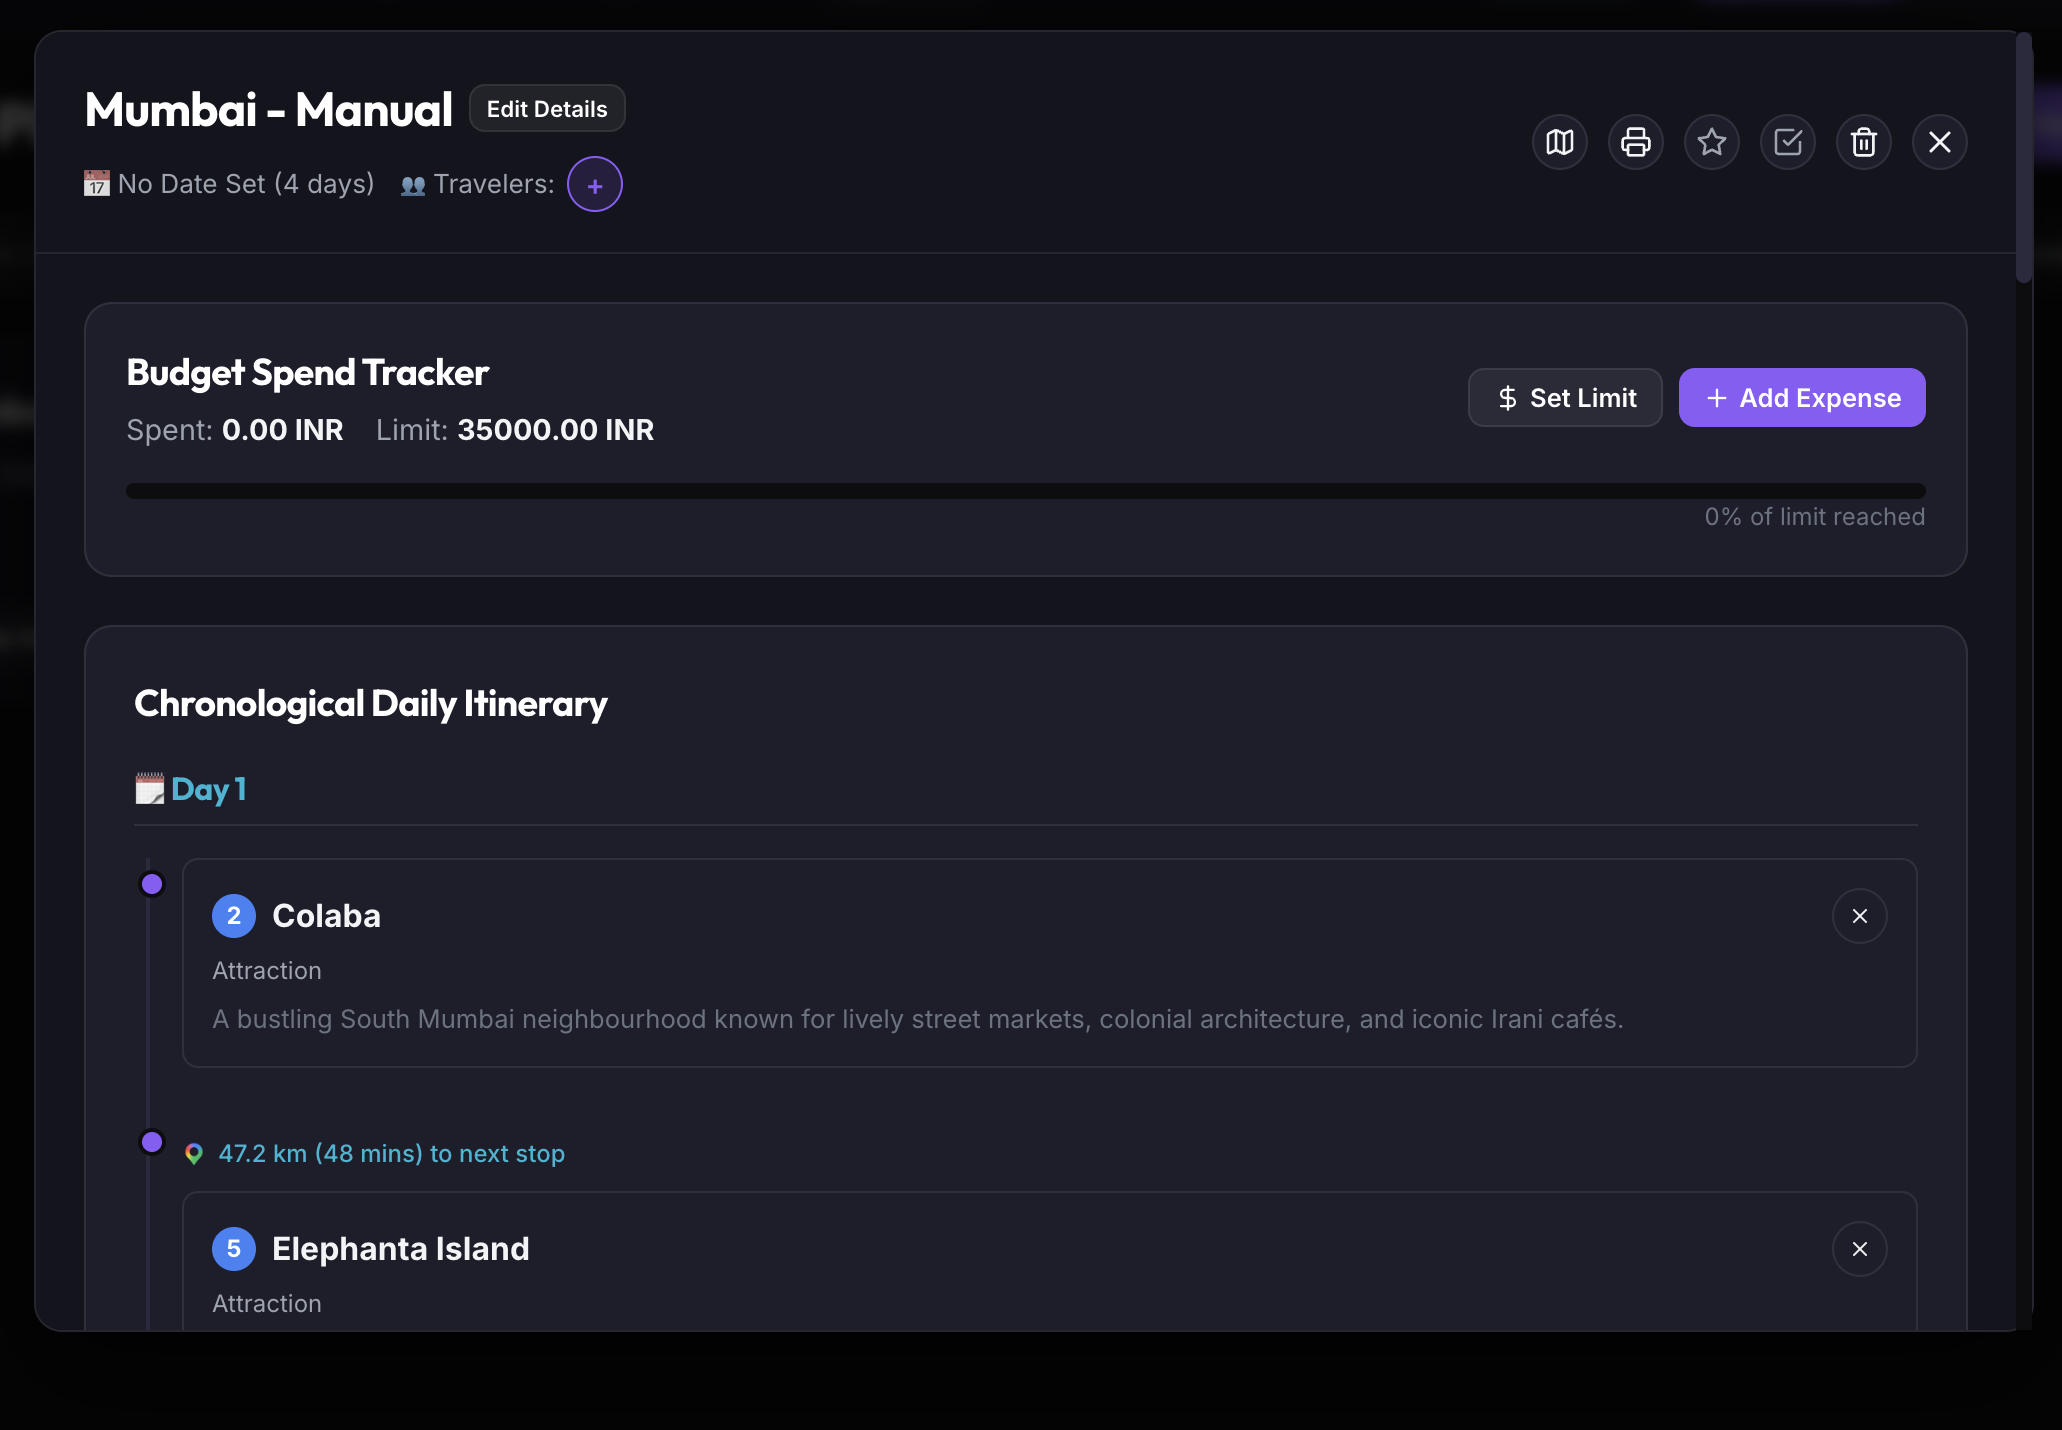
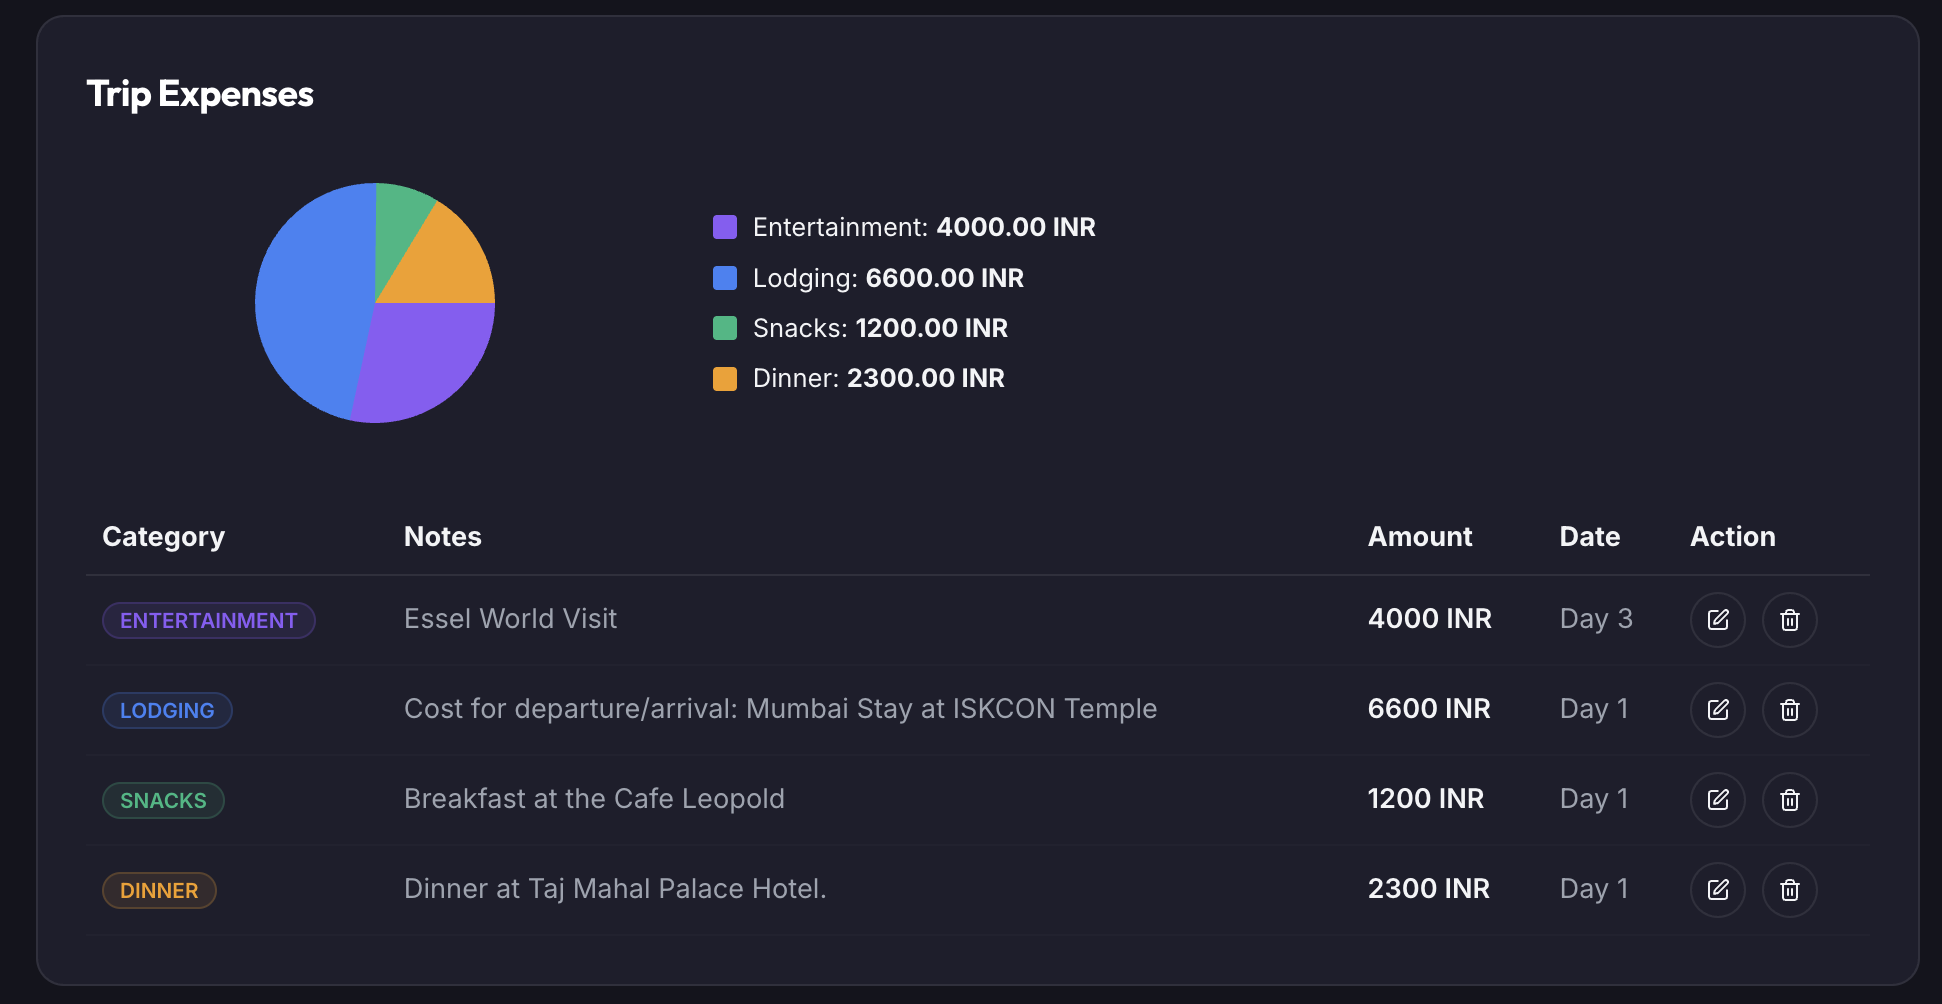
Compare planned target allocations against real-time actual spending with visual color-coded budget progress bars.
Figure 7.1: Planned Budget vs Actual Spent Progress Bar
Recording Expenses & Receipt Attachments
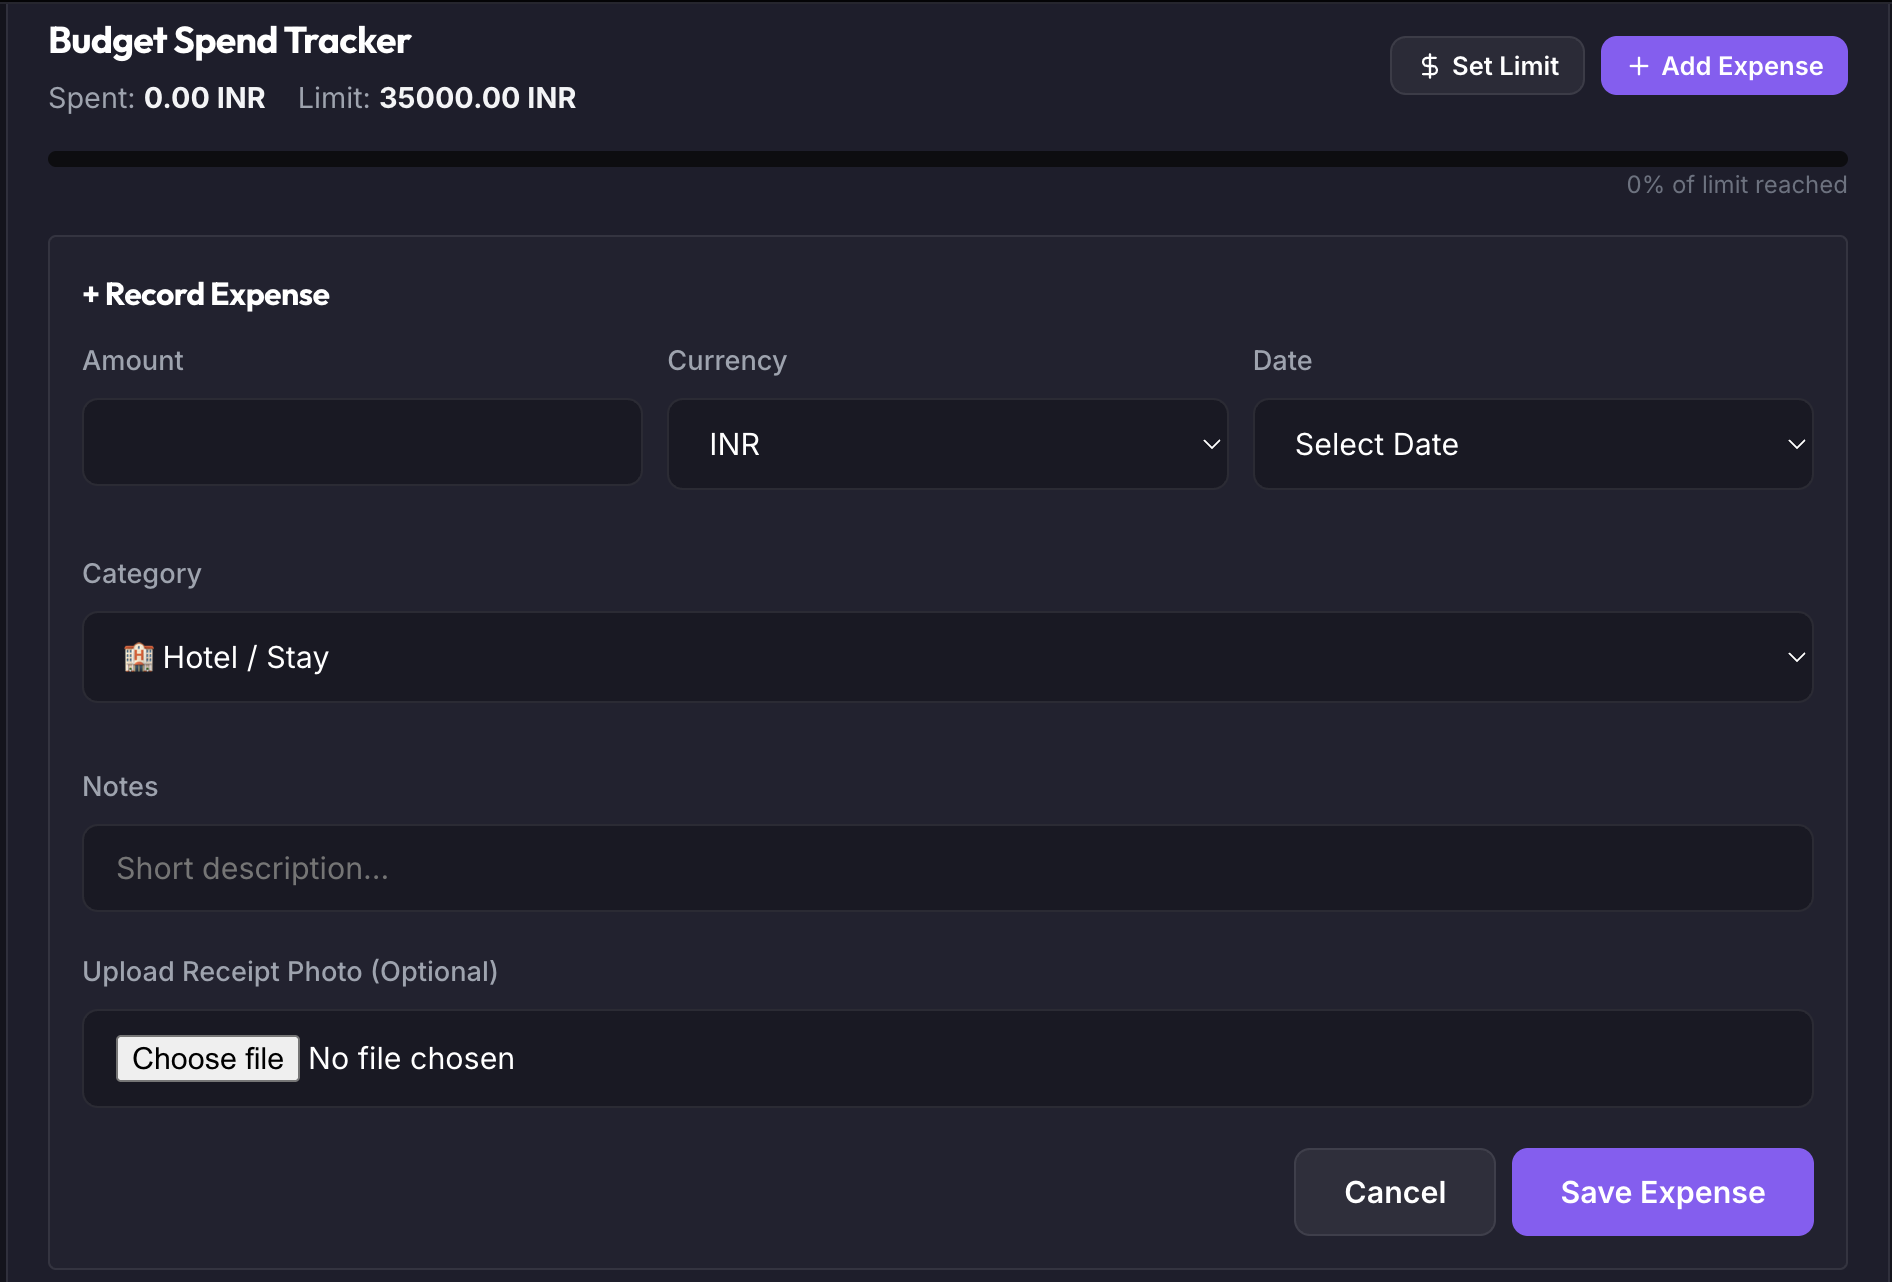
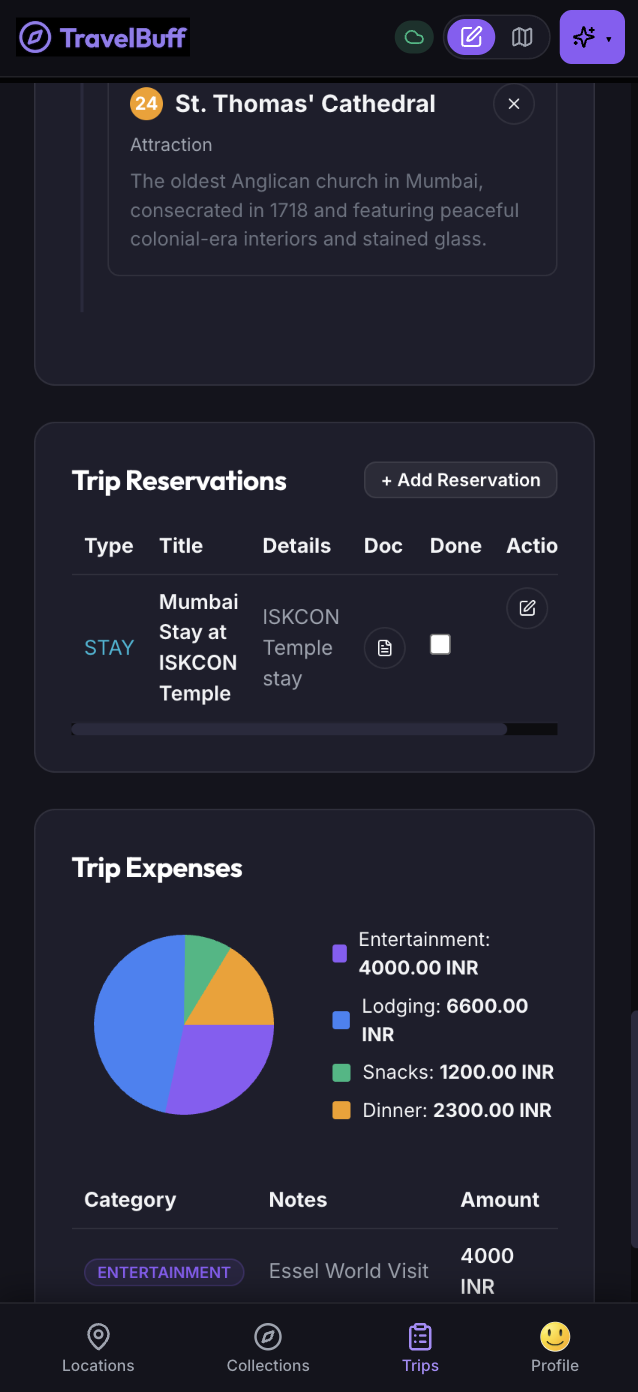
Record costs with currency, category (Lodging, Food, Transit, Shopping), notes, and receipt photo uploads. Flight/hotel bookings automatically sync with expenses.
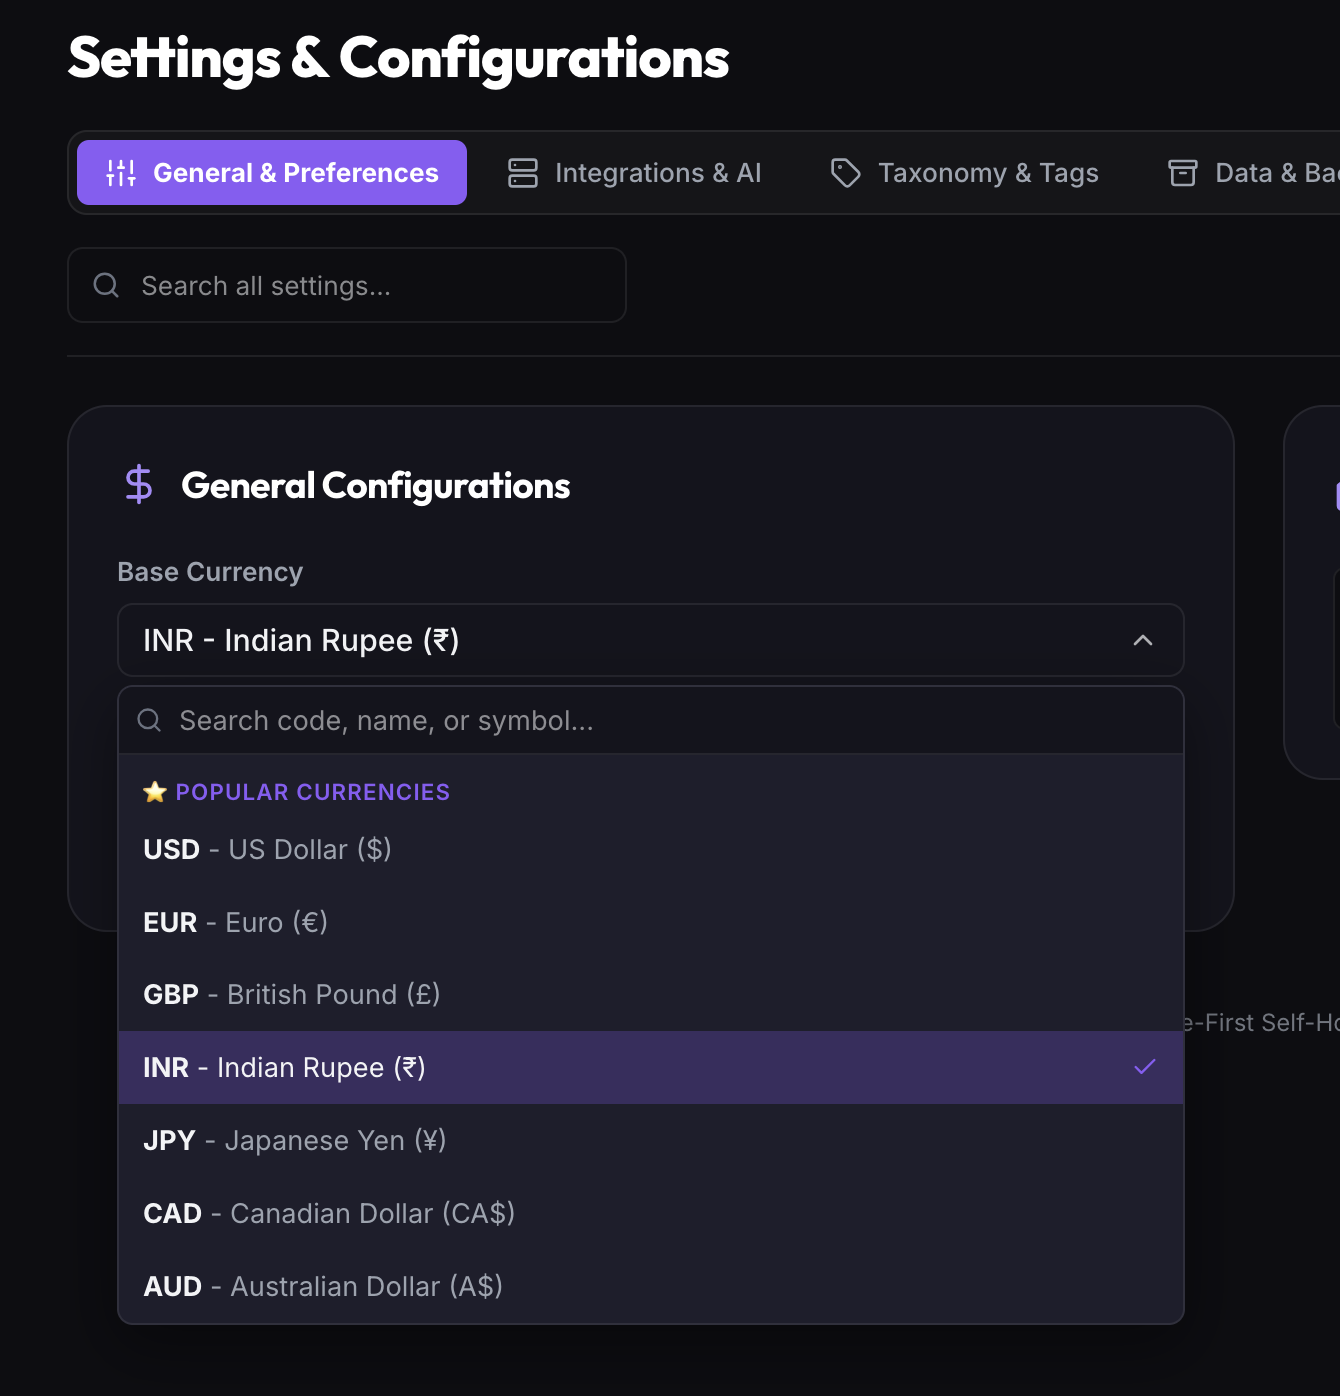
TravelBuff supports all official ISO 4217 world currencies (~160+) with searchable combobox filtering (by code, name, or symbol) and the top 12 popular currencies pinned at the top.
Figure 7.6: Searchable 160+ ISO Currency Combobox with Pinned Major Currencies
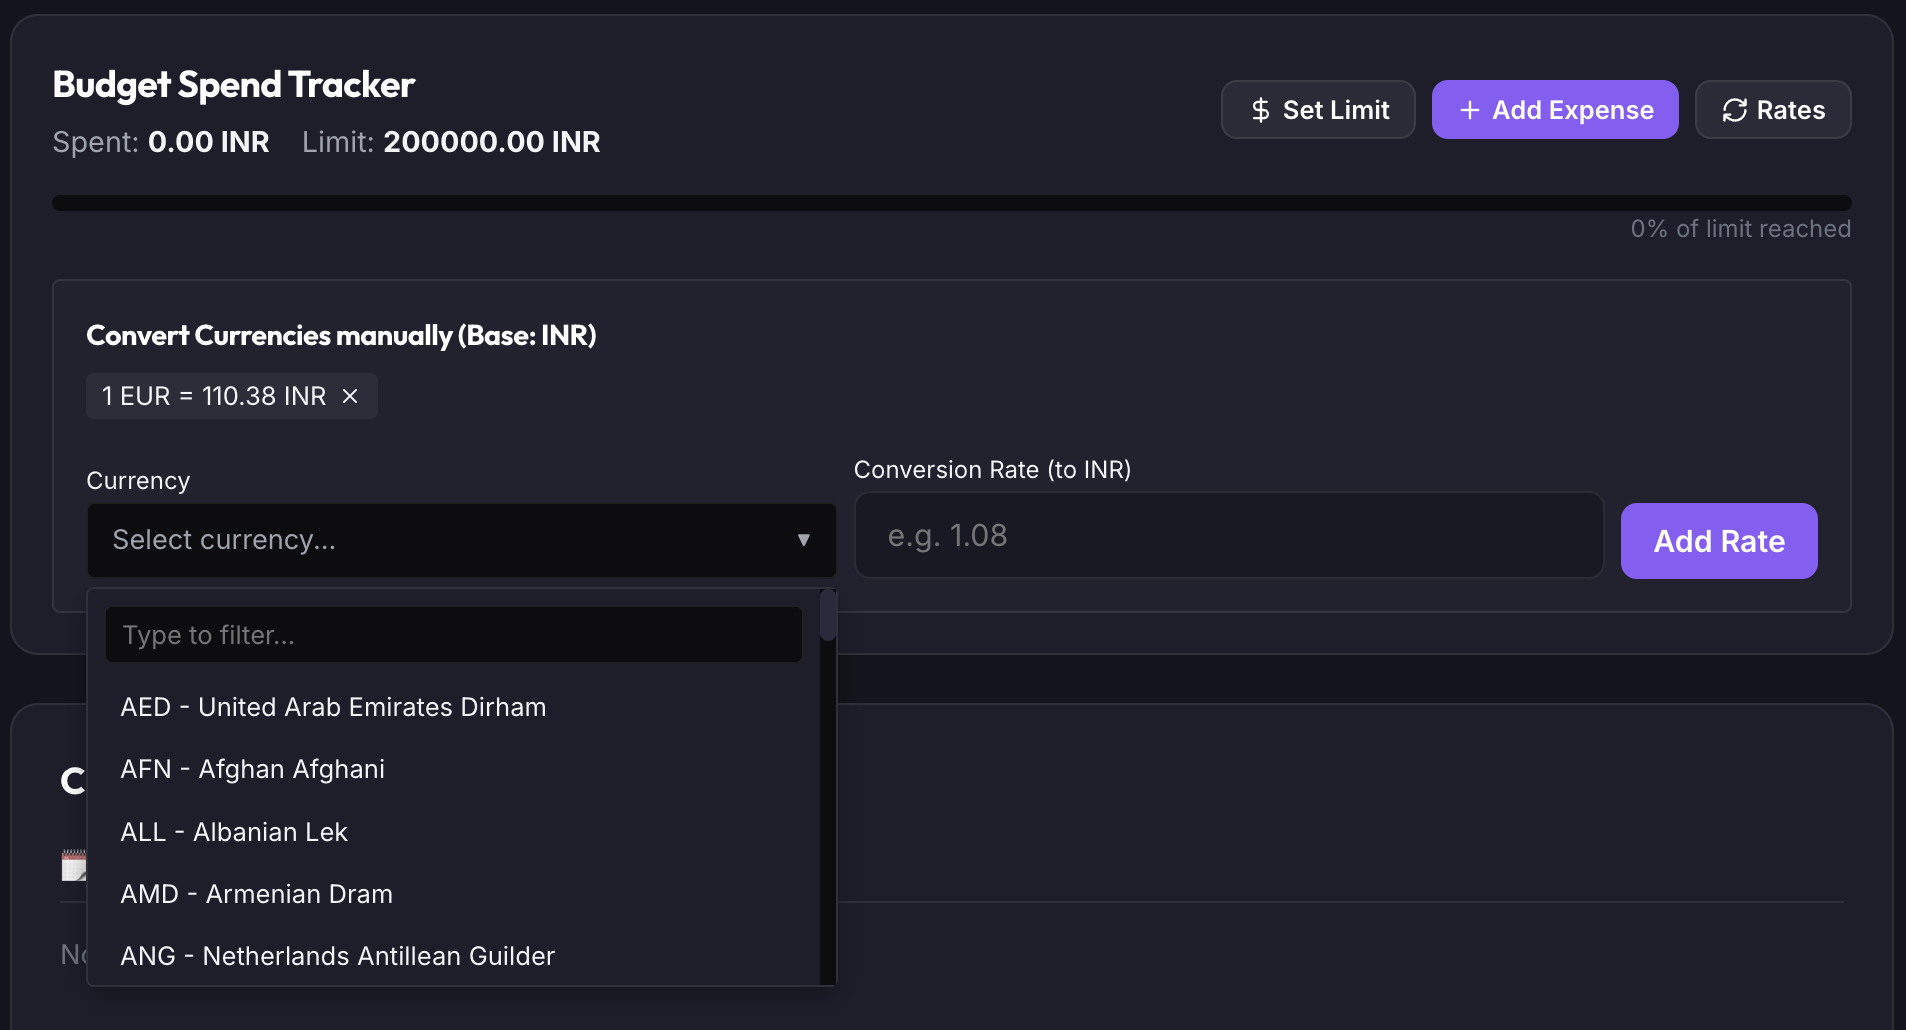
Custom Exchange Rate Overrides
Convert foreign currency costs to base currency automatically or input custom conversion overrides from local exchange kiosks.
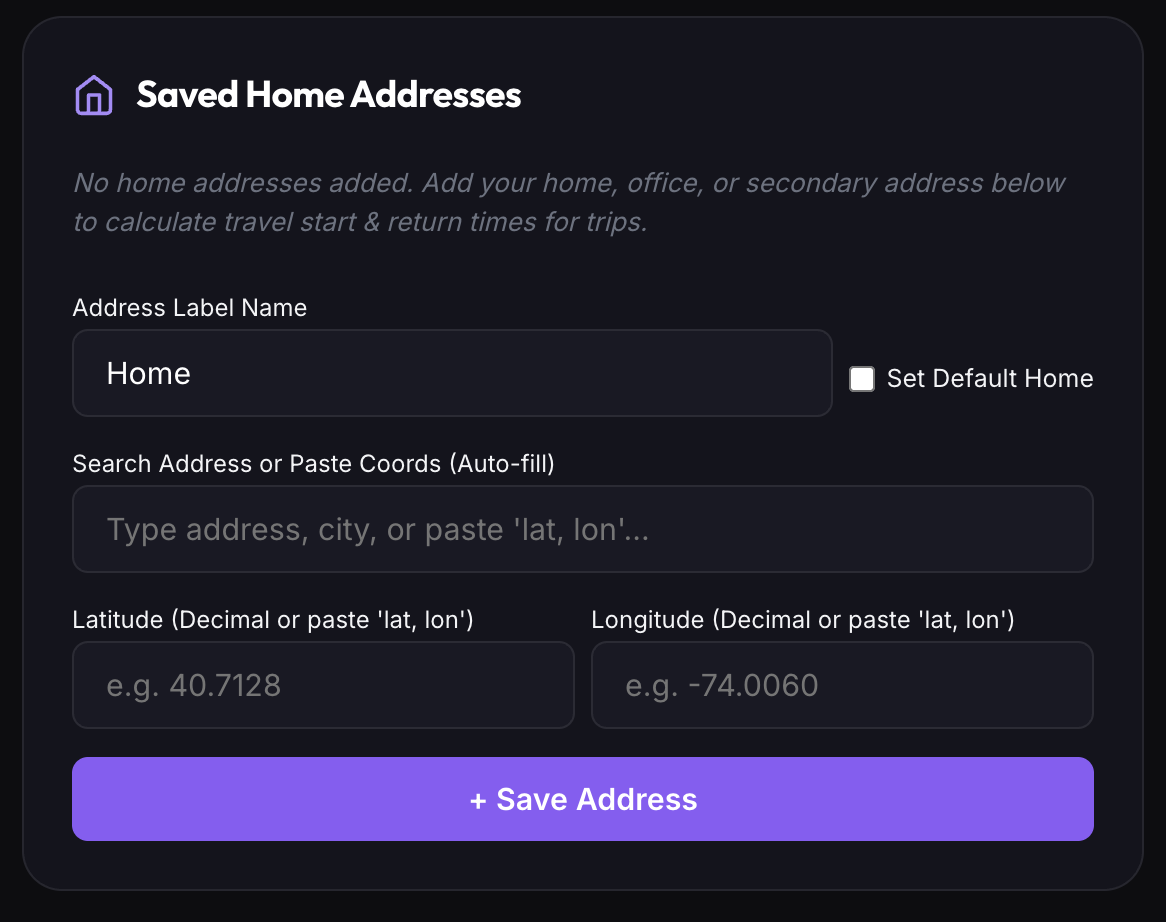
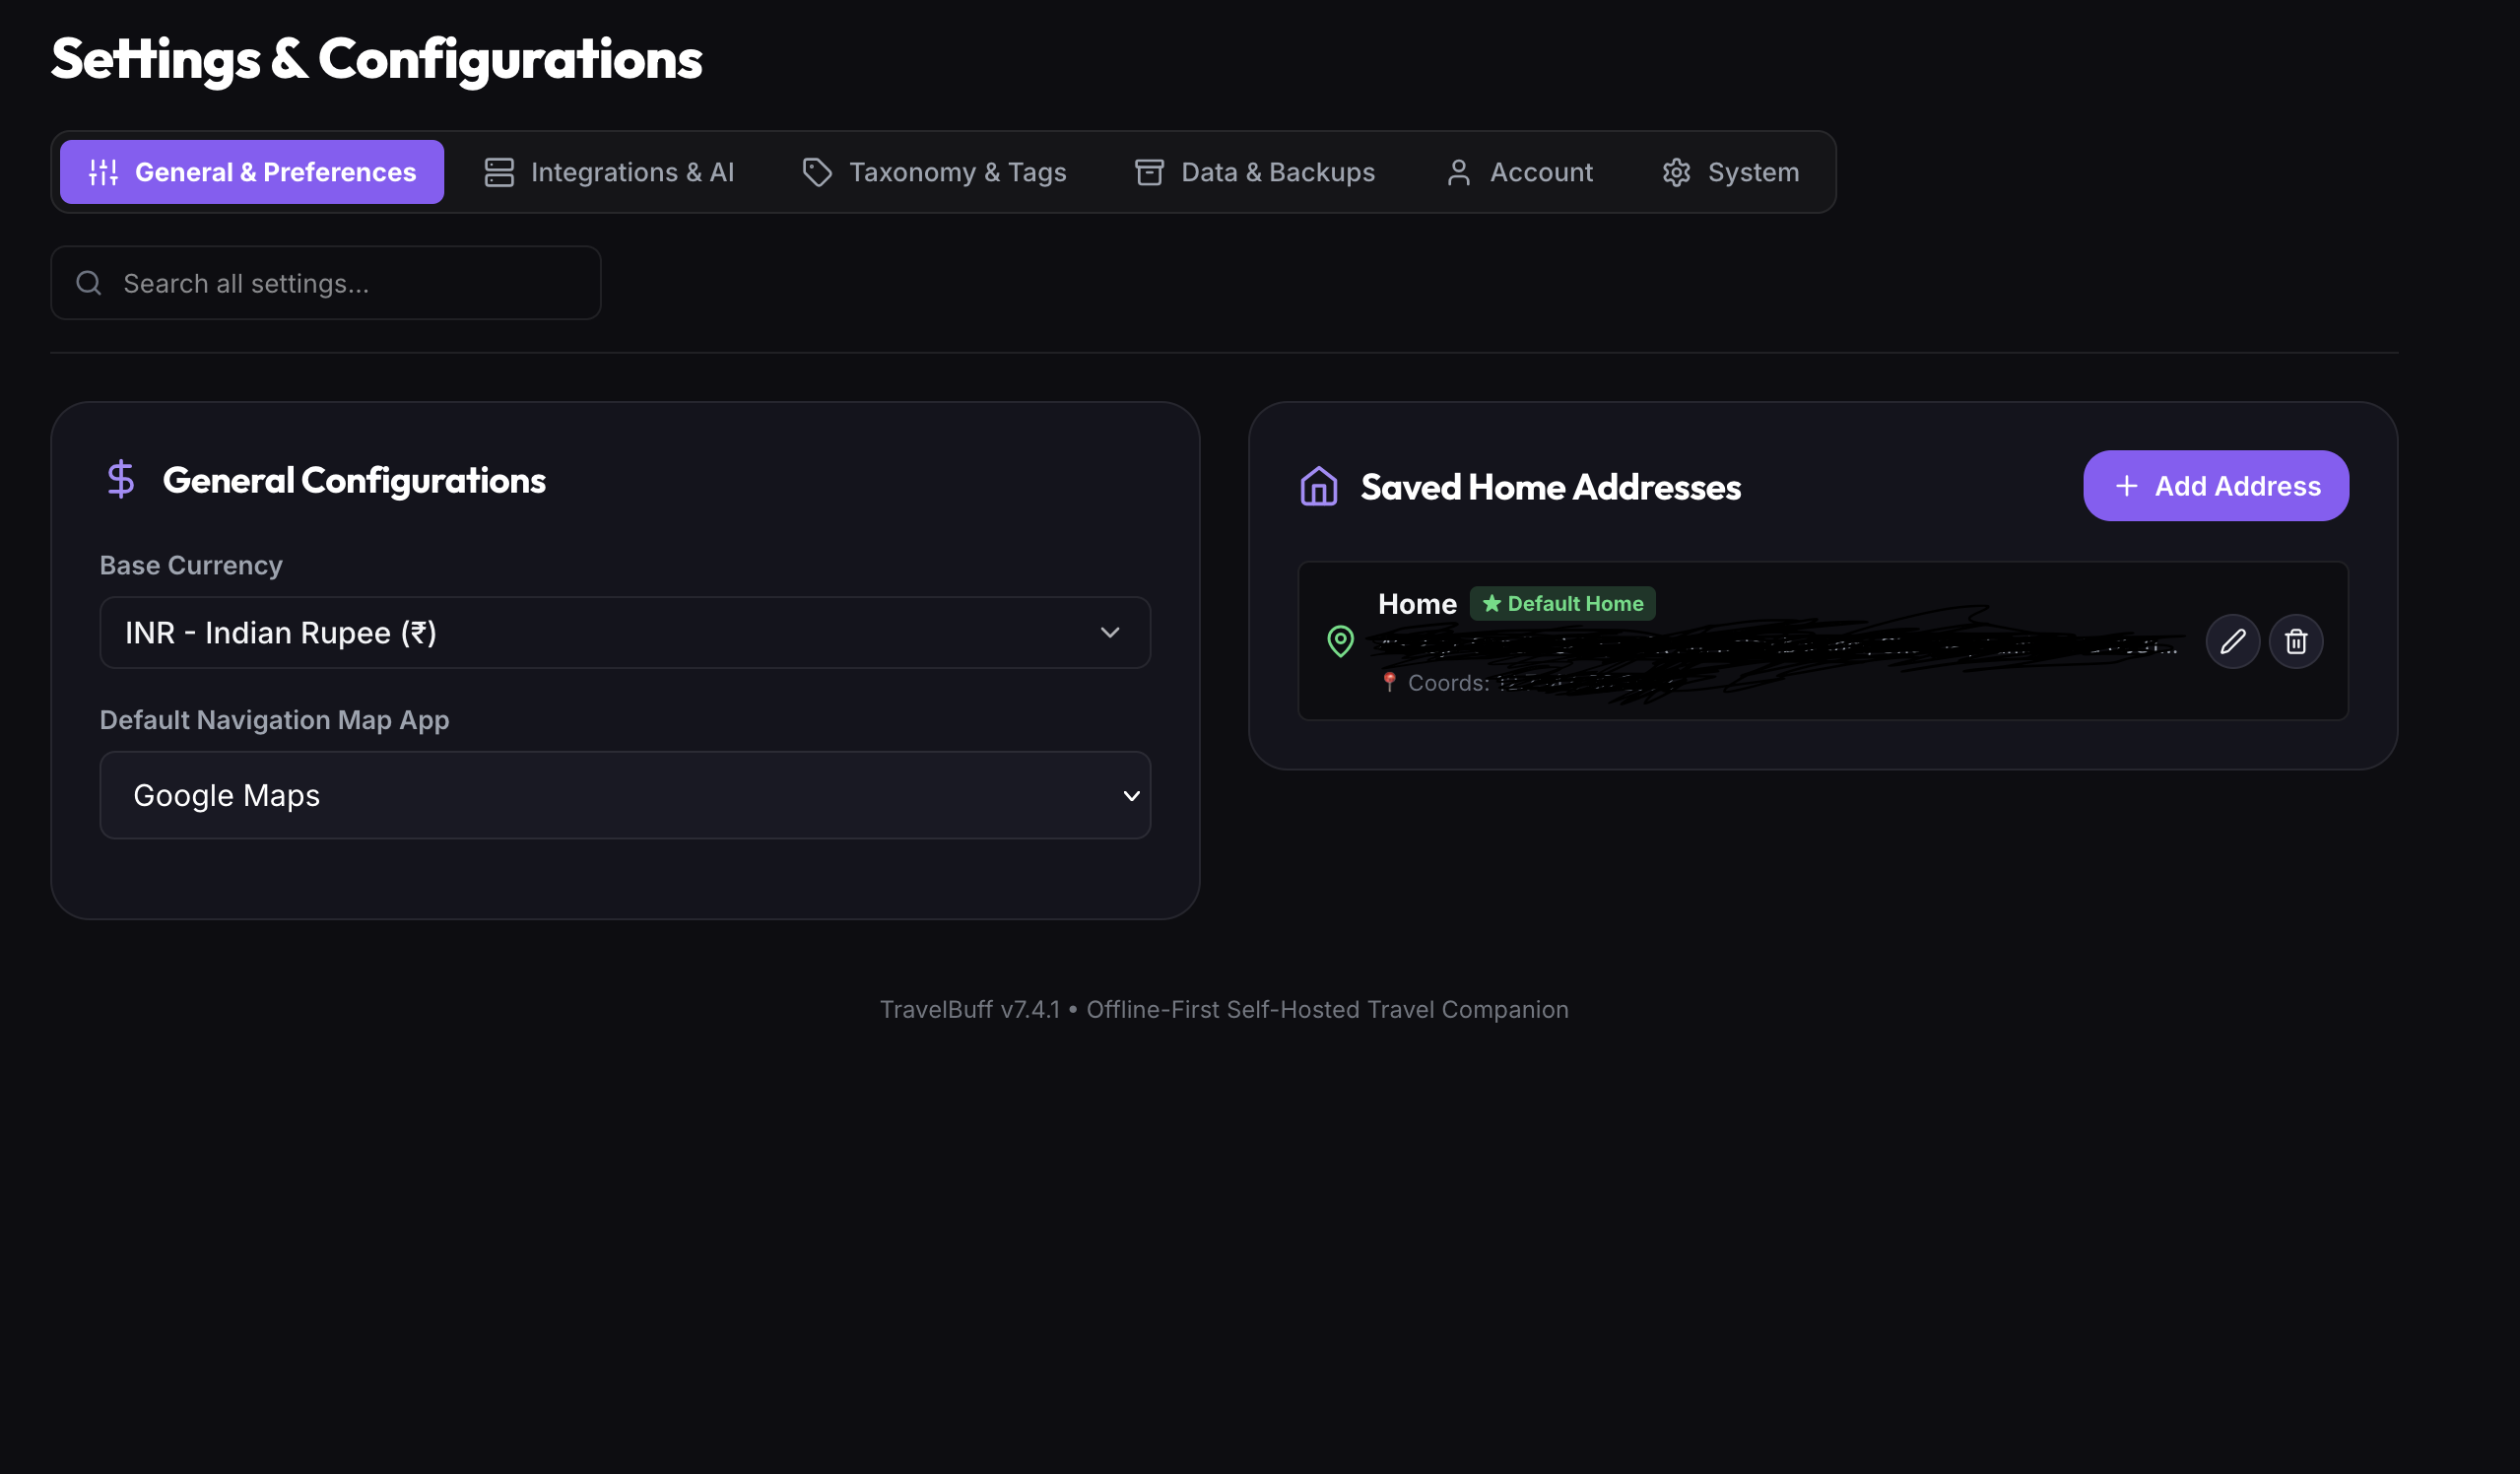
Set primary home location under Settings to compute starting routes for all planned journeys.
Figure 7.5: Saved Home Addresses Setup Table
8. Trip Mode (On-the-Road Companion)
Why Trip Mode is Essential While Traveling
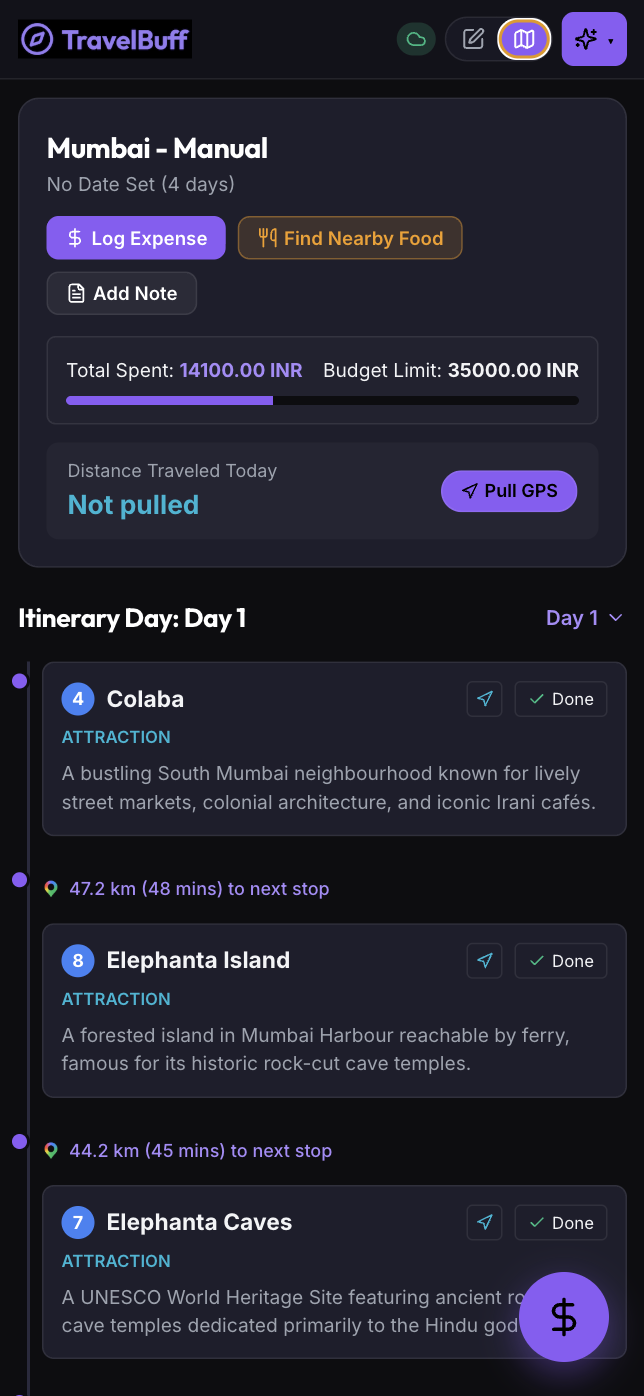
Trip Mode transforms TravelBuff into a streamlined, mobile-optimized, single-screen travel companion designed for effortless one-handed use on the road.
Key Features of Trip Mode
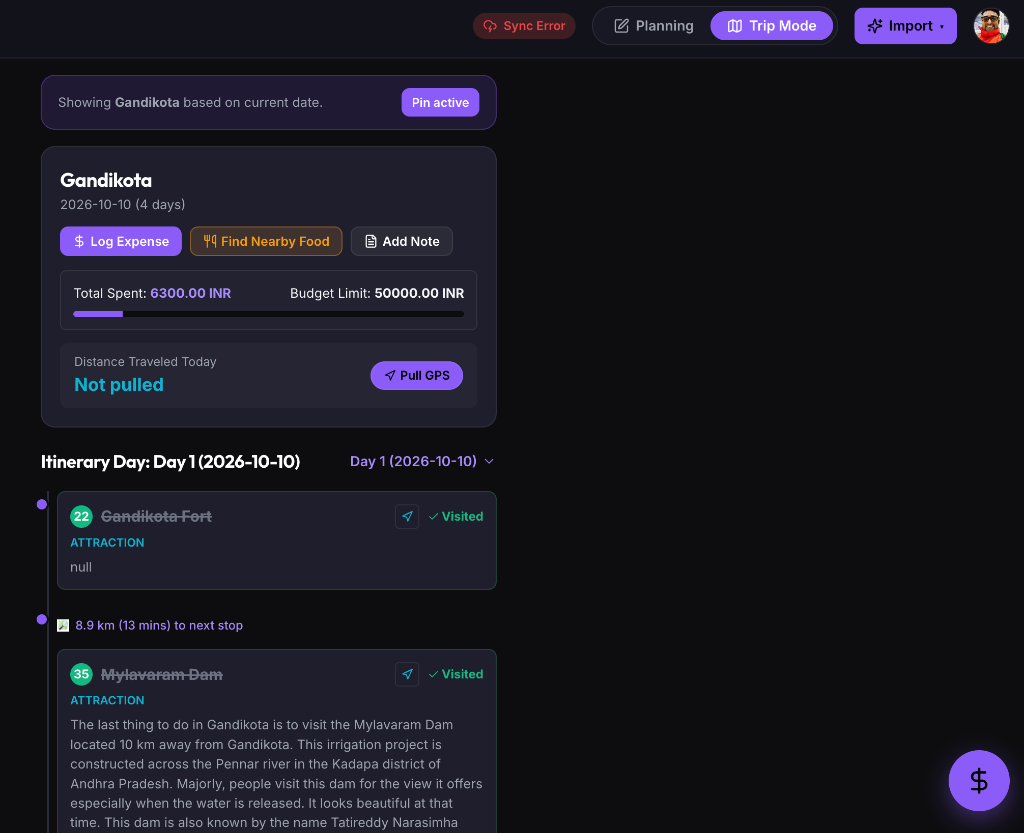
Today's Streamlined Schedule: Shows today's stops with category icons, turn-by-turn map links, and distances.
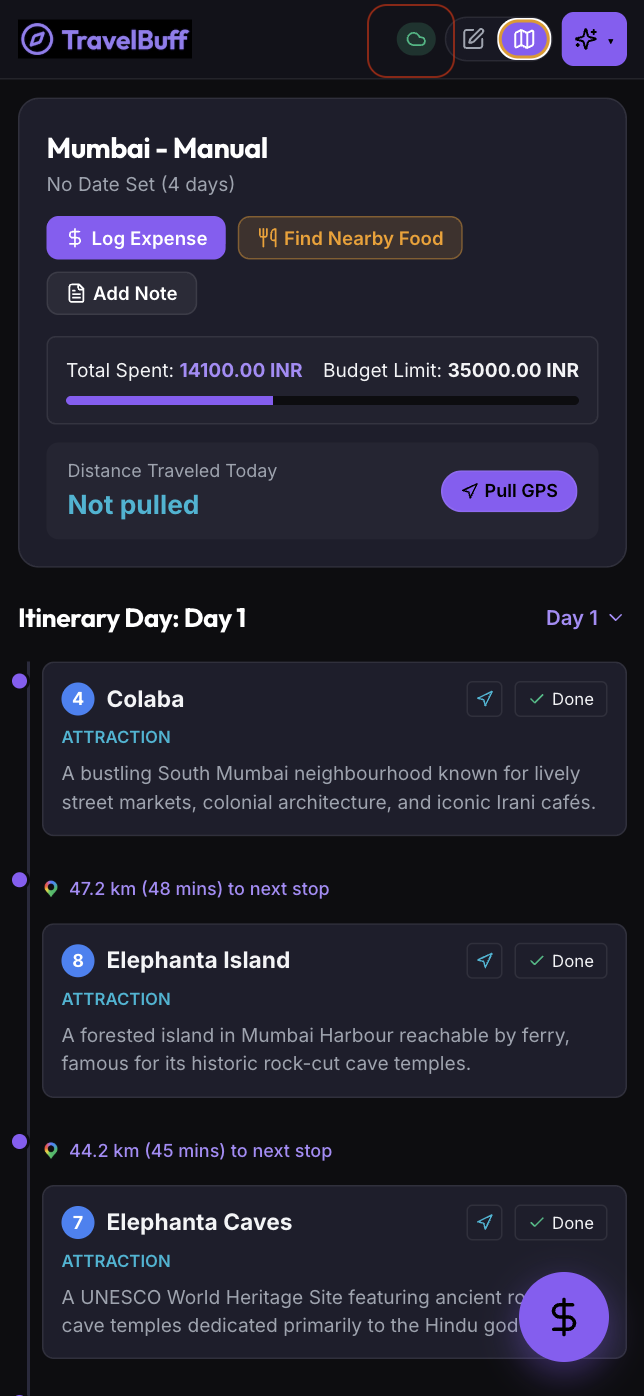
100% Offline Mode & Instant Local Sync: Everything is stored locally on device and automatically syncs when internet reconnects.
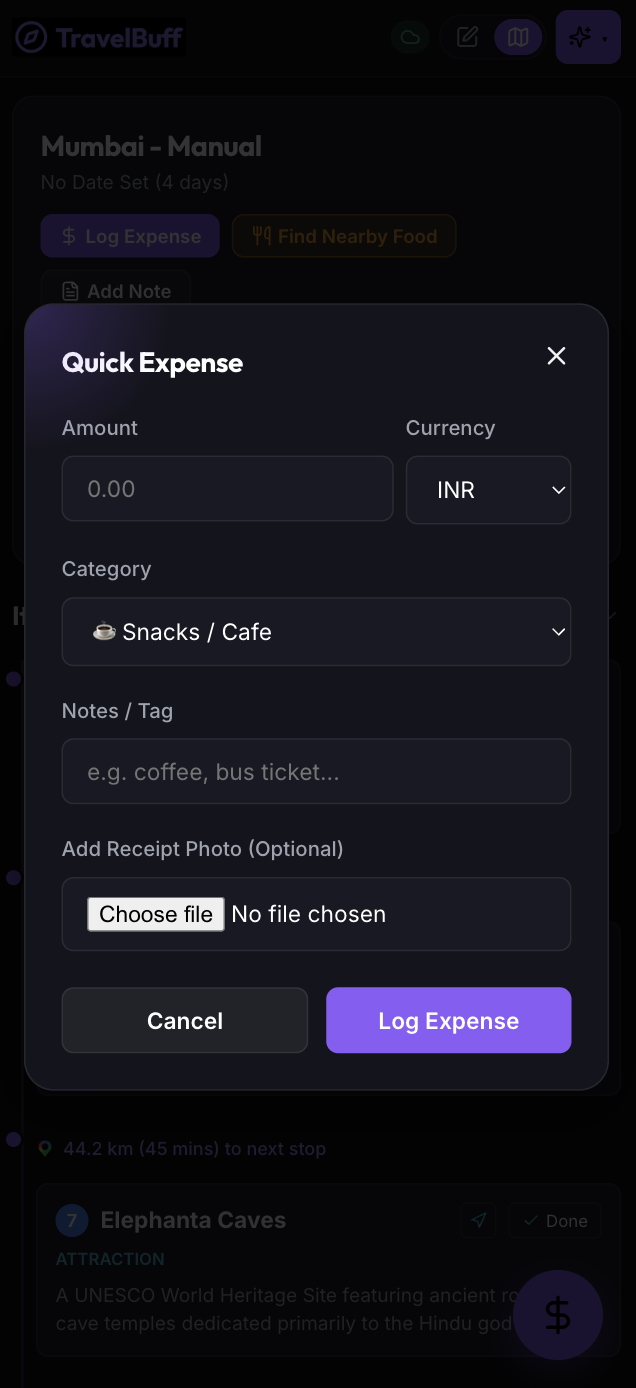
Quick Expense Logger: Log coffee or taxi cash expenses in 1 tap offline with receipt photo attachment.
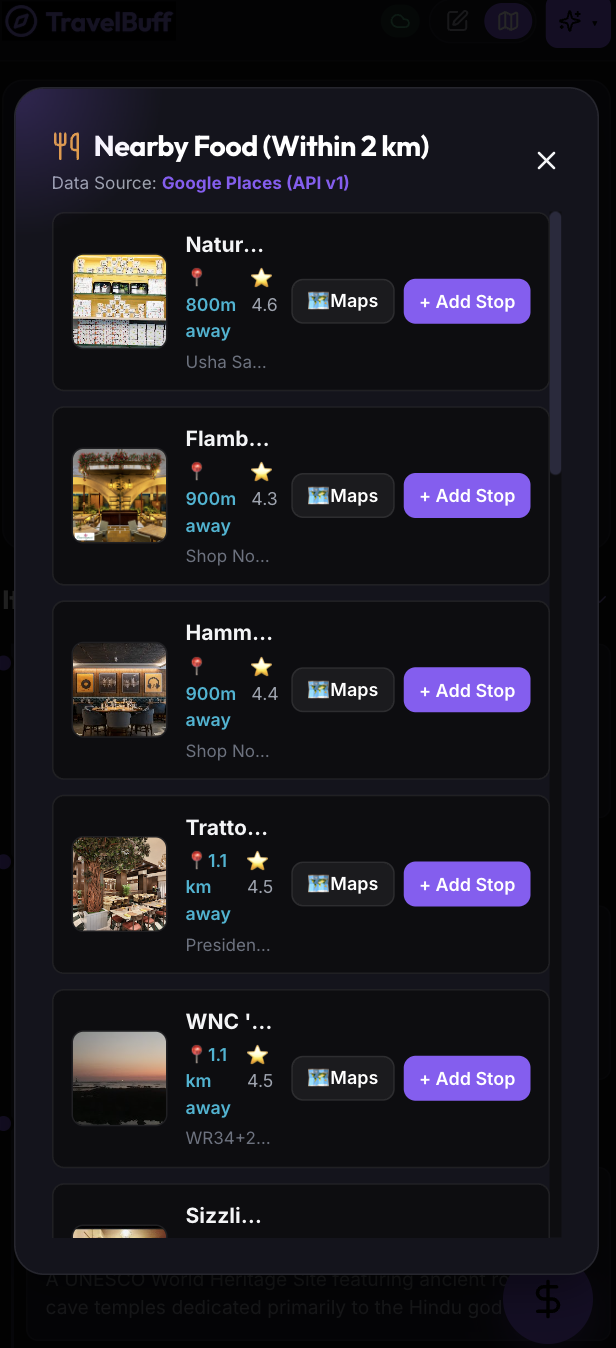
Nearby Food & Cafe Finder: Locates restaurants, cafes, and vegetarian spots within 2 km using live GPS with a 1-click Bookmark to Itinerary button.
Instant Booking Vouchers: Fast access to hotel reservations and flight tickets with built-in PDF/image viewer.
GPS Travel Log Import: OwnTracks integration to calculate actual kilometers traveled vs planned route estimates.
Quick Trip Notes: Jot down room numbers, door codes, or reminders instantly.
Figure 8.1: Mobile Trip Mode Single-Screen Schedule ViewFigure 8.2: 100% Offline Mode & Instant Local Storage StatusFigure 8.3: One-Tap Mobile Quick Expense LoggerFigure 8.4: 2 km Radius Nearby Food Finder & 1-Click BookmarkFigure 8.5: Instant Booking Vouchers & PDF Viewer
9. Settings & Administration
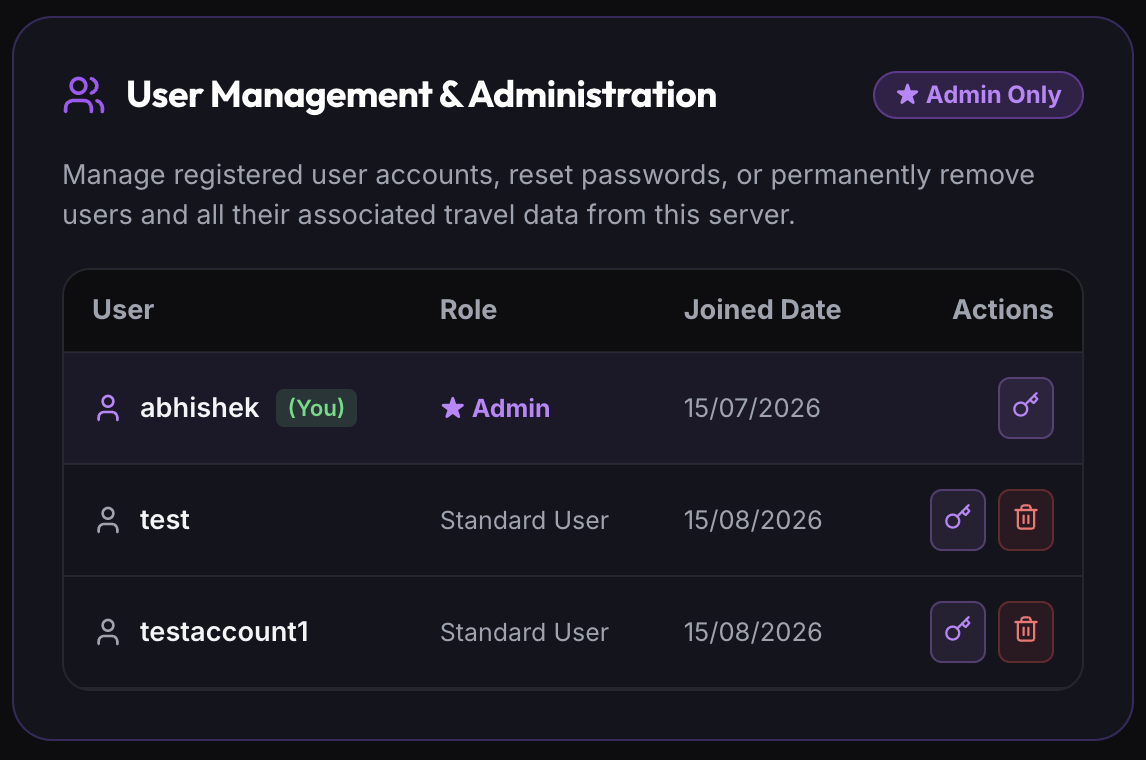
6-Tab Hybrid Settings Overview & Global Live Search
TravelBuff provides a structured, 6-tab Hybrid Settings interface with a persistent Global Live Search bar at the top:
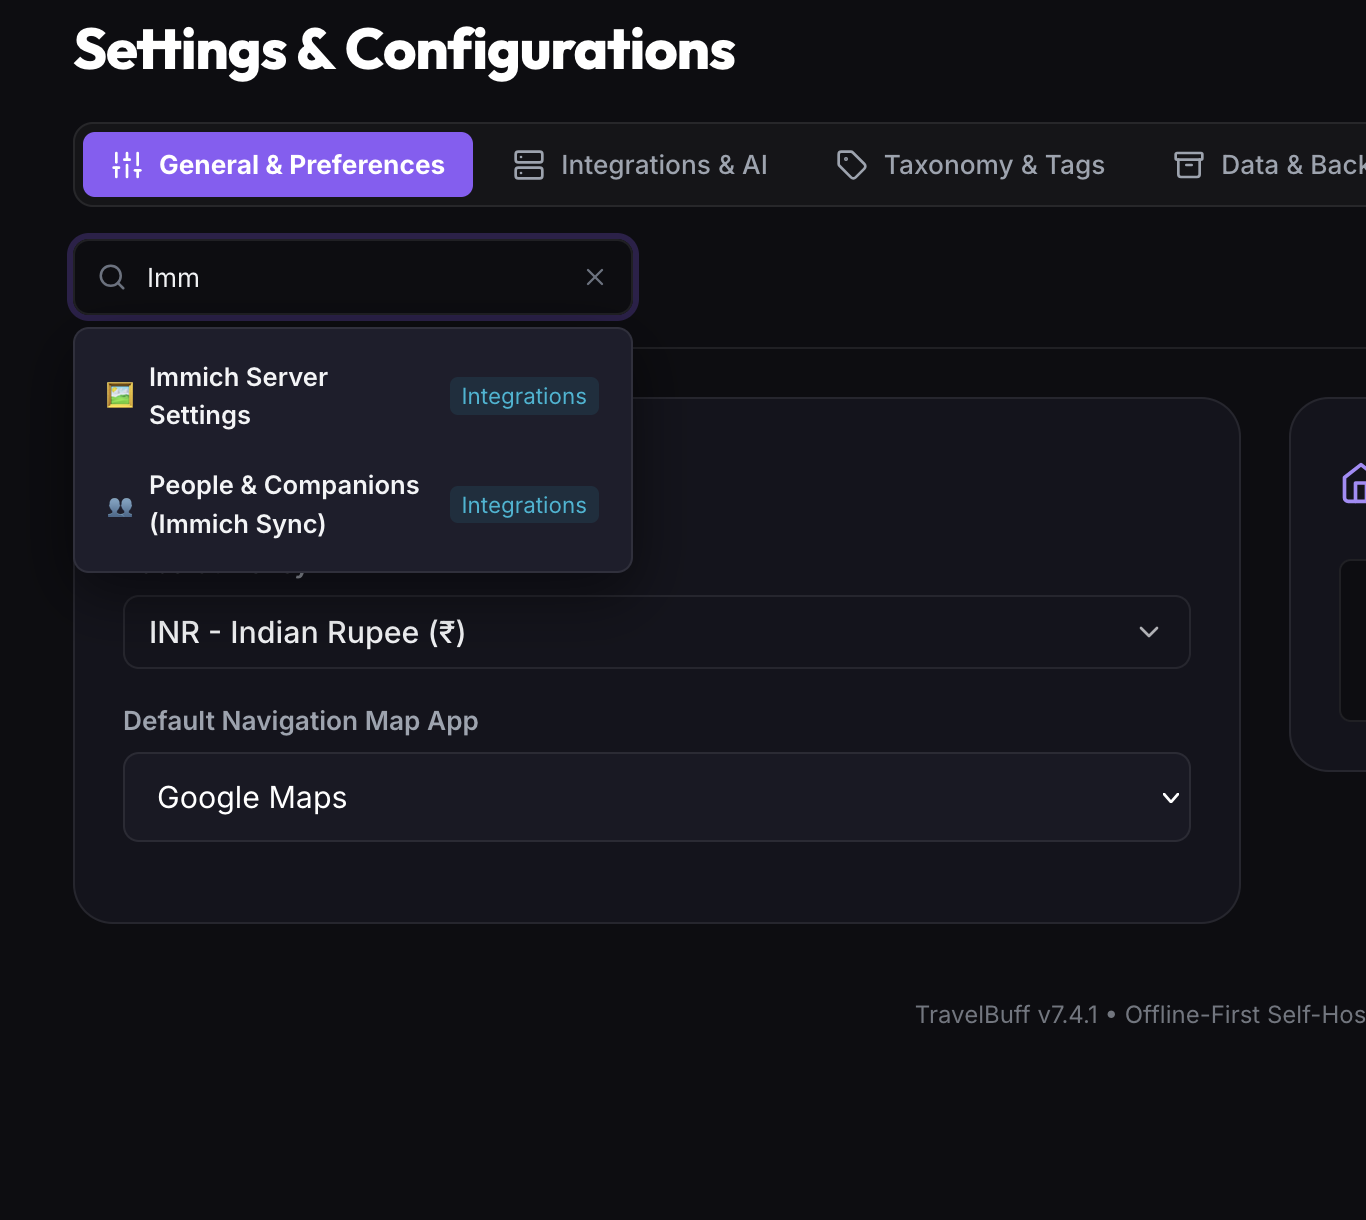
Global Live Search: Type any keyword (e.g., "Immich", "API key", "Backup", "Currency") for instant matching across all settings. Clicking any result switches directly to the tab and smoothly scrolls to the section with an active glow outline.
Figure 9.0: 6-Tab Hybrid Settings Interface OverviewFigure 9.0b: Global Live Search Across All Settings Sections
1. ⚙️ General & Preferences
Base Currency: Select your home currency from 160+ ISO currencies.
Default Navigation Map App: (iOS/macOS) Choose between Google Maps and Apple Maps.
Saved Home Addresses: Manage origin and destination coordinates for automated trip routing.
2. 🔌 Integrations & AI
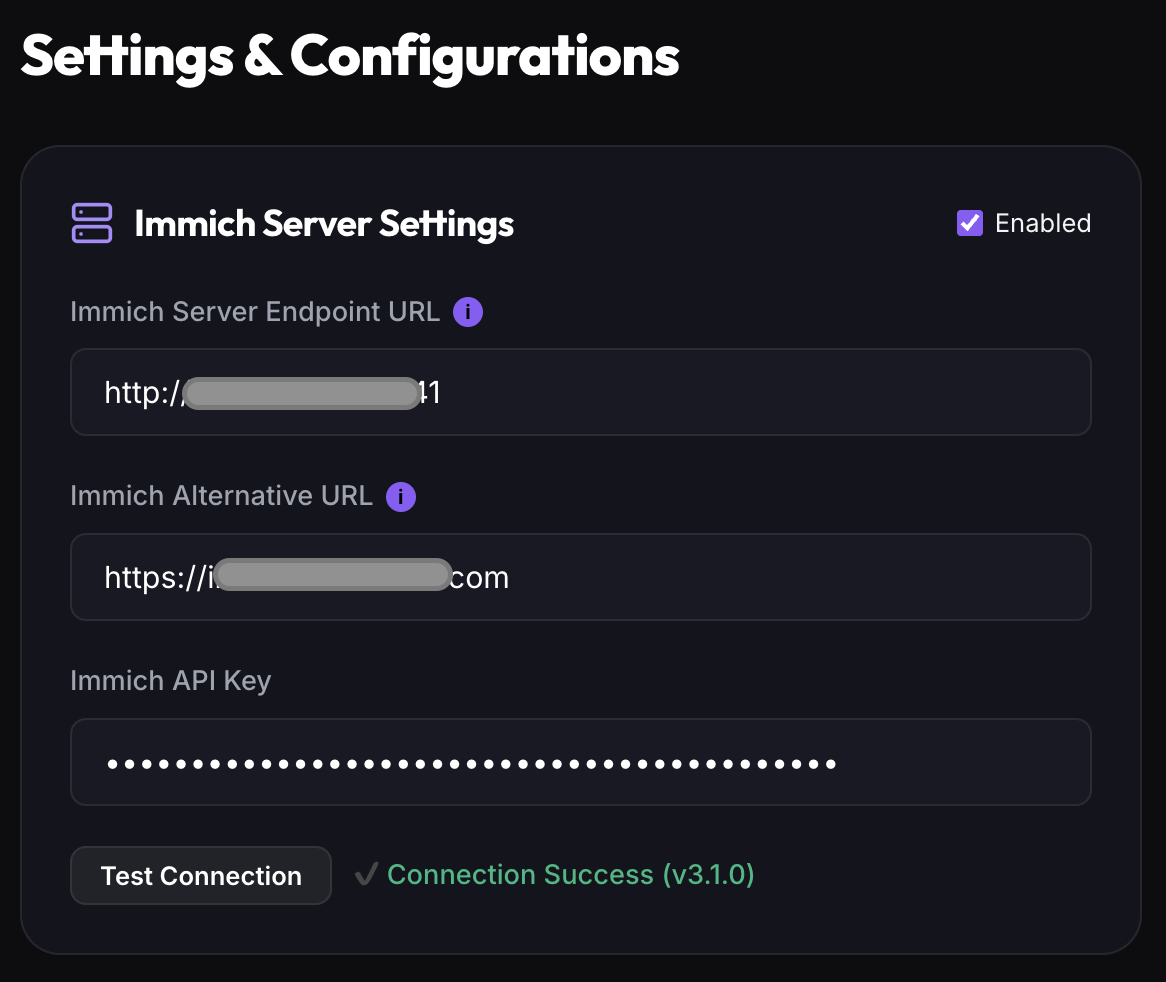
Immich Server Settings: Endpoint URL, API key, connectivity tester, and public web gallery links.
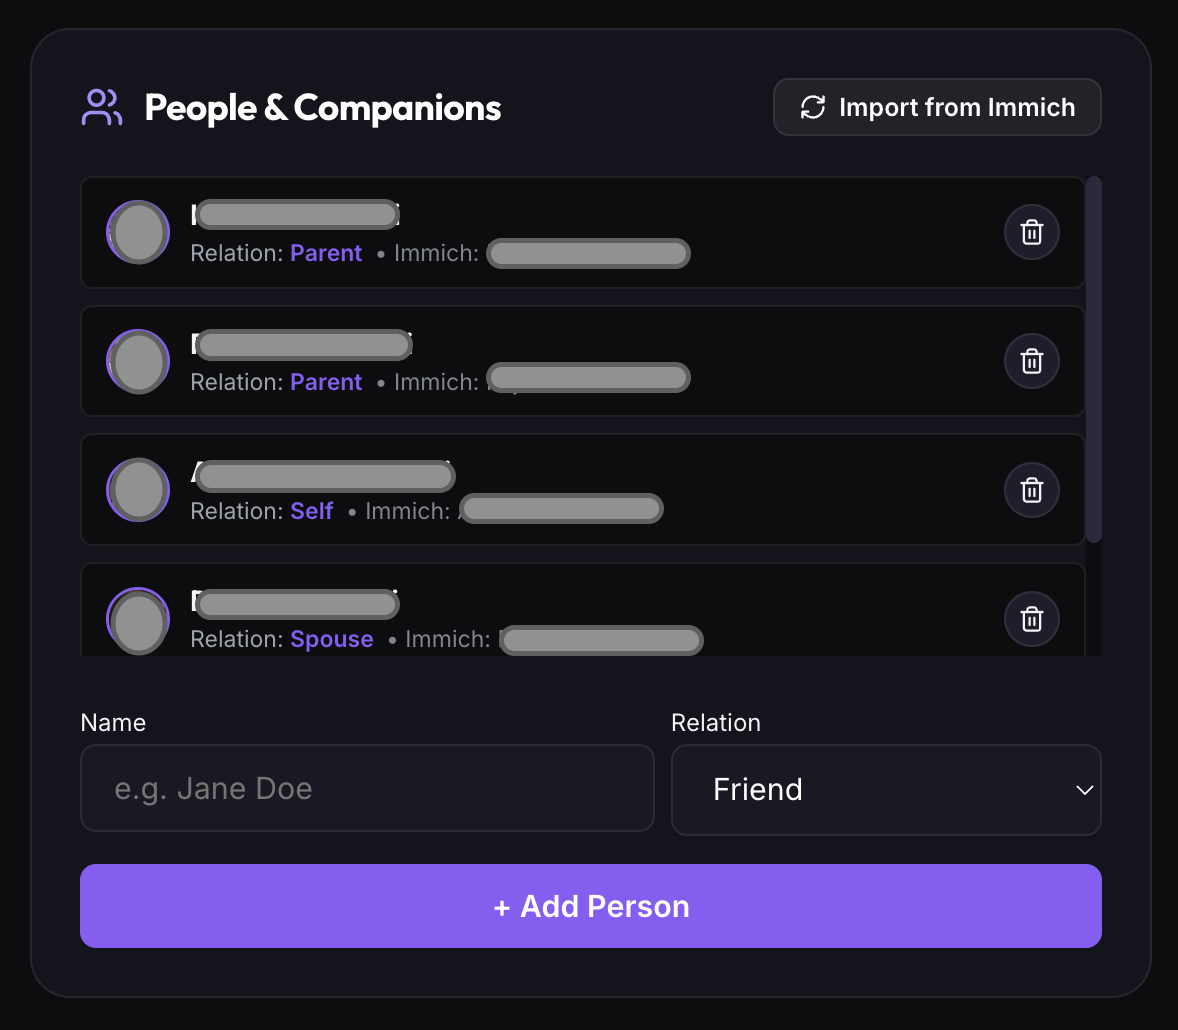
People & Companions (Immich Face Sync): Embedded inside the Immich card to sync recognized face profiles into travel companion avatars.
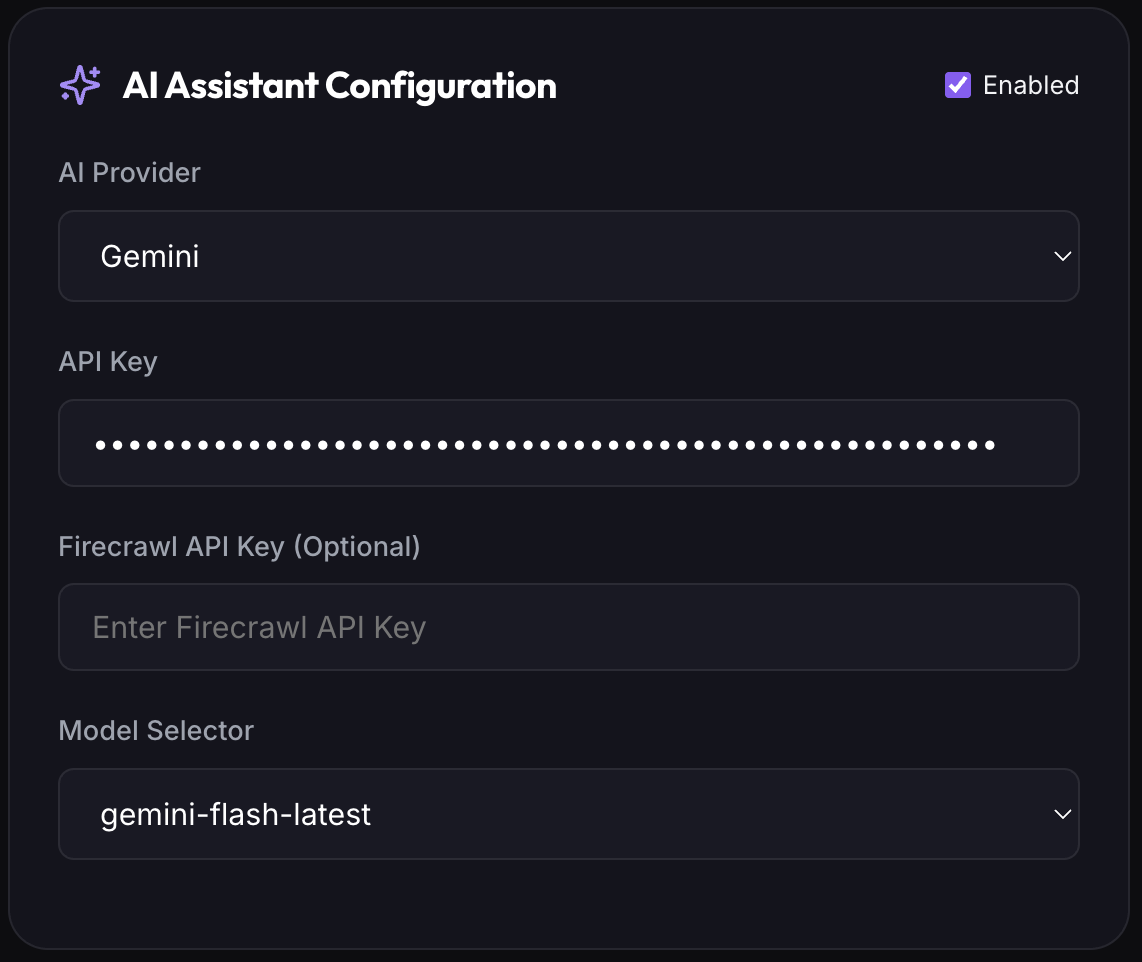
AI Assistant Configuration: Connect OpenAI, Claude, Gemini, Ollama, DeepSeek, Groq, or OpenRouter with custom model selectors and Firecrawl API scraping.
Google Maps Integration: Google Maps API key integration for Maps JavaScript, Directions, Geocoding, and Places APIs.
OwnTracks GPS Integration: Webhook target URL for live GPS trail logging.
Figure 9.1: Immich Photo Server Configuration & Connection TesterFigure 9.2: Multi-Model AI Provider Selector & Endpoint SetupFigure 9.3: Google Maps API Integration Panel
3. 🏷️ Taxonomy & Tags
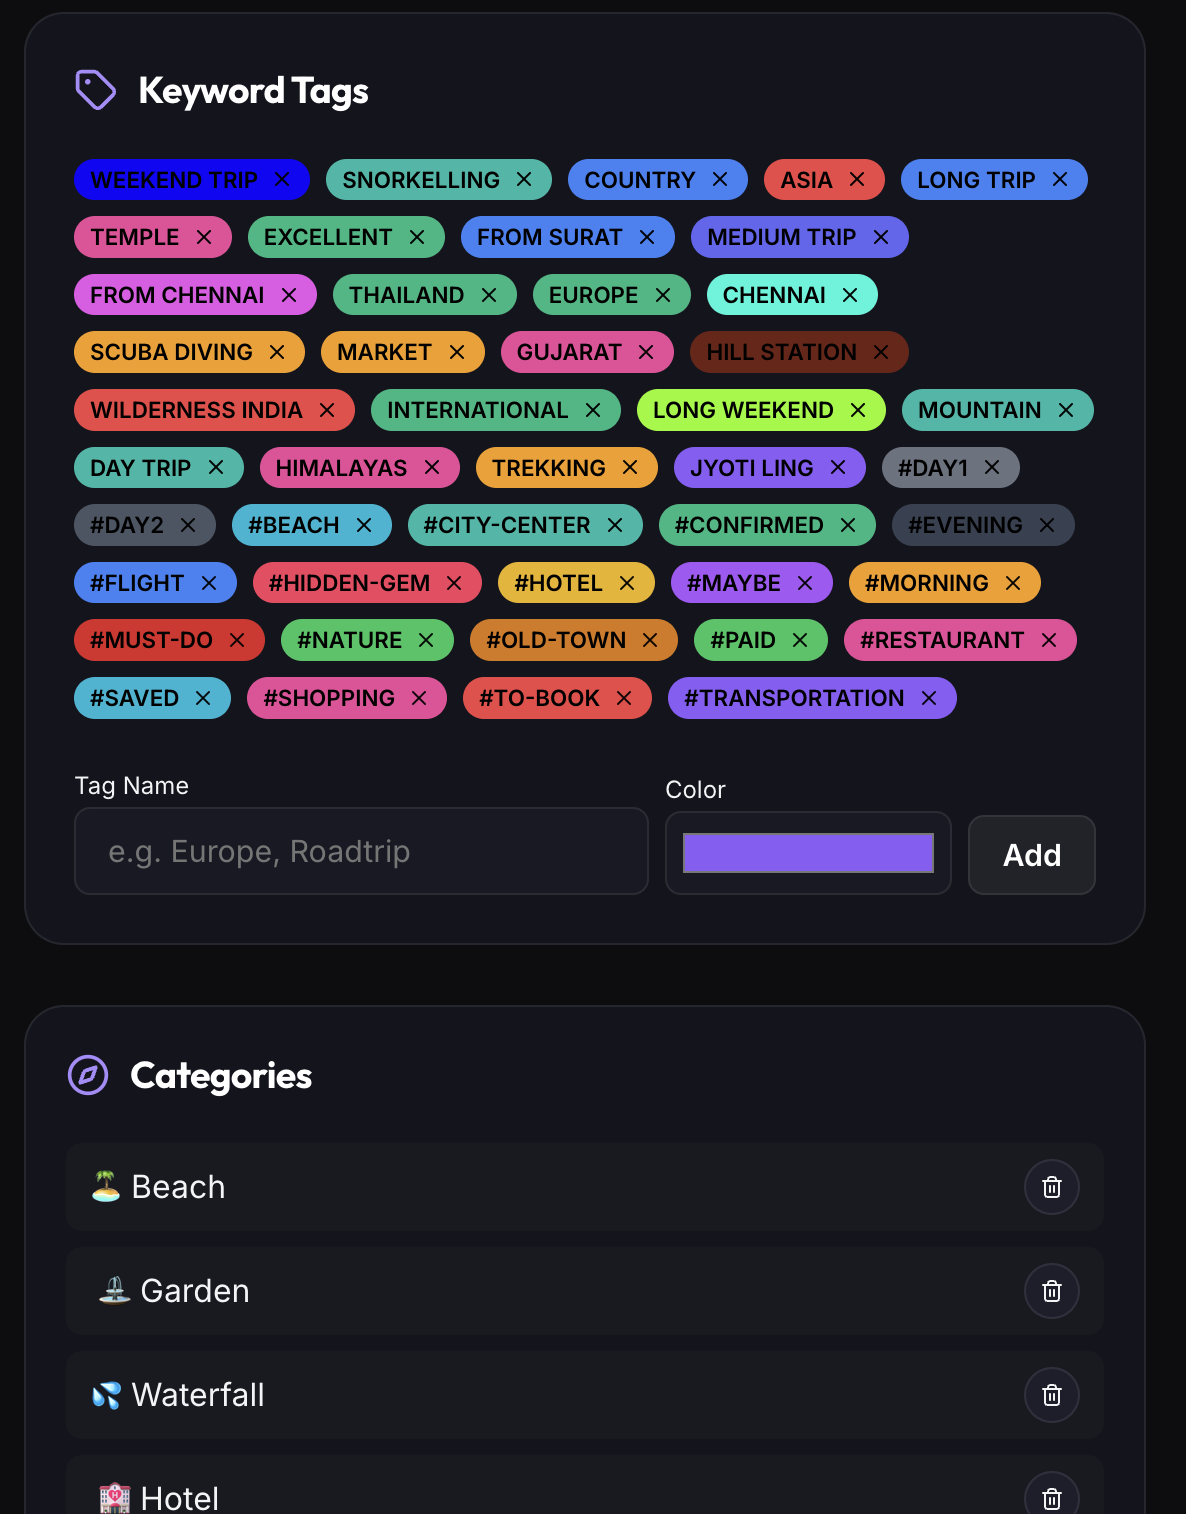
Keyword Tags: Custom taxonomy tags with HEX color pickers.
Custom Categories: Custom place categories with emoji icons (📌, 🍜, 🏰).
Figure 9.6: Custom Categories & HEX Color Tag Selector
4. 💾 Data & Backups
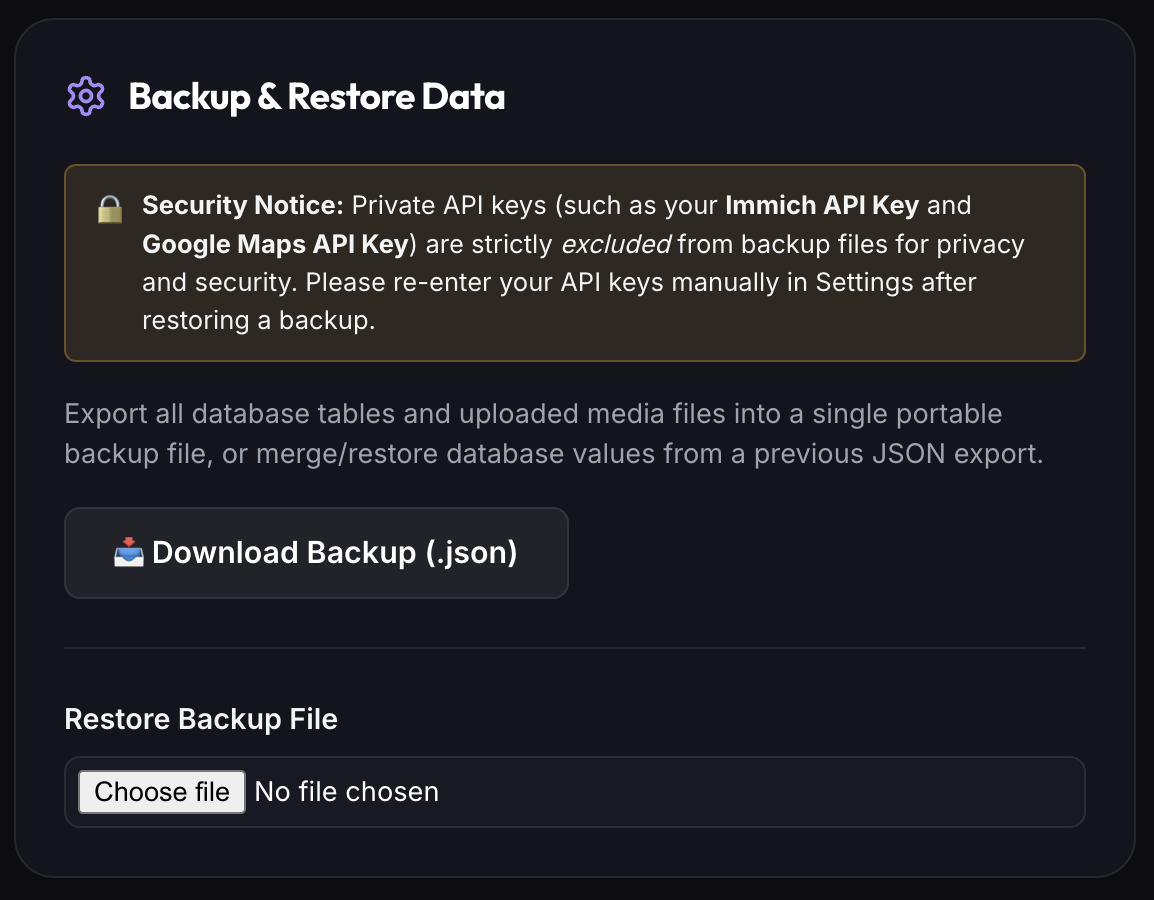
Backup & Restore Data: Export full JSON backups or restore in chunked background uploads.
Archived Items & Data Retention: View, restore, or permanently delete archived locations.
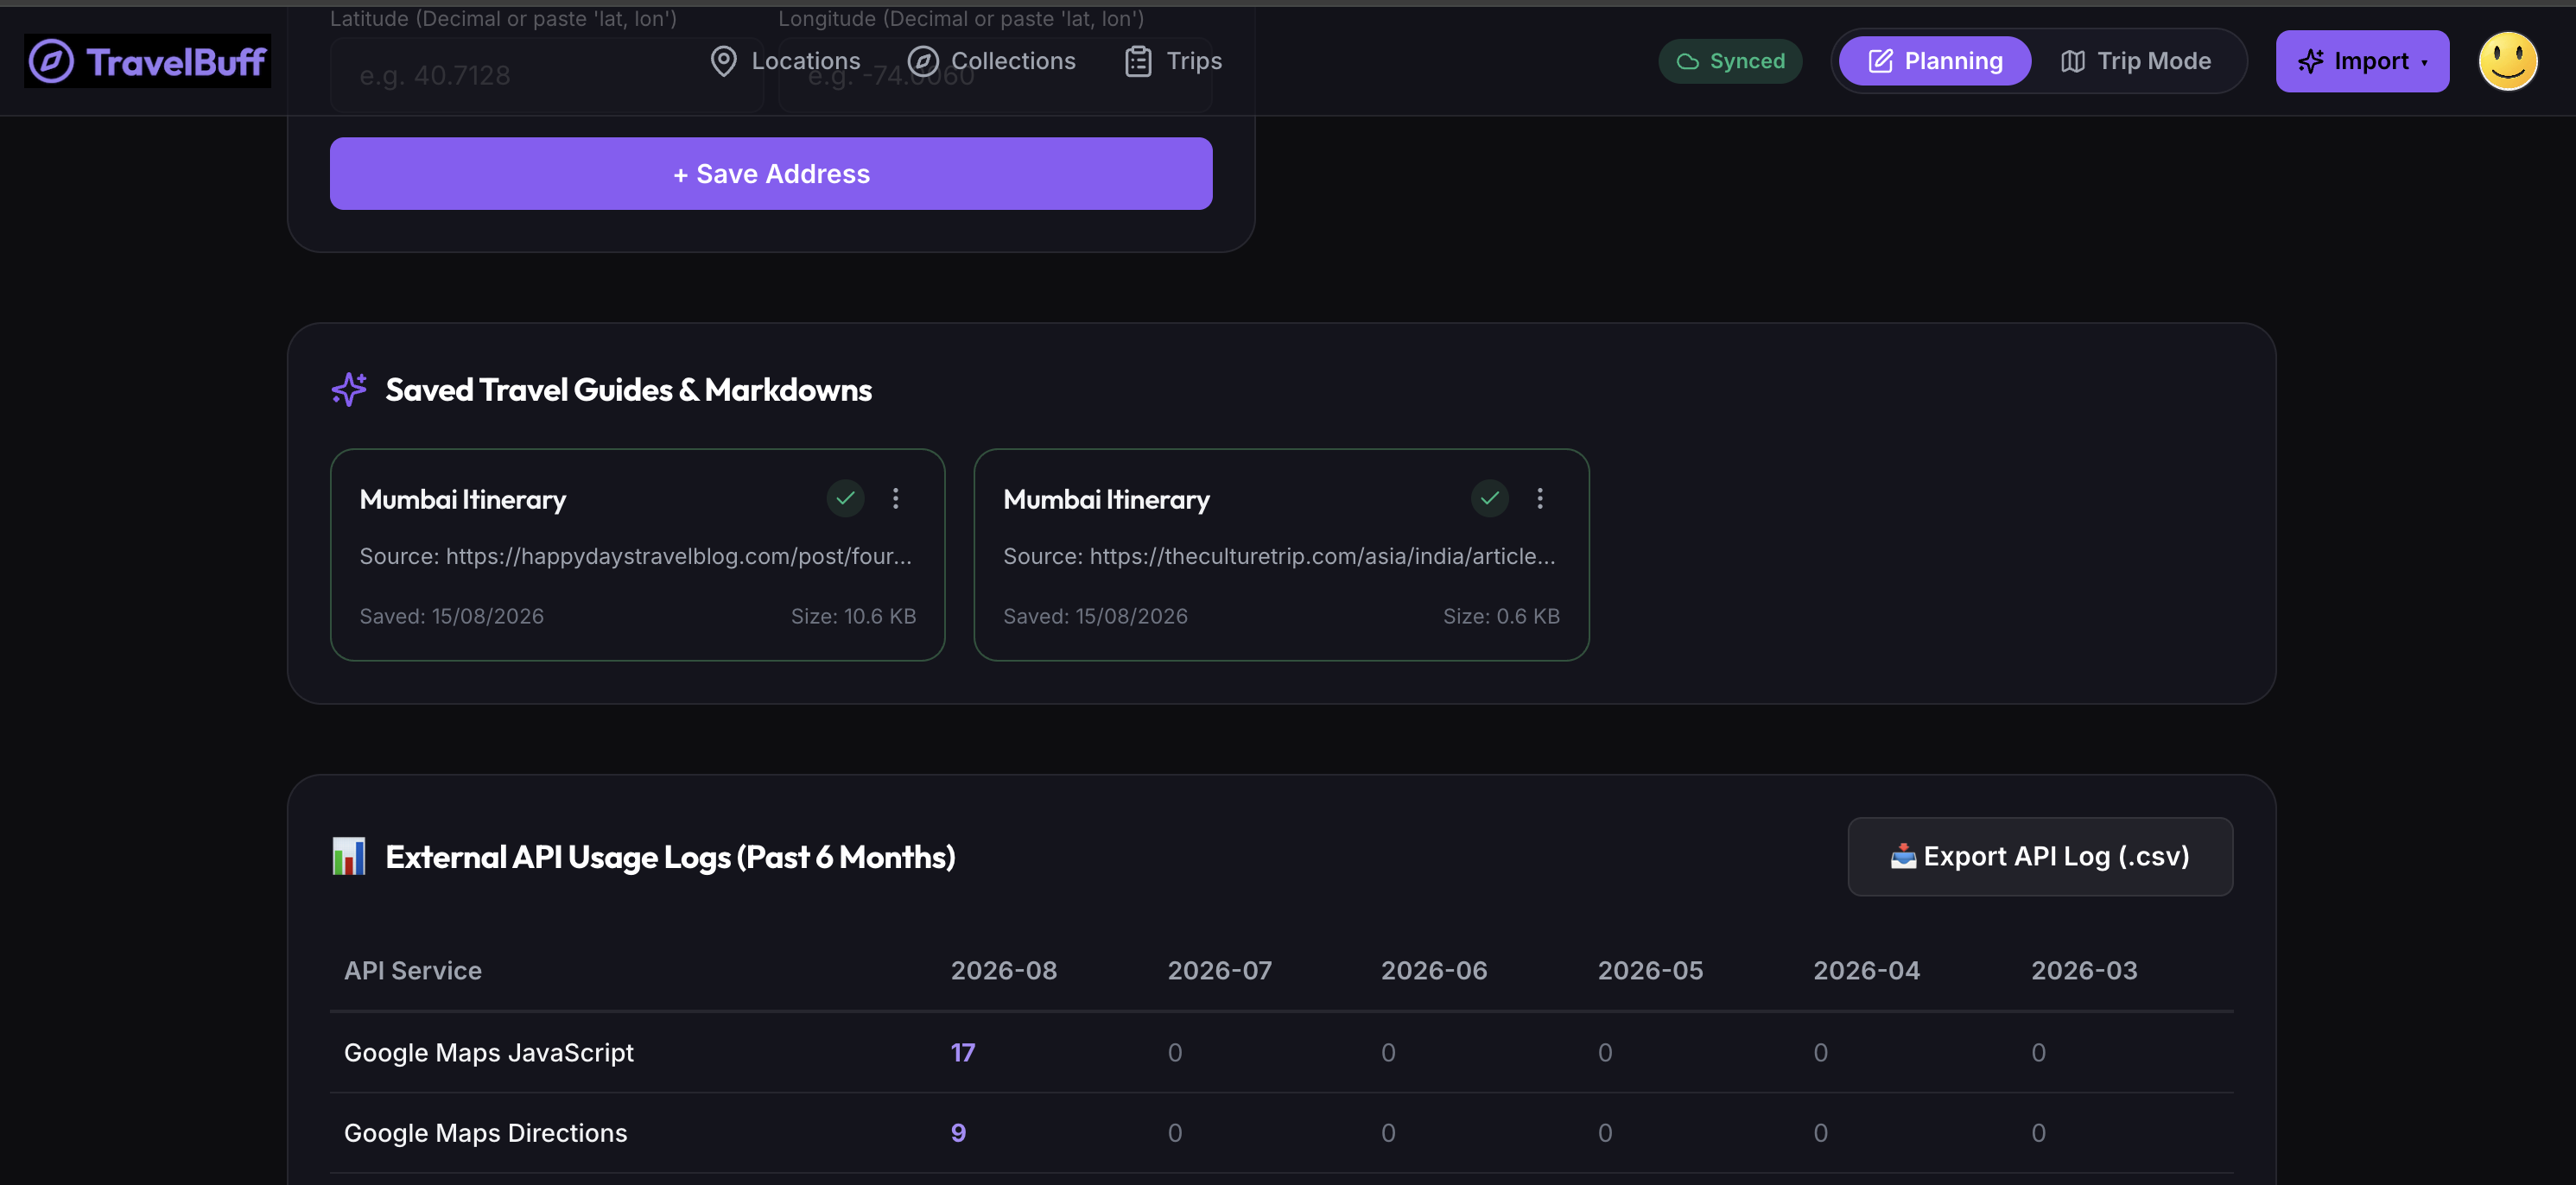
External API Usage Logs: 6-month request tracking across Google Maps, OSRM, Wikipedia, and AI with CSV export.
Help & Guided Onboarding: Restart interactive spotlight tours, reopen the Getting Started checklist, and access release notes.
10. Helpful Tips & Shortcuts
📍 Automatic Coordinate Smart Parsing
Paste coordinate strings like 28.6139° N, 77.2090° E or 28.6139, 77.2090 directly into address search; TravelBuff automatically parses and splits latitude/longitude.
Video 10.1: Automatic Coordinate Smart Parsing Demo
⌨️ Keyboard Shortcuts & Modal Controls
Press Esc to dismiss dialog modals, photo viewers, and prompt consoles instantly.
🌐 Native Browser History & Direct Web Bookmarking
Full support for browser back/forward buttons (Alt + Left Arrow / Cmd + [) and direct folder bookmarking (Cmd + D / Ctrl + D).
🍽️ 1-Click Food Spot Bookmarking in Trip Mode
Click Find Nearby Food while in Trip Mode, browse venues within 2 km, and click Bookmark to insert directly into today's itinerary.
🚚 Drag & Drop Itinerary Reordering
Drag stops up or down to re-sequence days while driving distances and durations automatically update in real-time.
Video 10.2: Drag & Drop Itinerary Stop Reordering Demo
✈️ Offline Pre-Loading for Flights & Subways
Open active trip in Trip Mode before boarding flights to cache schedules, hotel vouchers, and maps completely offline.
11. Mobile & Screen Adaptability
Mobile & Screen Adaptability Features
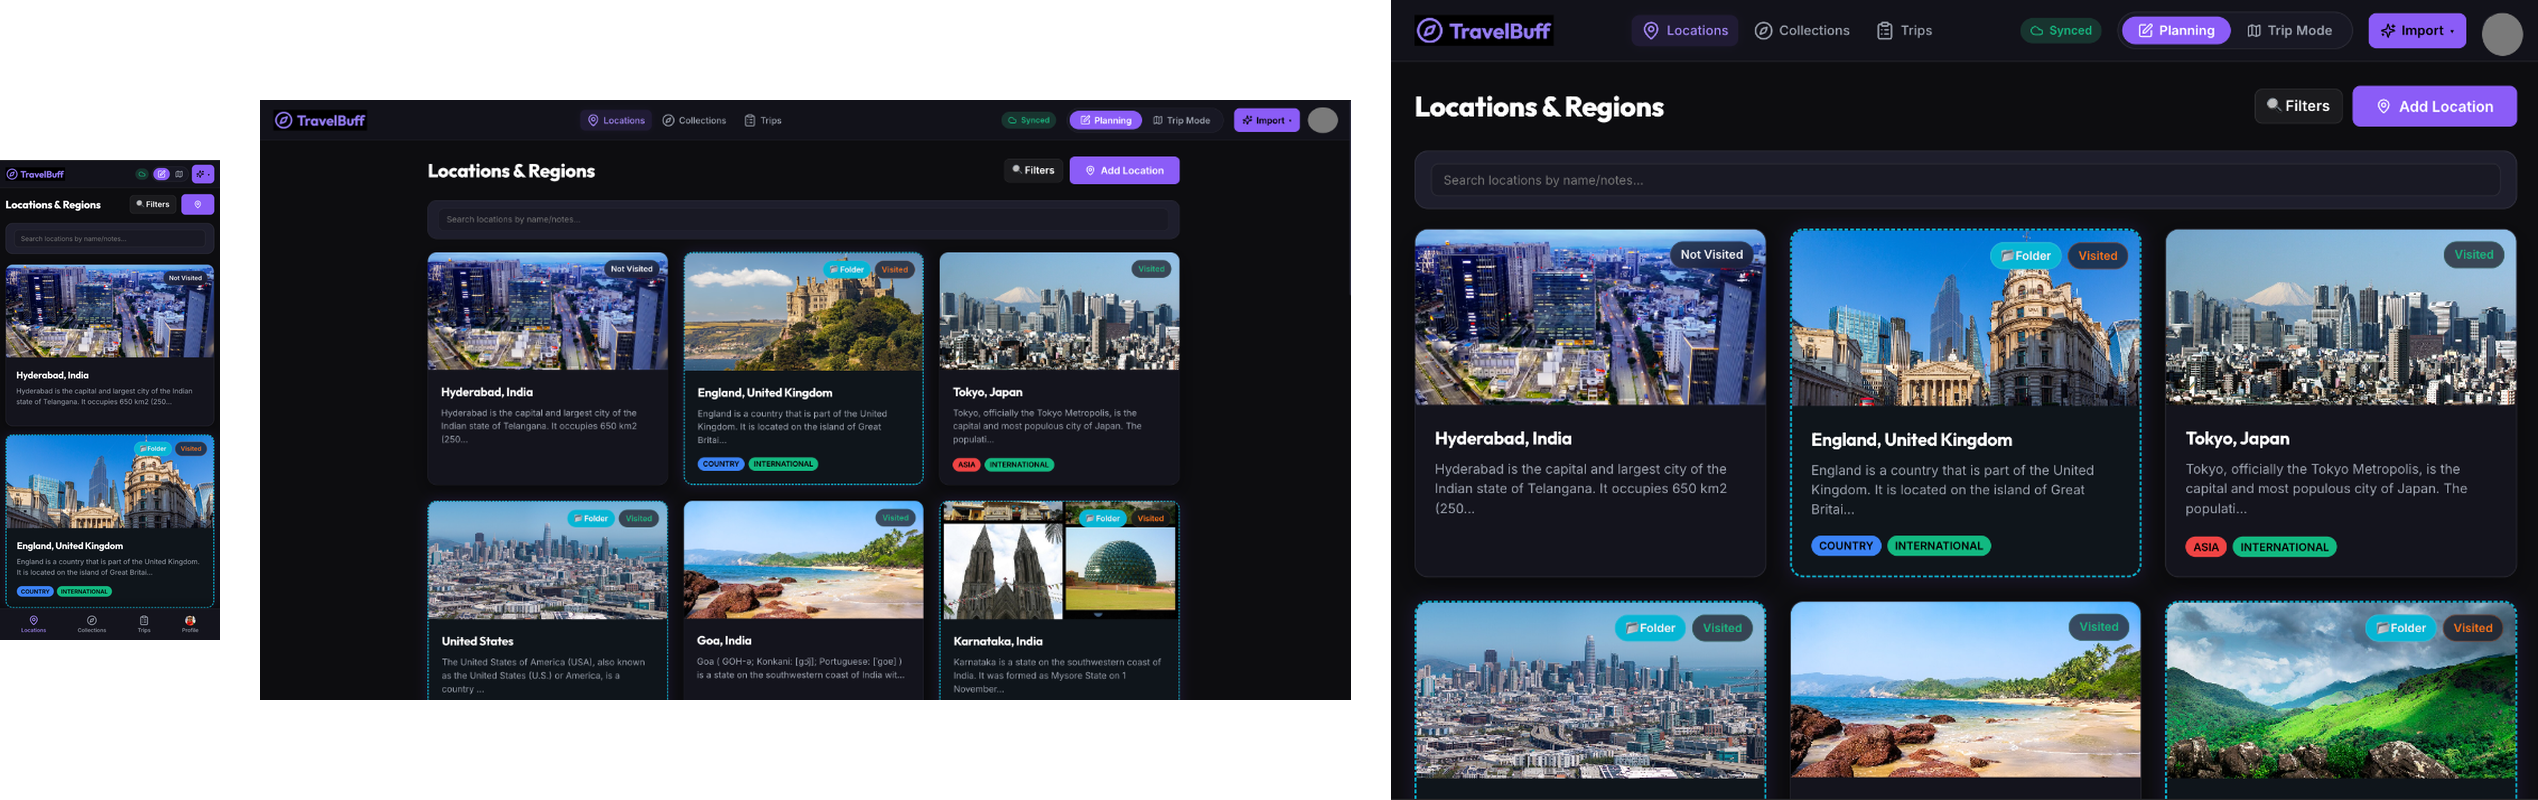
Flexible Header Layouts: Navigation automatically shifts for compact phone displays.
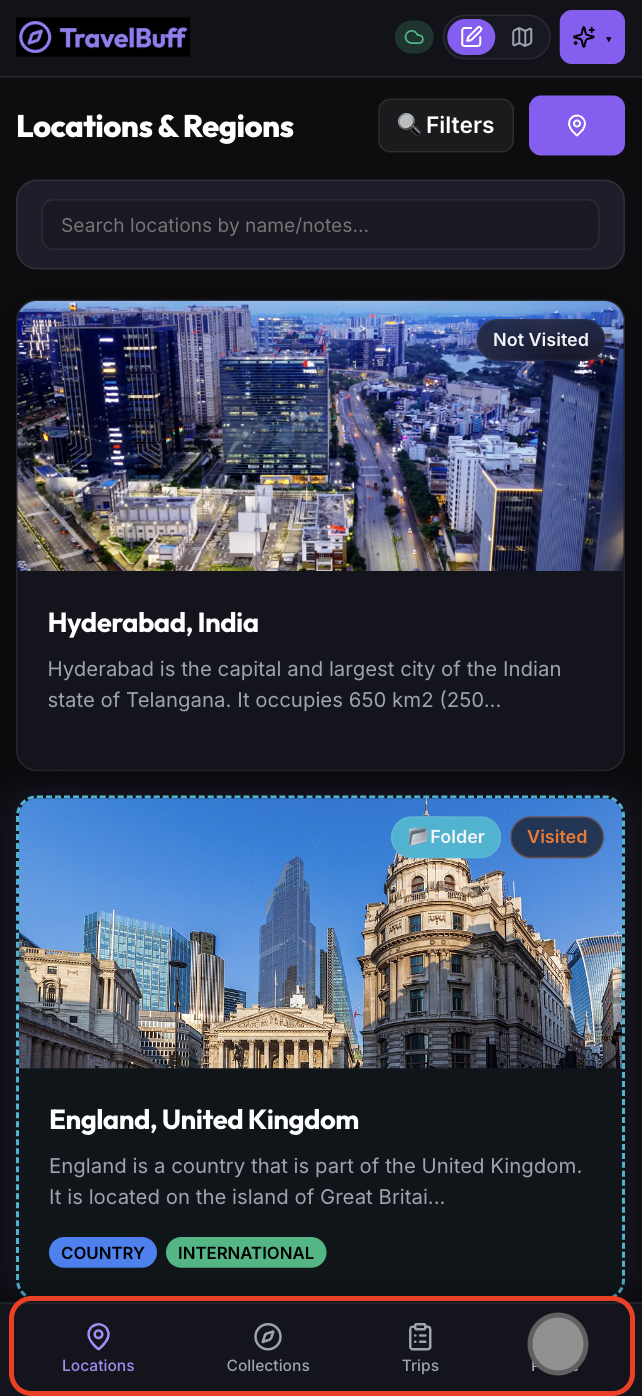
Fixed Bottom Navigation Bar: Quick touch navigation between Locations, Collections, Trips, and Settings on smartphones.
Notch & Edge Padding: Automatic safe area insets to prevent phone home bars from obscuring controls.
Figure 11.1: Mobile Smartphone Fixed Bottom Navigation BarFigure 11.2: Mobile Screen Edge Padding & Notch Adaptability
12. Release Notes & Version History
Version 7.4.1 (Current Release)
Locations view reliability update:
Locations View Runtime Crash Fix: Fixed ReferenceError: Sparkles is not defined runtime exception on the Locations home screen by importing Sparkles from lucide-react.
Version 7.4.0
Major features & navigation architecture:
Global Duplicate Prevention for Folders & Locations: Live duplicate search inspecting names, country/state, and GPS proximity within 150 meters across all hierarchy levels with parent breadcrumbs banner.
Collection Multi-Select Mode & Bulk Deletion: Added "Select" / "Done Selecting" toggle in Collections header with card checkboxes and floating bulk action bar.
Re-organized Hybrid 6-Tab Settings with Global Live Search: 6 distinct tabs (General & Preferences, Integrations & AI, Taxonomy & Tags, Data & Backups, Account, System) with top fuzzy search bar and scroll glow highlight.
App Update Notification Banner & "What's New in v7.4.0" Modal: Persistent update notification banner and rich "What's New" modal dialog.
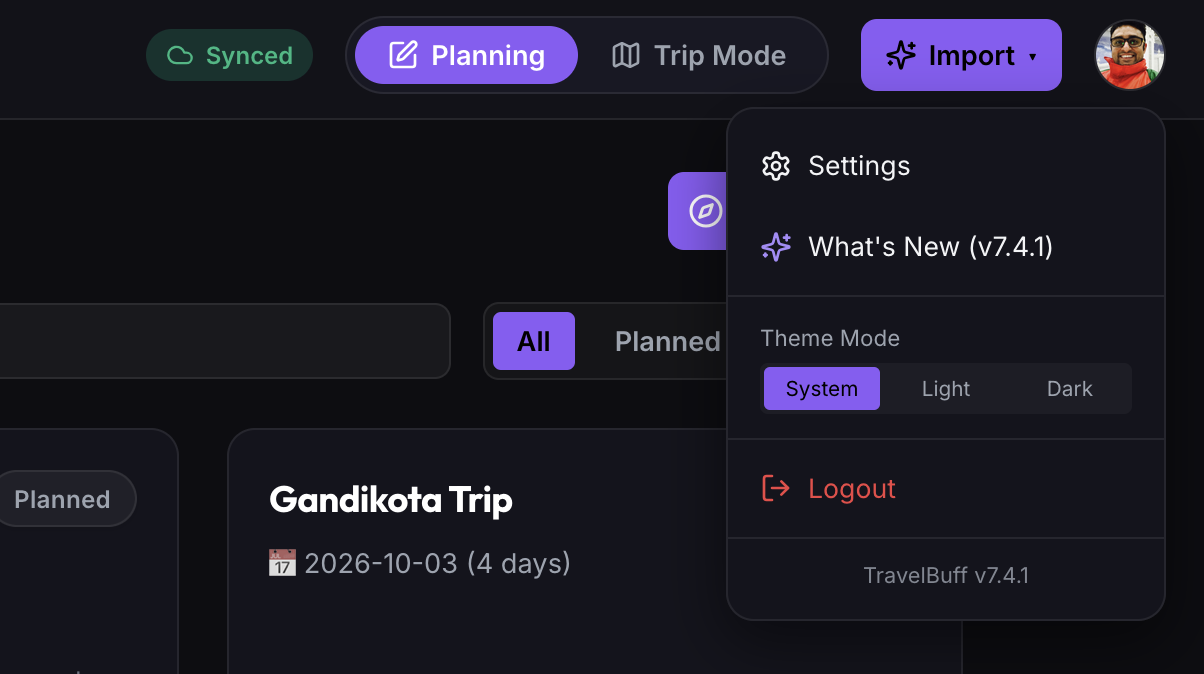
Avatar Dropdown Menu Cleanup: Streamlined user profile dropdown with direct "What's New" link and synchronized APP_VERSION footer.
Figure 12.2: Profile Menu & v7.4.1 Release Navigation
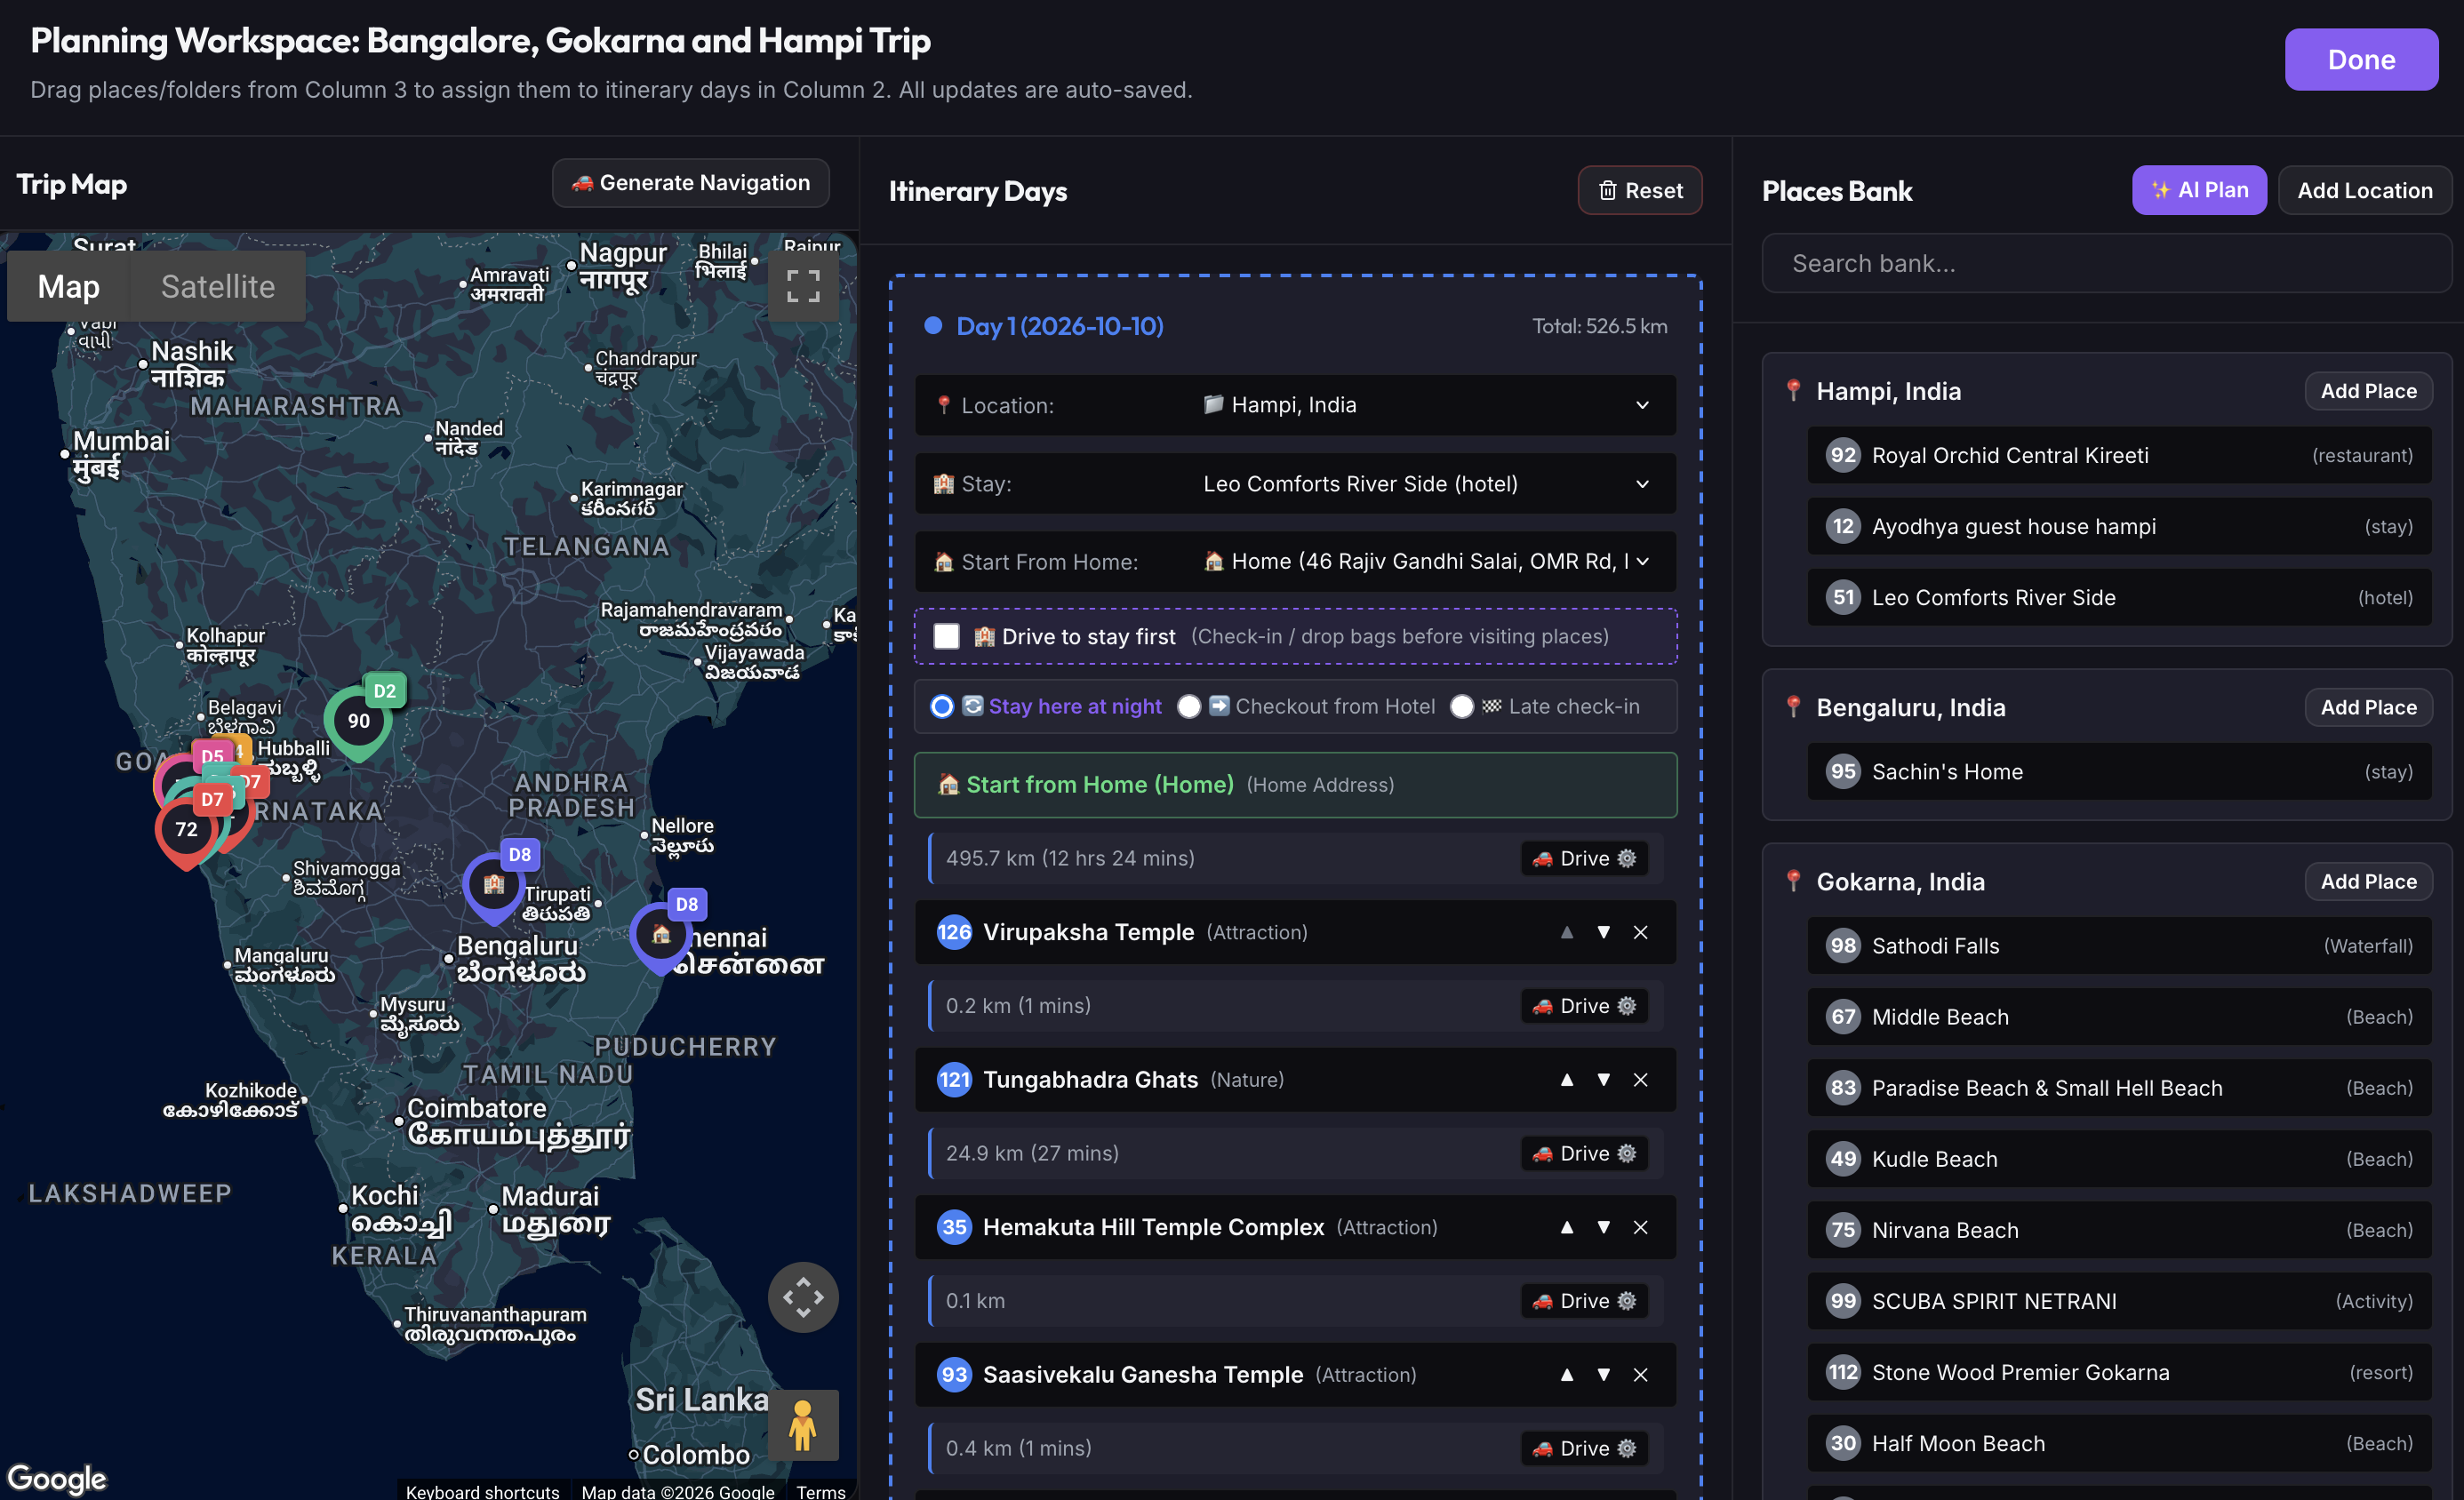
Timeline Endpoint Checkboxes & Stay Behaviors: Added Day 1 Start from Home, Drive to Stay First, and configurable Stay behaviors (🔄 Stay here at night, ➡️ Checkout, 🏁 Late check-in).
Places Bank AI Trip Planner, Day-Wise Trip Map filtering, and official OpenStreetMap tile server migration.
Version 7.0.0 - 7.1.0
Interactive UI spotlight tour, getting started checklist widget, and cryptographic anonymous telemetry client.
Version 1.0.0 - 1.2.13
Initial release of TravelBuff with offline-first Dexie.js storage, dual maps, AI travel importer, and multi-currency budgeting.
Insights & Releases
TravelBuff Engineering & Stories
Deep dives into self-hosting, offline-first architecture, trip planning workflows, and product updates.
Self-Hosting & Privacy
Aug 16, 2026•6 min read
Why Your Travel Plans Belong on Your Own Server (And How to Deploy in 5 Minutes)
Why sensitive itinerary data, reservation vouchers, and GPS logs don't belong on third-party cloud apps, and how to self-host your personal travel organizer with TravelBuff in 5 minutes.
Release Notes
Oct 12, 2026•4 min read
TravelBuff v1.2.7 Released: Trip Mode, Live Budget Tracking & Immich Albums
Introducing new Trip Mode companion features, budget spend tracking, and enhanced Immich gallery support.
Architecture & Tech
Sep 28, 2026•5 min read
Why Offline-First Architecture Matters for Modern Travelers
Why relying on cloud apps in remote locations fails, and how Dexie.js keeps your data safe without internet.
Self-HostingAugust 16, 2026•6 min read
Article Title
Subtitle
TB
TravelBuff TeamOfficial TravelBuff Publication
Transparency & PrivacyUpdated August 2026
TravelBuff Privacy Policy
Our commitment to offline-first data ownership and transparent, anonymous telemetry.
1. The Offline-First Principle
TravelBuff was built from day one as an offline-first, self-hosted personal travel organizer. We believe your travel memories, itinerary plans, and financial details belong solely to you.
Local Database Storage: All your trips, destinations, custom notes, itineraries, and expense records are stored directly inside your browser database (Dexie.js / IndexedDB) or your private self-hosted server.
No Cloud Account Required: You do not need an account with us to use TravelBuff. We never synchronize your trip content to third-party central clouds.
Private Integrations: When you connect Immich or OwnTracks, your data flows directly between your private servers without passing through our infrastructure.
2. Anonymous Usage Statistics (Telemetry)
To help us prioritize device compatibility, bug fixes, and feature improvements, TravelBuff instances send anonymous, high-level system telemetry to our server (telemetry.travelbuff.app).
What We Collect:
Instance Identifier: A randomly generated UUIDv4 assigned to your local installation to measure active retention.
Coarse Location (Country Code): Extracted at the network edge from Cloudflare GeoIP (e.g. US, DE, IN).
What We NEVER Collect:
❌ No PII: No names, email addresses, usernames, or contact information.
❌ No IP Storage: Raw IP addresses are immediately discarded at the edge and never stored in the database.
❌ No Travel Content: No trip names, destination coordinates, notes, itinerary schedules, or photos.
❌ No Financial Data: No budget totals, expense items, currencies, or receipt images.
❌ No Secrets: No API keys, passwords, or private server URLs.
3. How to Opt-Out Anytime
You have full control over whether your instance sends anonymous statistics.
In App Settings: Go to Settings > Privacy & Telemetry and toggle off "Send Anonymous System Statistics". You can also click "View Current Payload" to inspect the exact JSON sent before transmitting.
Via Environment Variable: Add DISABLE_TELEMETRY=true to your .env file or Docker environment.
4. Open Source Transparency
Because TravelBuff is open-source, the telemetry collection client and database schemas are completely public and auditable by anyone in our repository.
Contact Us
Have questions, feedback, or need help? Send us a message below, or email support@travelbuff.app for support.
Message Sent!
Thank you for reaching out. We will get back to you shortly.